

A Graco car seat can become a booster only if that exact model is designed for booster use. Many Graco 4-in-1 and 3-in-1 seats convert from a forward-facing harness seat into a high-back booster. Some also become a backless booster. Others do not convert at all.
To convert a Graco car seat, check the seat label and owner’s manual, confirm that your child meets the booster limits, remove or store the harness as directed, and use the vehicle’s lap-and-shoulder belt. Never remove the harness from a seat unless the manual says the seat has a booster mode.

Check Whether Your Graco Seat Converts to a Booster
The model name and manual determine whether your Graco car seat can become a booster. A seat with “3-in-1,” “4-in-1,” “Harness Booster,” or “All-in-One” in its name may have a booster mode, but the name alone is not enough.
Look for these details:
- A label that lists high-back booster or backless booster use.
- A booster weight, height, age, or maturity range.
- Instructions for storing or removing the harness.
- A belt-routing path for the vehicle lap-and-shoulder belt.
- A model number on the seat, label, or manual.


Common Graco models may have different conversion steps, even when they look alike. For example, the Graco Nautilus, Tranzitions, and 4Ever families do not all use the same parts or instructions.
Use the official Graco support page to find the manual for your model. You can also check the National Highway Traffic Safety Administration recall database before using an older seat.
Do not convert the seat if:
- The manual does not list booster use.
- The seat is expired.
- The seat has been in a moderate or severe crash.
- The seat is missing a required part.
- The seat has cracks, damaged webbing, or broken hardware.
- You cannot identify the model or instructions.
- Your child is too small or not mature enough for booster use.
A booster does not hold a child with its own five-point harness. It raises the child so the vehicle seat belt can fit across the strong parts of the body.

Know When Your Child Is Ready for Booster Mode
Your child should meet the exact booster limits in the Graco manual and sit correctly for the whole ride. Weight and height matter, but maturity matters just as much.
A child using a booster must be able to:
- Sit upright without leaning or sliding down.
- Keep the lap belt low across the hips and upper thighs.
- Keep the shoulder belt across the chest and shoulder.
- Avoid putting the shoulder belt behind the back or under the arm.
- Stay in the correct position during the full trip.
- Remain seated properly even when asleep.
Many children are not ready for a booster at the first age listed by a manufacturer. The American Academy of Pediatrics recommends keeping a child in a forward-facing seat with a harness for as long as the child remains within the seat’s height and weight limits.
Use the harness until your child outgrows it or can safely use a booster. Do not switch simply because the child wants to sit like an older sibling.
High-back booster or backless booster?
A high-back booster provides head and torso support. It may help position the shoulder belt and can be useful in vehicles with low seat backs or without a usable head restraint.
A backless booster raises the child but does not provide head support. Use one only when the vehicle seat supports the child’s head to at least the top of the child’s ears, or as required by the seat and vehicle instructions.


A high-back booster is often the better starting point. A backless mode may be suitable later if the vehicle seat has a proper head restraint and the belt fits well.

How to Convert a Graco Car Seat Into a High-Back Booster
The steps below describe the general process for a Graco harness-to-booster seat. Your owner’s manual takes priority over this guide. Do not force a part, skip a required step, or use a generic method for a model with different instructions.
1. Read the model-specific manual
Find the model number and date of manufacture on the seat label. Then open the section titled something like:
- “High-back booster”
- “Booster mode”
- “Converting to a belt-positioning booster”
- “Harness storage”
- “Removing the harness”
Read the entire booster section before changing the seat. Pay special attention to the allowed child size, belt path, headrest position, and rules for lower anchors.
2. Remove the seat from the vehicle
Place the seat on a clean, well-lit surface. Conversion is easier when the seat is not tight against the vehicle seat.
Do not work from memory. Take a photo of the harness route before removing anything if the manual allows you to remove it. Keep every part in a labeled bag unless the manual says a part must stay attached.
3. Loosen and remove the harness as directed
Most Graco harness-to-booster seats require the five-point harness to be removed from the seat’s shell or stored in a dedicated compartment.
The exact process may include:
- Loosening the harness.
- Removing the chest clip and buckle tongues.
- Detaching the harness straps from the splitter plate or adjustment system.
- Pulling the straps through the seat cover and shell.
- Storing the harness, buckle, and related parts in the locations shown in the manual.
Do not cut the harness. Do not remove padding, foam, or structural parts unless Graco specifically instructs you to do so.
Some models let you store the harness in the seat instead of removing every component. Other models require a different process. The manual for your exact model controls.
4. Position the seat back and headrest
Return the seat cover and pads to their proper positions. Adjust the headrest so the shoulder-belt guide is slightly above the child’s shoulders, following the Graco instructions.
The child’s head should remain supported. The vehicle belt should pass through the booster’s belt guide rather than across the child’s neck.
5. Place the booster in the vehicle
Put the booster on a vehicle seating position with a lap-and-shoulder belt. The booster should sit flat on the vehicle seat.
Never use a booster with a lap-only belt unless both the Graco manual and vehicle manual specifically permit that use. A standard booster needs a lap-and-shoulder belt to position the child correctly.


6. Secure the booster as the manual allows
Some Graco boosters permit lower-anchor attachment. Others do not, or they allow it only in certain modes.
If the manual permits lower anchors:
- Attach them exactly as shown.
- Confirm that the connectors are fully engaged.
- Follow the manual’s rules about whether the child must still be restrained by the vehicle belt.
- Do not use lower anchors as a replacement for the vehicle seat belt.
In booster mode, the vehicle belt normally restrains the child. The booster’s lower anchors, when approved, may help keep the empty booster in place, but they do not replace the belt across the child.
7. Buckle the child with the vehicle belt
Route the vehicle belt through the booster’s marked guides.
The lap belt should lie:
- Low across the hips and upper thighs.
- Below the soft stomach area.
- Flat against the child.
The shoulder belt should lie:
- Across the middle of the chest.
- Across the collarbone and shoulder.
- In front of the child, not behind the back or under the arm.
Remove slack from the belt, but do not twist it. The buckle should rest on the child’s hip or upper thigh area, not high on the stomach.

How to Check That the Booster Is Set Up Correctly
A correct setup has three parts: the booster is stable, the belt follows the marked path, and the child can maintain a safe position.
Use this quick check:
| Check | What you should see |
|---|---|
| Seat position | The booster sits flat and faces forward |
| Lap belt | Low on the hips and upper thighs |
| Shoulder belt | Across the chest and shoulder |
| Belt path | Through every required guide |
| Belt condition | Flat, untwisted, and not loose |
| Child position | Upright, with the back against the seat |
| Head support | Vehicle head support or booster supports the child’s head |
| Buckle | The latch clicks and remains secured |
After buckling, ask your child to sit normally. Do not judge the fit only while the child is sitting stiffly for inspection.
A good booster fit lets the child bend their knees naturally at the edge of the vehicle seat while keeping their back against the seat back. If the child slides forward, leans out of position, or moves the belt, the child may need to keep using the harness.
What if the seat moves?
A booster may move more than a harnessed car seat when it is empty. That can be normal for models that do not use lower anchors.
If the child is buckled correctly, the vehicle belt—not the booster alone—restrains the child. Still, follow the Graco manual. If your model permits lower anchors, using them may reduce movement when the booster is empty.
Do not add towels, pool noodles, aftermarket clips, or homemade belt guides. These items can change how the belt works and may not be approved for your seat.

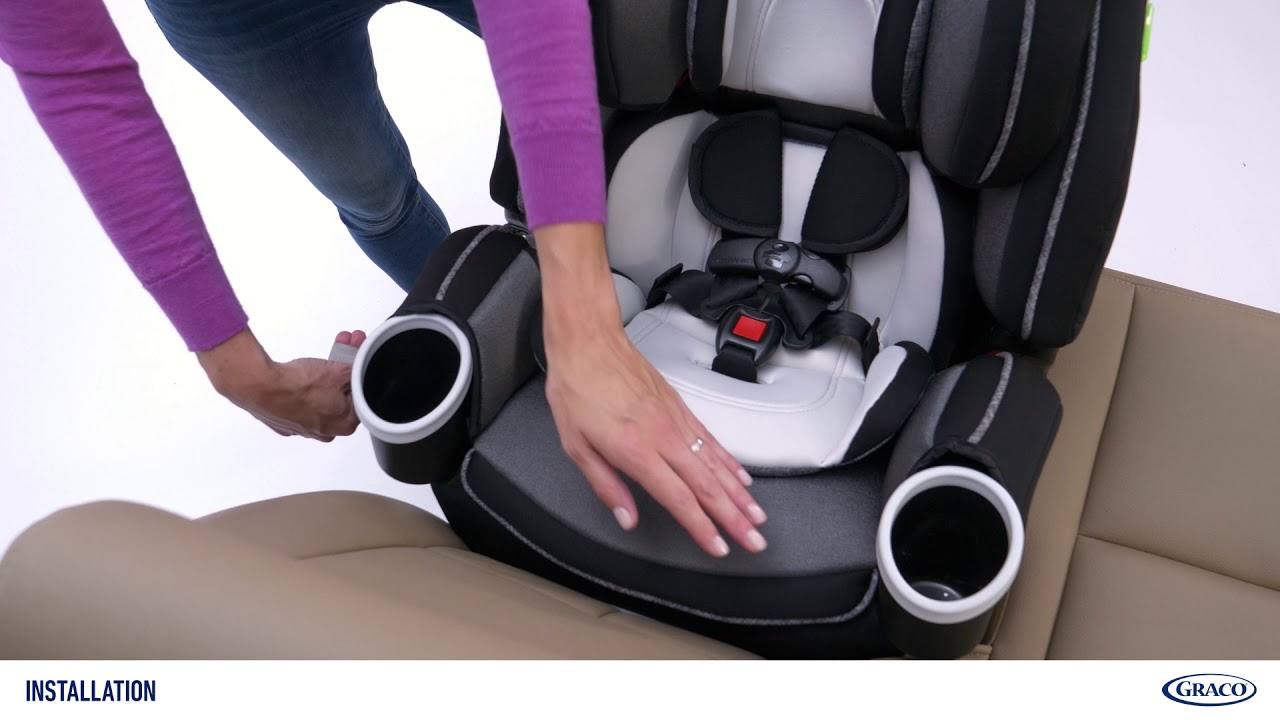
How to Make a Graco Seat Into a Backless Booster
Only some Graco seats convert into a backless booster. If your model has this mode, the manual will explain how to remove the seat back and use the lower portion.


The general process is:
- Confirm that your child meets the backless-booster limits.
- Read the backless-booster section of the manual.
- Remove the seat back only at the approved release points.
- Store the seat back and hardware as directed.
- Place the booster base on a vehicle seat with a lap-and-shoulder belt.
- Use the required belt guide, if the model includes one.
- Check the child’s head support and belt fit.
Never use the lower portion of a Graco seat as a backless booster if the manual does not approve that configuration. A seat back is not simply an optional part. It may provide belt guidance, head support, or structural support.
The vehicle seat must provide enough head support when a backless booster is used. In general, the child’s head should not rise above the vehicle’s supported area. Check both manuals for the exact requirement.
Common Problems When Converting a Graco Car Seat
Most conversion problems come from using the wrong manual, removing the wrong part, or expecting the booster to work like a harnessed seat.
“I cannot find the booster belt path.”
Look for red or colored guides near the headrest or armrests. The manual may show the belt path with a diagram.
If there is no booster section or belt path, stop. The seat may not be approved for booster use.
“The harness will not come out.”
Do not pull harder or cut the strap. The harness may need to be loosened fully, detached from a splitter plate, or routed through a specific opening.
Check the manual’s harness-removal steps. If the harness is not removable in the way described, contact Graco customer service.
“The shoulder belt touches my child’s neck.”
Raise or lower the booster headrest according to the manual. Make sure the belt is in the correct guide and that the child is sitting all the way back.
If the belt still does not fit, try another approved seating position or continue using a harnessed seat. Do not use an aftermarket shoulder-belt positioner unless the manufacturer specifically approves it.
“The lap belt sits on the stomach.”
This is not a safe belt fit. Check that the child’s hips are back and that the belt passes through the correct lower guide.
If the belt still rides high, the booster may not fit the child or that vehicle seating position. Try a different approved position.
“The booster tips or slides.”
A small amount of movement can occur, especially when the booster is empty. Confirm that it sits flat and that no vehicle seat contour is lifting an edge.
Check whether the Graco manual permits lower-anchor use. Never attach the booster to lower anchors if the manual does not allow it.
“The child keeps leaning or unbuckling.”
A booster is not suitable if the child cannot stay positioned. Return to the harnessed mode if the seat permits it, or use another approved harnessed seat until the child is ready.


Safety Rules to Follow in the United States
Child-passenger laws differ by state, and state rules may change. Check your state’s current law through the Governors Highway Safety Association or your state’s highway-safety agency.
A state law is only a minimum. The Graco manual and the vehicle manual may set additional limits.
Follow these rules:
- Use the seat only in an approved vehicle seating position.
- Keep the child in a forward-facing harness as long as the seat limits and the child’s behavior support it.
- Use a lap-and-shoulder belt with a booster unless the instructions clearly say otherwise.
- Do not place a booster in a seating position with an active front air bag if the vehicle or seat instructions prohibit it.
- Do not use a booster with a damaged, expired, recalled, or incomplete seat.
- Do not add unapproved accessories.
- Never place the shoulder belt behind the child’s back or under the arm.
- Replace a car seat after a moderate or severe crash unless the manufacturer and relevant guidance say it remains usable.
The NHTSA car-seat guidance and the American Academy of Pediatrics car-seat guidance provide general U.S. safety information. Neither replaces the instructions for your exact Graco model.

When Should You Stop Using the Graco Booster?
Replace the booster when it reaches the expiration date, is damaged, has missing parts, or no longer fits the child correctly.
Check the date molded into the seat or printed on its label. Graco’s expiration period can vary by product family, so do not assume that every Graco seat has the same service life.
You should also stop using the booster when:
- The child exceeds the stated height or weight limit.
- The child’s ears rise above the allowed support area.
- The belt no longer fits correctly.
- The seat no longer sits securely in the vehicle.
- The seat has been involved in a crash that meets replacement guidance.
- The manual or manufacturer says the seat must be retired.
When the child can pass the five-step seat-belt test in the vehicle, a booster may no longer be needed. The child should sit with their back against the seat, knees bent at the edge, feet supported, lap belt low, shoulder belt across the chest, and the ability to stay in position for the whole ride.

Frequently Asked Questions
Can every Graco car seat become a booster?
No. Only Graco models approved for booster use can be converted. Check the label and the manual for your exact model.
Do I remove the Graco harness to use booster mode?
Usually, yes, but the method differs by model. Some seats require harness removal, while others allow the harness to be stored inside the seat. Follow the manual and never cut the harness.
Can I use the Graco harness and vehicle seat belt together?
Use the restraint method shown for the selected mode. Do not combine the harness and booster belt in a way the manual does not approve.
Does a Graco booster need lower anchors?
Not always. The vehicle seat belt restrains the child in booster mode. Lower anchors are optional only when the Graco manual allows them.
Can I use a Graco booster with a lap-only belt?
Most belt-positioning boosters require a lap-and-shoulder belt. Check the Graco and vehicle manuals before use. Do not assume a lap-only belt is acceptable.
What should I do if I lost the Graco manual?
Find the model number and date of manufacture on the seat label, then download the correct manual from Graco’s official support site. Do not rely on instructions for a similar-looking model.


Conclusion: Convert Only the Model-Approved Parts
To make a Graco car seat into a booster, first confirm that the exact model supports booster mode. Then follow its manual to remove or store the harness, set the headrest, use the correct vehicle belt path, and check the child’s belt fit.
The safest next step is simple: find the model number on the seat, download the matching Graco manual, and compare its booster limits with your child’s size and ability to sit correctly.