

A car seat is installed correctly when it fits the child, fits the vehicle, and stays secure at the correct angle. In the United States, the safest way to check is to follow both the car seat manual and the vehicle owner’s manual. Then test the seat at the belt path, check the harness, and confirm that every required strap and clip is in the right place.
A secure car seat should not move more than 1 inch from side to side or front to back when tested at the belt path. The harness should lie flat and snug on the child. The seat should also face the right direction for the child’s age, size, and seat limits.

Quick checklist: Is the car seat installed correctly?
Use this short check before each trip:
- The car seat is in an approved seating position.
- The seat faces the correct direction for the child.
- The installation follows both manuals.
- The seat moves less than 1 inch at the belt path.
- The seat has the correct recline angle.
- The harness straps are at the correct height.
- The harness is snug, with no slack at the shoulders.
- The chest clip rests at armpit level.
- The seat belt or lower-anchor strap is routed correctly.
- The top tether is used for a forward-facing seat when required or allowed.
- No thick coat, padding, or unapproved accessory is under the harness.
- The child remains within the seat’s height and weight limits.
If any item fails, do not assume the problem is minor. Reread the manuals and fix the issue before driving.
Step 1: Confirm the seat is right for the child
A correct installation cannot make the wrong car seat safe. Start by checking the child’s weight, height, age, and development against the seat’s labels and manual.
Keep children rear-facing as long as allowed
The American Academy of Pediatrics recommends that infants and toddlers ride in a rear-facing car seat until they reach the highest weight or height allowed by the seat’s manufacturer. A rear-facing seat supports the head, neck, and spine during a crash.
Do not turn a child forward-facing just because the child’s legs touch the vehicle seat. Bent legs are normal and are not, by themselves, a reason to change direction.
Use a forward-facing seat with a harness
When a child outgrows the rear-facing limits, use a forward-facing seat with a harness and top tether. Keep using that seat until the child reaches its height or weight limit.
After that, the child may need a belt-positioning booster. A booster is usually needed until the vehicle’s lap and shoulder belt fits correctly without help.
Check the expiration date and crash history
Most car seats have an expiration date printed on the seat, label, or manual. The date is set by the manufacturer and can differ by model.
Do not use a seat that has been in a moderate or severe crash unless the manufacturer says it may be reused. NHTSA advises replacing a car seat after a moderate or severe crash. If you do not know the seat’s crash history, its safety status may be uncertain.

Step 2: Read both manuals before installing
the car seat manual explains the seat’s belt paths, recline settings, harness positions, and weight limits. The vehicle manual explains which seating positions can be used, where the lower anchors and top tether anchors are located, and how the vehicle seat belts lock.
Check these points in both manuals:
- Approved seating positions: Some seats do not fit well in every position.
- Installation method: The seat may allow either a seat belt or lower anchors.
- Lower-anchor limits: The vehicle or car seat may set a combined weight limit for the child and seat.
- Top-tether use: The vehicle manual identifies the correct anchor.
- Recline settings: A rear-facing seat may require a different angle from a forward-facing seat.
- Center seating: The center position may not have lower anchors. Never borrow anchors from the left and right positions unless the vehicle manual specifically allows it.
The labels on the seat provide useful reminders, but the full manuals control when a label and a general rule seem to conflict.
Step 3: Choose one approved installation method
Use either the vehicle seat belt or the lower anchors unless the car seat and vehicle manuals clearly allow both methods together.
Seat belt installation
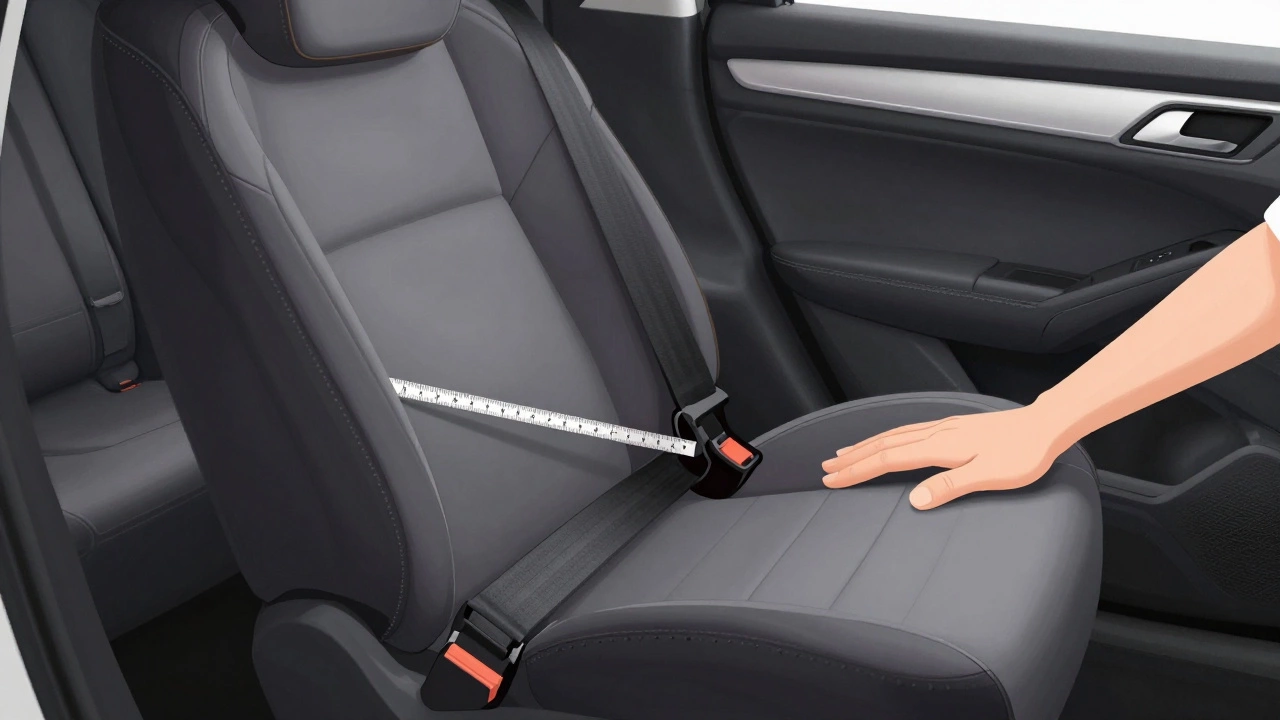
Route the seat belt through the belt path marked for the seat’s direction. Do not route it through an opening meant for the harness or for the opposite direction.
The belt must hold the seat tightly. Many vehicle seat belts can lock when the shoulder belt is pulled all the way out and then allowed to retract. Some vehicles use a locking latch plate instead. Your vehicle manual explains which system applies.
If the belt does not lock, use the method described in the vehicle manual or car seat manual. Do not add a locking clip unless the instructions call for one and you know where it belongs.
Lower-anchor installation
Lower anchors are metal bars built into the vehicle seat area. They connect to the car seat’s lower-anchor connectors.
Lower anchors are not automatically safer than a seat belt. The correct choice is the method that the manuals allow and that produces a tight, correct installation.
Check the lower-anchor weight limit before using this method. The limit can vary by vehicle and car seat. If the child and seat are over the stated limit, switch to a seat belt installation if permitted.
Do not confuse lower anchors with the top tether
The lower anchors hold the lower part of the car seat. The top tether reduces forward movement of a forward-facing seat.
They serve different purposes. A forward-facing seat should use the top tether when the car seat and vehicle instructions require or allow it. Attach the tether only to the marked tether anchor, not to a cargo hook or another nearby loop.
Step 4: Install the car seat tightly
Place the seat in the approved vehicle position. Set the recline angle before tightening the belt or lower-anchor strap.
Then follow these steps:
- Open the correct belt path.
- Route the seat belt or lower-anchor strap exactly as shown.
- Remove slack from the belt or strap.
- Press down or back on the car seat while tightening, as directed by the manual.
- Close the belt-path cover if the seat has one.
- Attach and tighten the top tether for a forward-facing installation.
- Check the recline indicator again.
Perform the one-inch movement test
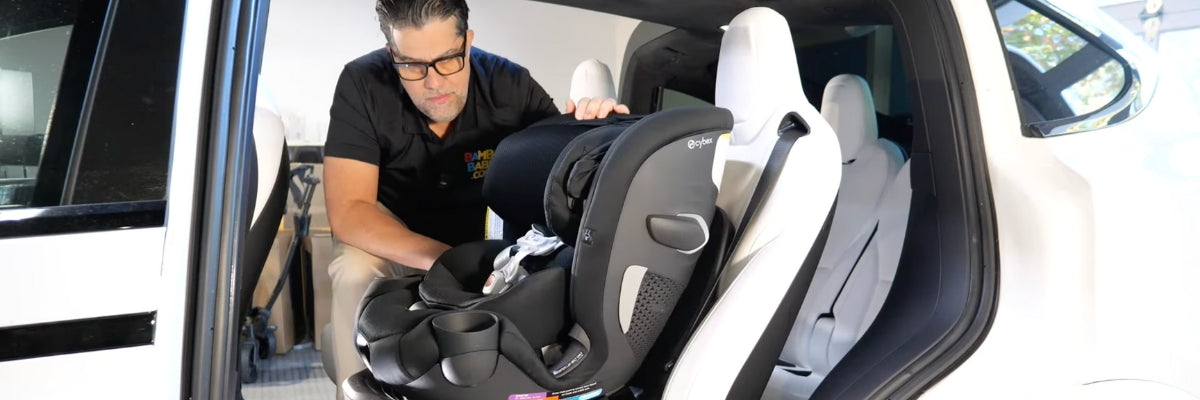
Hold the car seat at the belt path. Do not test it by pulling on the top of the shell or headrest.
Push and pull the seat from side to side and front to back. The seat should move less than 1 inch in each direction.
A small amount of movement at the top of the seat can be normal. The key test is movement at the place where the seat belt or lower anchors hold the car seat.
If the seat moves more than 1 inch:
- Remove the installation and start again.
- Confirm that the belt or strap is in the correct path.
- Make sure the seat belt is locked.
- Remove slack near the buckle.
- Check whether the buckle is sitting inside the belt path and preventing a tight fit.
- Try another approved seating position.
- Try the other approved installation method.
- Ask a certified Child Passenger Safety Technician, or CPST, to check it.
Do not use towels, pool noodles, or other items unless the car seat manual specifically permits them for that purpose. Some rear-facing installations require an approved angle adjustment. The manual—not a general online tip—should decide what is allowed.
Step 5: Check the recline angle
A rear-facing car seat must be reclined within the range shown by its angle indicator. The correct angle helps support the child’s head and keeps the child from slumping.
A newborn often needs a more reclined position than an older rear-facing child. The seat’s indicator may change as the child grows.
A forward-facing seat usually uses a more upright setting, but the correct setting still depends on the model. If the angle indicator is hard to read, park on level ground and check it in good light.
Never guess the angle based only on how the seat looks. A seat that appears level may still be outside the manufacturer’s allowed range.
Step 6: Secure the child in the harness
A tightly installed car seat can still be used incorrectly if the harness is loose or routed at the wrong height.
Set the harness height correctly
For a rear-facing child, the harness straps should usually come from at or below the child’s shoulders. For a forward-facing child, they should usually come from at or above the shoulders.
The exact rule can vary by seat, so confirm it in the manual. Some seats have different harness-routing rules or approved positions.
Tighten the harness
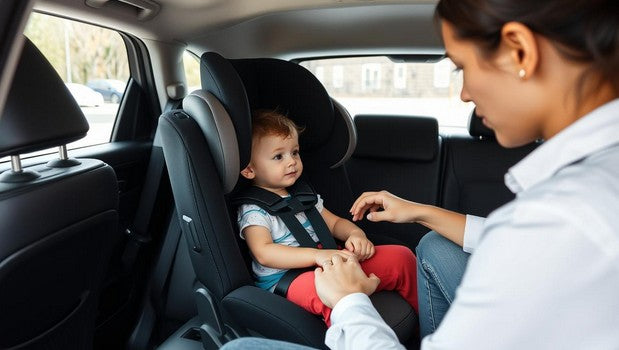
Place the child’s back and bottom flat against the seat. Buckle the harness, then pull the harness adjuster until the straps are snug.
Use the pinch test:
- Pinch the harness webbing at the child’s shoulder.
- Try to pinch the strap between your thumb and finger.
- You should not be able to pinch extra webbing.
The harness should lie flat. Do not twist the straps.
Position the chest clip
The chest clip should sit at the child’s armpit level. It should not rest on the belly or neck.
The chest clip helps keep the shoulder straps in position. It does not replace a snug harness.
Remove thick coats and bulky layers
A winter coat can compress in a crash and leave extra space under the harness. Dress the child in thin layers instead. After buckling the harness, place a blanket over the straps if needed.
Do not place aftermarket inserts, head supports, strap covers, or padding under the child unless the car seat manufacturer supplied them or approved them for that exact seat.

Signs the installation may be wrong
Certain problems appear often during a car seat check. Each one has a different fix.
| What you notice | Possible cause | What to check |
|---|---|---|
| The seat moves over 1 inch at the belt path | Loose belt, unlocked belt, or poor fit | Re-route the belt, lock it, and tighten again |
| The seat tilts toward one side | Uneven tightening or seat-contour issue | Reinstall on level ground and follow the manual |
| The child slumps forward | Incorrect recline angle or loose harness | Check the angle indicator and tighten the harness |
| Harness straps sit above or below the shoulders | Wrong harness slot | Use the height stated in the manual |
| You can pinch the harness | Harness has slack | Tighten at the adjuster |
| Chest clip sits on the stomach | Clip was placed too low | Move it to armpit level |
| Seat belt will not stay tight | Belt-locking method is incorrect | Read the vehicle manual |
| Lower anchors are hard to attach | Wrong anchor, poor access, or limit reached | Check anchor labels and weight limits |
| Forward-facing seat moves forward a lot | Top tether is missing or loose | Attach it to the marked tether anchor |
| Seat rests against the front seat | Contact is not approved | Check both manuals before allowing contact |
Movement at the top of the car seat is not the same as movement at the belt path. Focus on the belt path when performing the one-inch test.
Common installation mistakes to avoid
Using both LATCH and the seat belt without permission
Using both systems may seem stronger, but it is not automatically approved. Use both only when the specific car seat and vehicle instructions allow it.
Installing in front of an active air bag
Do not place a rear-facing seat in front of an active frontal air bag. The back seat is generally the safest place for children under 13, according to NHTSA.
If a child must ride in the front seat because of the vehicle’s seating limits, follow the vehicle manual and applicable safety guidance. Move the vehicle seat as far back as possible and address the air-bag instructions carefully.
Using a seat belt extender or homemade fix
Do not alter the seat belt, add household materials, or drill into the vehicle. These changes can affect how the restraint works.
Adding a non-approved accessory
A product sold separately may not have been tested with your car seat. Use only accessories approved by the car seat manufacturer for that model.
Turning the child forward-facing too soon
The child’s legs touching the vehicle seat, sitting with bent knees, or asking to face forward does not by itself mean the rear-facing stage is over. Use the rear-facing limits printed by the manufacturer.

When to get a professional car seat check
Ask a certified CPST for help when:
- You cannot get less than 1 inch of movement.
- The seat belt will not lock or stay tight.
- The seat does not fit the vehicle seating position.
- You are unsure where the top tether attaches.
- You need to install more than one car seat.
- The car seat manual is missing.
- The seat has been in a crash.
- The child has special positioning or medical needs.
- The child is close to the seat’s height or weight limit.
Many communities in the United States offer car seat inspections through hospitals, fire departments, police departments, health departments, and nonprofit programs. Use the National Highway Traffic Safety Administration’s certified Child Passenger Safety Technician directory to find current help near you.
A CPST can teach you how to install the seat. A technician should not replace the manufacturer’s instructions or promise that a particular seat is safe in every vehicle.
How to check a car seat after travel
Check the seat regularly, especially after another driver uses the vehicle.
Before driving, confirm:
- The seat is still in the correct direction.
- The belt or lower-anchor strap remains tight.
- The seat moves less than 1 inch at the belt path.
- The recline indicator is still in range.
- The tether remains attached when required.
- The harness is not twisted.
- The chest clip is at armpit level.
- The child has not outgrown the seat.
- No food, toy, or object is trapped behind the seat.
- The seat has not been damaged.
After cleaning, reinstall the seat according to the manual. Do not wash straps with harsh cleaners or soak them unless the manufacturer permits it. Harness webbing can weaken when cleaned the wrong way.
Key takeaways
- A correctly installed car seat moves less than 1 inch at the belt path.
- Read the car seat manual and vehicle manual together.
- Use the correct rear-facing, forward-facing, or booster stage.
- Check the recline angle.
- Keep the harness snug and flat.
- Place the chest clip at armpit level.
- Use the top tether for a forward-facing seat when instructed.
- Do not use unapproved padding or accessories.
- Get help from a certified CPST when the installation remains uncertain.
Frequently asked questions
Should a car seat move at all?
A car seat may have slight movement, especially at the top. When you hold it at the belt path, however, it should move less than 1 inch from side to side or front to back.
Is LATCH safer than a seat belt?
No method is automatically safer. LATCH and the vehicle seat belt can both provide a proper installation when used within their limits. Choose the method that the manuals allow and that gives a tight, correct fit.
Can a rear-facing car seat touch the front vehicle seat?
Sometimes. Some car seats and vehicles allow the rear-facing seat to touch the front seat, while others require space between them. Check both manuals. Never force the car seat against the front seat.
Should I use a pool noodle under a rear-facing seat?
Only if the car seat manual allows an angle-adjustment aid and explains how to use it. Do not add a pool noodle or rolled towel based on a general rule.
When should a child stop using a car seat?
A child should remain in a car seat or booster according to the restraint’s height and weight limits and applicable state law. A child is ready for a seat belt alone when the lap belt sits low across the hips, the shoulder belt crosses the chest and shoulder, the knees bend at the seat edge, the child can sit upright, and the child can stay in position for the full ride.
Where can I have my car seat checked?
Use NHTSA’s certified Child Passenger Safety Technician directory or contact a local health department, hospital, fire department, or community safety program. Availability and appointment rules vary by location.
Final check before you drive
Install the seat on a level surface, follow both manuals, and test it at the belt path. Then buckle the child and check the harness, chest clip, recline angle, and tether.
If anything still feels unclear, stop and get an in-person inspection from a certified CPST. A short check can find a routing, angle, or harness error that is hard to spot at home.
U.S. sources and further help
- National Highway Traffic Safety Administration: Car Seats and Boosters
- NHTSA: Find a Child Passenger Safety Technician
- American Academy of Pediatrics: Car Seats: Information for Families
- Centers for Disease Control and Prevention: Child Passenger Safety
- National Highway Traffic Safety Administration: Ease of Use Ratings and Car Seat Guidance