

To use a car jack, park on firm, level ground, turn off the engine, secure the vehicle, place the jack under the correct lift point, and raise the car only as high as needed. Never work under a vehicle supported only by a jack. Use jack stands for any work beneath the car.
This guide applies to common passenger cars, SUVs, and pickup trucks in the United States. Your vehicle owner’s manual always takes priority because lift points, jack locations, spare-tire tools, and emergency procedures vary by make and model.
Introduction: What a Car Jack Does
A car jack is a tool that lifts one part of a vehicle off the ground. Drivers most often use one to change a flat tire, inspect a tire, or perform a limited roadside task.
A jack is not a stable support system. It can tip, slip, or lose pressure. For that reason, use it only to raise the vehicle. Once the vehicle is high enough, lower it onto jack stands before doing work beneath it.


Most cars sold in the United States include a small scissor jack or compact bottle jack. These jacks are usually meant for emergency tire changes, not long repairs. A floor jack is more stable and easier to use in a garage, but it still requires the correct lift point and jack stands.

What You Need Before You Start
Gather the right tools before lifting the vehicle. You will usually need:
- The vehicle’s owner’s manual
- The correct car jack
- A lug wrench or tire iron
- A spare tire or tire repair kit, if supplied
- At least one wheel chock
- A flashlight in low light
- Work gloves
- Jack stands for any work under the vehicle
- A tire-pressure gauge
- A reflective warning triangle or roadside flare, where legal and safe to use
Check the jack’s capacity before using it. The rating must exceed the load it will carry. A vehicle’s curb weight is not the same as the weight on one wheel, but do not guess when the jack rating is unclear. Use the rating shown on the jack or in its manual.
Inspect the jack for damage. Do not use it if it is bent, cracked, leaking hydraulic fluid, badly rusted, or missing parts. Check that a scissor jack opens smoothly and that a hydraulic jack holds pressure.
If you are on a highway shoulder or another dangerous location, your first priority is traffic safety. If you cannot reach a safe, firm area away from moving traffic, call roadside assistance. In the United States, move away from traffic when possible and call 911 if the location creates an immediate danger.
How to Use a Car Jack Step by Step
Follow this sequence for a tire change or brief inspection. The exact jack point may differ, so confirm it in the owner’s manual before lifting.
1. Find a safe place to stop
Stop on firm, level ground. A paved parking lot or flat driveway is better than soft soil, gravel, grass, or a slope.
Avoid lifting a vehicle on:
- A hill
- A soft shoulder
- Loose gravel - Wet grass
- Ice
- A road surface that slopes toward traffic
- A surface with potholes or broken pavement
If you have a flat tire on a busy road, drive only as far as needed to reach a safer location. Driving on a completely flat tire can damage the wheel and tire.


2. Park and secure the vehicle
Put the transmission in Park if the vehicle has an automatic transmission. Use first gear or reverse if it has a manual transmission. Set the parking brake firmly.
Turn off the engine. Remove the key or keep the key fob away from the vehicle if the owner’s manual requires it.
Place a wheel chock against the tire opposite the corner you will lift. If you do not have a chock, a solid block of wood may help on private, level ground. Do not use a loose rock that can roll or break.
For example, if you will lift the front-left wheel, chock the rear-right wheel. Chock more wheels if the manual recommends it.
3. Loosen the lug nuts before lifting
Remove the hubcap if needed. Turn each lug nut counterclockwise with the lug wrench.
Do not remove the nuts yet. Loosen them by about one turn while the tire remains on the ground. The tire’s contact with the ground keeps the wheel from spinning.
If a lug nut will not move, make sure the wrench fits fully. Press down with controlled force. Do not jump on the wrench or use a pipe extension unless the vehicle maker allows it. A sudden slip can cause injury.
4. Locate the correct lift point
Look in the owner’s manual for the approved jack point. Many vehicles have reinforced points near the wheel well, often along the pinch weld or frame rail.
Some lift points have a notch, arrow, mark, or reinforced metal shape. Place the jack exactly where the manufacturer shows. Do not lift under:
- The oil pan
- The transmission pan
- A plastic body panel
- An exhaust pipe
- A suspension arm not listed as a lift point
- A thin floor panel
- A differential unless the manual permits it
The correct point spreads the load through a strong part of the vehicle. The wrong point can bend the body, damage components, or cause the jack to slip.
5. Position the jack
Set the jack on the ground with its base fully flat. Center the jack head under the approved lift point.
For a scissor jack, keep the screw or handle facing the direction shown in the manual. For a floor jack, close the release valve before pumping. Keep your hands and feet away from the space beneath the vehicle.
Before lifting, check that the jack is straight and that its base will stay stable as the vehicle rises. If the base starts to tilt, stop and lower the vehicle.
6. Raise the vehicle slowly
Raise the vehicle with slow, controlled movements. Watch the jack, lift point, and tire as the wheel leaves the ground.


Lift only until the flat tire is about 1 to 2 inches above the ground, unless the owner’s manual gives a different instruction. The replacement tire may need more clearance if it is fully inflated and larger than the damaged tire.
Stop at once if:
- The jack leans
- The vehicle shifts
- The base sinks
- The lift point bends
- The jack makes an unusual sound
- The vehicle does not rise evenly
- The jack reaches its maximum height
- The tire is still stuck to the ground after the jack reaches a safe limit
Lower the vehicle and correct the problem. Never place a hand or body part under the vehicle to check clearance.
7. Remove the lug nuts and wheel
With the tire slightly off the ground, finish removing the lug nuts by hand. Keep them together in a safe place.
Pull the wheel straight toward you. If it is stuck, tap the tire sidewall with a rubber mallet or carefully rock the tire while keeping clear of the vehicle’s underside. Do not strike the wheel with a steel hammer.
If the wheel is frozen to the hub, do not increase the jack height to gain leverage. Lower the car, seek professional help, or use a proper wheel-removal method recommended for that vehicle.
8. Install the spare or replacement wheel
Align the wheel with the wheel studs or hub. Push it fully into place.
Install the lug nuts by hand. Tighten them in a star or crisscross pattern until the wheel is snug. Hand-starting each nut helps prevent cross-threading.
Do not fully tighten the lug nuts while the vehicle is suspended. Do not use an impact wrench to force a damaged or cross-threaded nut.
9. Lower the vehicle and tighten the lug nuts
Lower the vehicle slowly until the tire touches the ground and cannot spin. Do not remove the jack yet if the vehicle is still unstable.
Tighten the lug nuts in a star pattern. This helps seat the wheel evenly. Use a torque wrench to tighten them to the specification in the owner’s manual or service information.
Do not rely on a generic torque number. Lug-nut torque can vary by vehicle, wheel type, stud size, and model year.
After tightening, lower the vehicle completely and remove the jack. Check the lug nuts again with the torque wrench. Store the jack and tools securely.
10. Check the tire and drive carefully
Check the spare-tire pressure before driving. Many temporary spare tires require a higher pressure than the regular tires.
Follow the speed and distance limits printed on the temporary spare or listed in the owner’s manual. A compact spare may have limits such as a reduced maximum speed and a short driving range, but the exact limits vary.


After driving a short distance, stop in a safe place and check the lug nuts again if the vehicle maker recommends it. Have a full-size tire repaired or replaced as soon as possible.
Using a Floor Jack and Jack Stands for Repairs
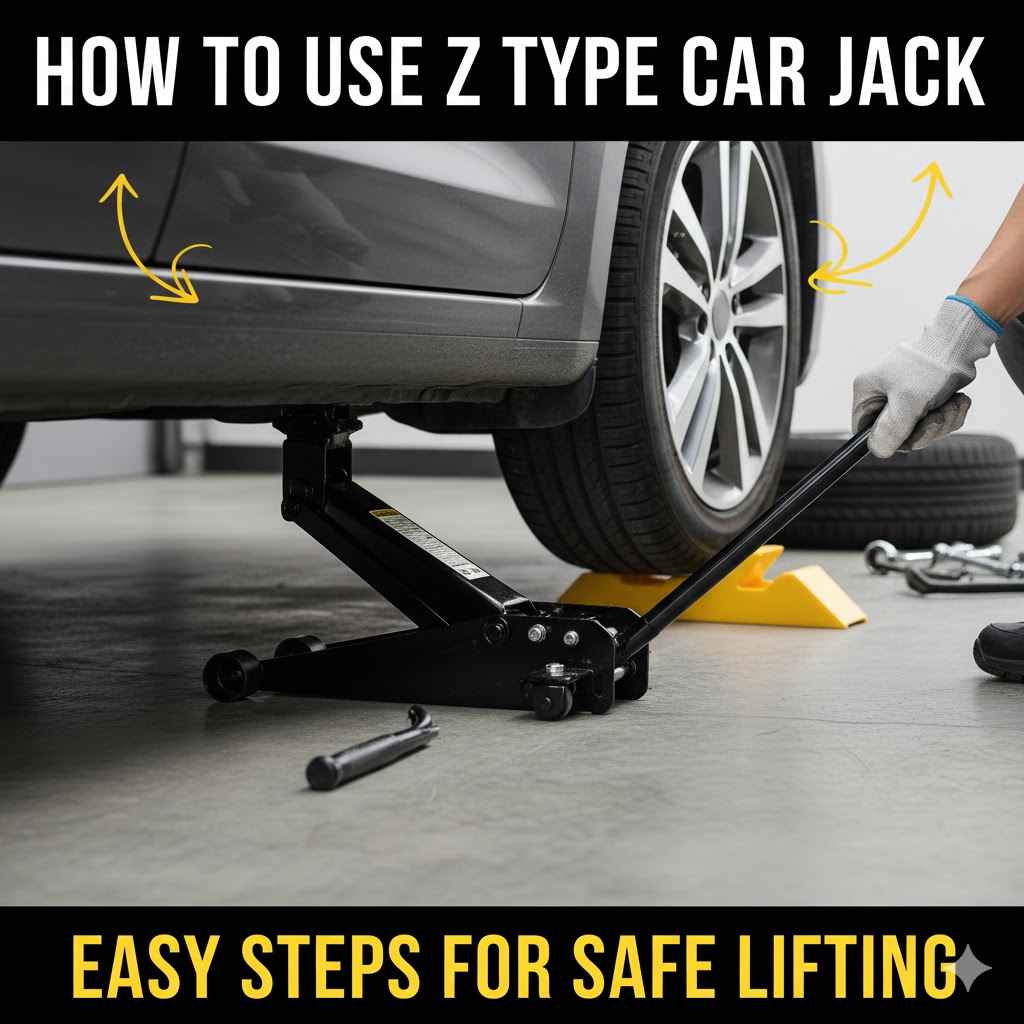
A floor jack is useful for garage work, but it should not hold the vehicle while you work underneath it. Use jack stands on solid, level ground.
Follow this process:
- Park the vehicle, set the parking brake, and chock the wheels.
- Locate the approved lifting point.
- Raise the vehicle with the floor jack.
- Place jack stands under the manufacturer-approved support points.
- Adjust both stands to an equal height.
- Lower the vehicle slowly onto the stands.
- Gently test the vehicle for stability before working near it.
- Leave the floor jack lightly positioned as a backup only if the manufacturer or repair procedure permits it.
The jack stands must have a capacity suitable for the vehicle. Place them symmetrically when the repair requires both sides to be raised.
Never use stacked wood blocks, concrete blocks, bricks, spare tires, or makeshift supports as substitutes for jack stands. These materials can crack, shift, or roll.
Some vehicles have air suspension, electronic ride-height control, or special lifting procedures. Check the service information before lifting these vehicles. Electric vehicles and hybrids also require care around high-voltage components. Use only the approved lift points.
Scissor Jack vs. Floor Jack vs. Bottle Jack
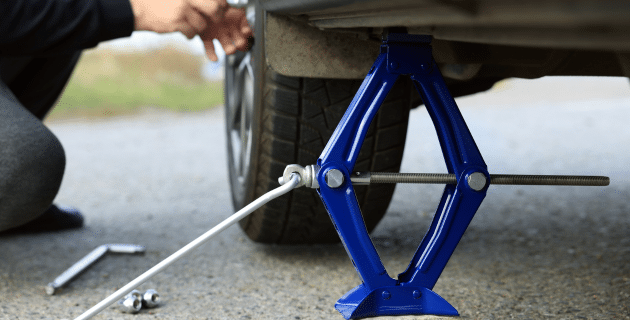
The best jack depends on the job. A compact scissor jack may be suitable for an emergency tire change, while a floor jack is usually better for planned garage work.
| Jack type | Best use | Main benefit | Main limitation |
|---|---|---|---|
| Scissor jack | Emergency tire change | Small and easy to store | Slow and less stable |
| Hydraulic floor jack | Garage tire and brake work | Stable and quick to raise | Heavy and needs level ground |
| Bottle jack | Heavy vehicles with suitable lift points | High capacity in a compact shape | May not fit under low vehicles |
| Farm or high-lift jack | Specialized off-road equipment | Large lifting range | Unsafe for many road vehicles |
A jack’s maximum height also matters. A low-profile sports car may need a low-entry floor jack. A tall pickup may need more lift height. Capacity alone does not make a jack suitable.
Choose a jack based on four checks:
- It fits under the vehicle before lifting.
- It reaches the approved lift point.
- It has enough capacity.
- Its base remains stable on the surface you will use.
A larger jack is not automatically safer. The wrong lifting point or a soft surface can make any jack dangerous.
What to Do If the Car Jack Will Not Lift the Vehicle
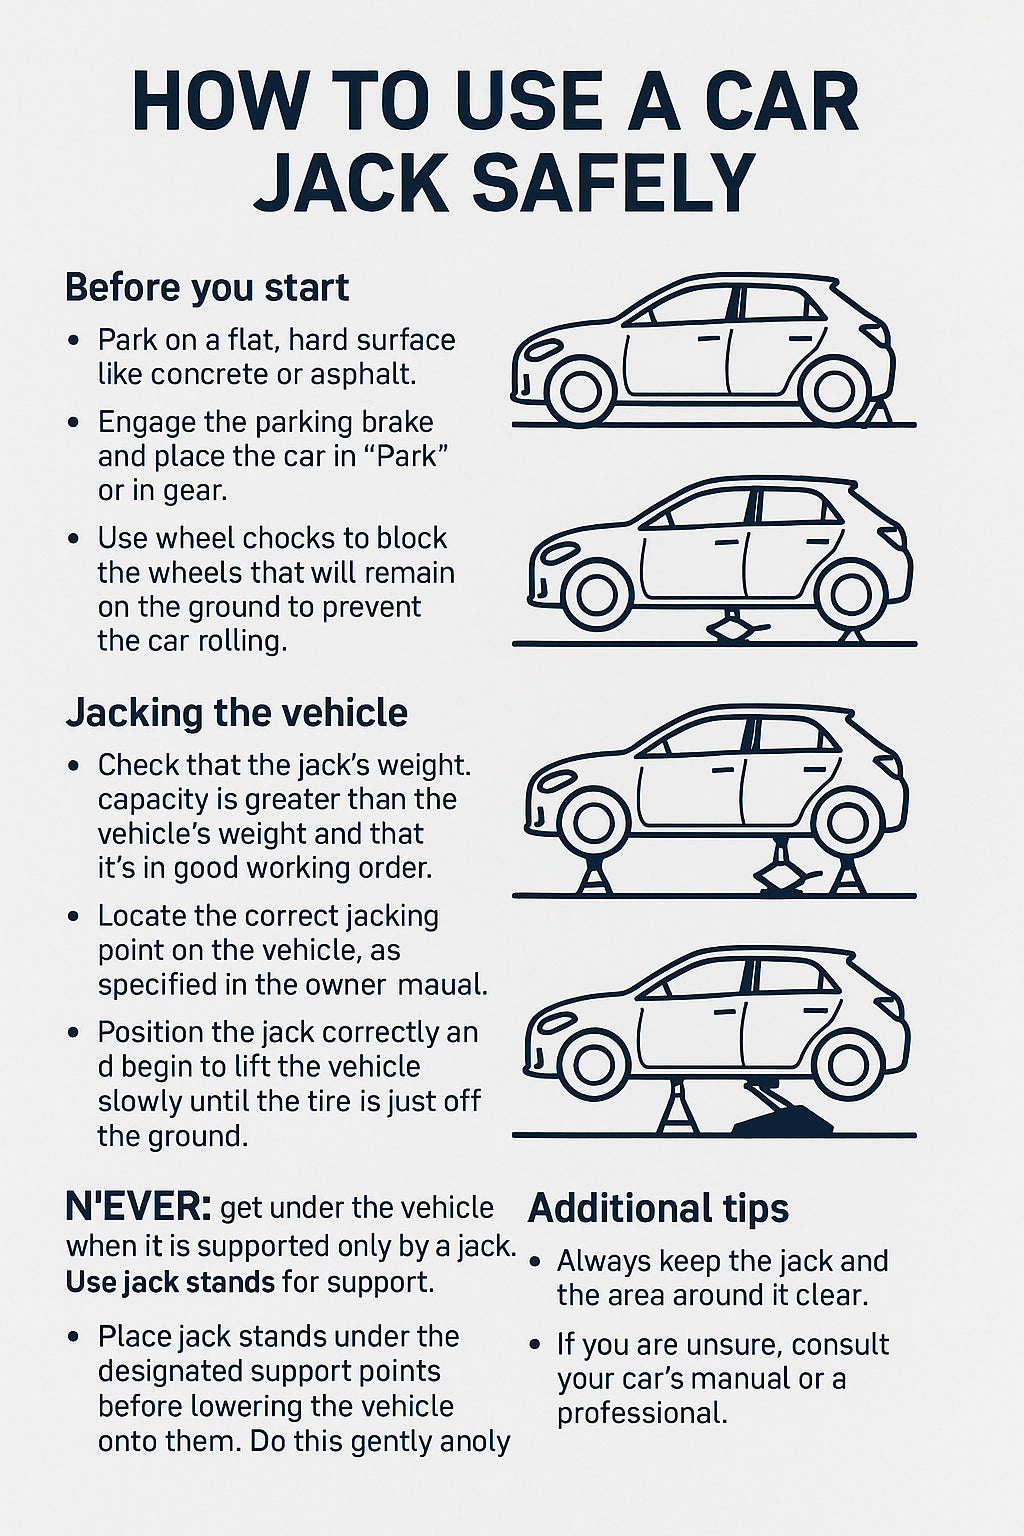
Stop if the jack does not work normally. Do not keep pumping or turning the handle without finding the cause.
The jack will not fit under the car
The tire may be fully flat, leaving too little clearance. Confirm that you are using the correct jack and position. Some vehicles have a specific first step for a flat tire.


Do not drive onto a block or use a second jack unless the vehicle maker or a qualified technician provides a safe procedure. If the jack still cannot reach the lift point, call roadside assistance.
The jack rises but the vehicle does not
The release valve may be open on a hydraulic jack. Close it as described in the jack instructions. The jack may also be below its lifting capacity or placed at the wrong point.
Lower the vehicle if the jack reaches its limit. Never add blocks beneath the jack to gain height.
The jack tilts or sinks
Lower the vehicle at once if you can do so safely. The ground may be soft, uneven, or sloped. Move to firm, level pavement only if doing so does not increase traffic risk.
A broad, approved jack pad may help on private property, but it must fit the jack and vehicle. Do not place unstable boards, loose stones, or stacked objects under the jack.
The wheel will not come off
The wheel may be stuck to the hub by corrosion. Make sure the vehicle is stable and the lug nuts are removed. Do not crawl under the car or raise it higher to force the wheel off.
If a safe removal method is not clear, lower the vehicle and get professional help.

Common Car-Jack Mistakes to Avoid
The most serious mistakes involve stability, support, and placement.
- Using the jack on a slope: The vehicle can roll or the jack can slide.
- Skipping the wheel chock: The parking brake and transmission may not stop all movement.
- Lifting under a weak part: Body panels and oil pans can bend or break.
- Crawling under a jack-supported car: A jack can fail without warning.
- Raising the car too high: Extra height increases instability.
- Using a damaged jack: Rust, leaks, or bent parts can cause failure.
- Leaving passengers inside: Movement and weight can change the load.
- Removing all lug nuts before lifting: The wheel may shift or pull away unexpectedly.
- Using the wrong spare tire: Tire size, speed rating, and drivetrain limits may matter.
- Ignoring the manual: Vehicle lift points and jack procedures are not universal.
If traffic, weather, darkness, or road conditions make the job unsafe, do not attempt it. A roadside service call is often safer than changing a tire in a live traffic area.

How to Know the Car Is Safely Supported
Before changing a tire, the vehicle should be stable, the jack should remain upright, and the correct lift point should contact the jack head.
For repair work, the vehicle must rest on correctly placed jack stands. Check that:
- The stands sit on firm, level ground.
- Both stands are at the same height when required.
- The support points match the service manual.
- The vehicle does not rock when lightly tested.
- The wheels that remain on the ground are chocked.
- No person is beneath the vehicle while it is supported only by the jack.
A tire being off the ground does not prove that the vehicle is safe. Stability comes from the complete setup: surface, transmission, parking brake, chocks, lift points, and support stands.
Frequently Asked Questions
Can I use a car jack on gravel?
Avoid it when possible. Gravel can shift under the jack and make the vehicle unstable. Move to firm, level pavement or call roadside assistance if moving the vehicle would be unsafe.


Can I change a tire with only the factory jack?
Yes, if the jack is undamaged, the vehicle is on firm level ground, and you follow the owner’s manual. A factory jack is normally intended for a short emergency tire change, not for work beneath the vehicle.
Do I need jack stands to change a tire?
You do not normally need jack stands for a brief tire change if the factory jack is used correctly and you stay clear of the vehicle’s underside. You do need jack stands for repairs that require you to work under the vehicle.
How high should I jack up a car?
Raise it only enough for the damaged tire to clear the ground and for the replacement tire to fit. For many tire changes, about 1 to 2 inches of clearance is enough, but the owner’s manual controls.
Should I loosen lug nuts before jacking up the car?
Yes. Loosen them slightly while the tire is still on the ground. This stops the wheel from spinning and reduces the chance of moving the vehicle while it is raised.
Can I use a hydraulic jack without jack stands?
Use a hydraulic jack to lift the vehicle, not as the sole support for a person working underneath it. Lower the vehicle onto properly rated jack stands before going under the car.
What should I do with a temporary spare tire?
Install it according to the owner’s manual, check its pressure, and follow its printed speed and distance limits. Replace or repair the regular tire promptly.
Key Takeaways
- Use a car jack only on firm, level ground.
- Read the owner’s manual before choosing a lift point.
- Chock a wheel and set the parking brake.
- Loosen lug nuts before lifting.
- Raise the vehicle only as high as necessary.
- Never place any part of your body under a vehicle supported only by a jack.
- Use properly rated jack stands for repairs beneath the vehicle.
- Call roadside assistance when traffic, weather, surface, or equipment makes the job unsafe.
Sources and Further Reading
- National Highway Traffic Safety Administration: Tire Safety
- OSHA: Jacks and Automotive Service Equipment
- Your vehicle’s owner’s manual and roadside emergency instructions
- The operating manual supplied with your jack and jack stands
Before you begin, open the owner’s manual to the tire-changing section. Confirm the lift point, spare-tire limits, and lug-nut torque before raising the vehicle.