

Introduction
To put an infant car seat in a car, keep the seat rear-facing, choose an approved seating position, secure the base with either the vehicle seat belt or lower anchors, set the correct recline angle, and tighten the seat until it moves no more than 1 inch at the belt path. Then buckle your baby with the harness snug and the chest clip at armpit level.
Always follow the car seat manual and your vehicle owner’s manual. U.S. car seats and vehicles can differ in their anchor locations, weight limits, recline settings, and belt-locking methods. If the installation still feels unclear, a certified child passenger safety technician can check it in person.

What You Need Before Installing an Infant Car Seat
Gather these items before you begin:


- The infant car seat and its base, if the model uses one
- The car seat instruction manual
- Your vehicle owner’s manual
- The child’s current weight and height
- A firm, empty vehicle seat
- Enough time to check the installation without rushing
Do not install the seat while your baby is in it. Read both manuals first. The car seat manual explains how the base, harness, recline foot, belt path, and lower-anchor system work. The vehicle manual explains which seating positions and anchors are approved.
Choose a suitable seating position
The rear seat is the safest place for most children. Never place a rear-facing infant car seat in front of an active passenger air bag. A front air bag can seriously injure or kill a baby during a crash.
Use a seating position that permits a tight installation. The center position is not automatically safest if the seat does not fit well there. Some vehicles do not allow lower anchors in the center, even when anchors appear close together. Use the center only when the vehicle and car seat manuals permit that method.
Check the car seat before use
Do not use a car seat if:
- It has an unknown crash history.
- It is missing parts or instructions.
- The harness is frayed, cut, or damaged.
- The shell is cracked.
- It is past the expiration date listed by the manufacturer.
- It has been recalled.
- It has been altered with unapproved parts.
Avoid a secondhand seat unless you know its full history. A seat may look fine but have hidden damage or missing parts.
How to Install an Infant Car Seat Base
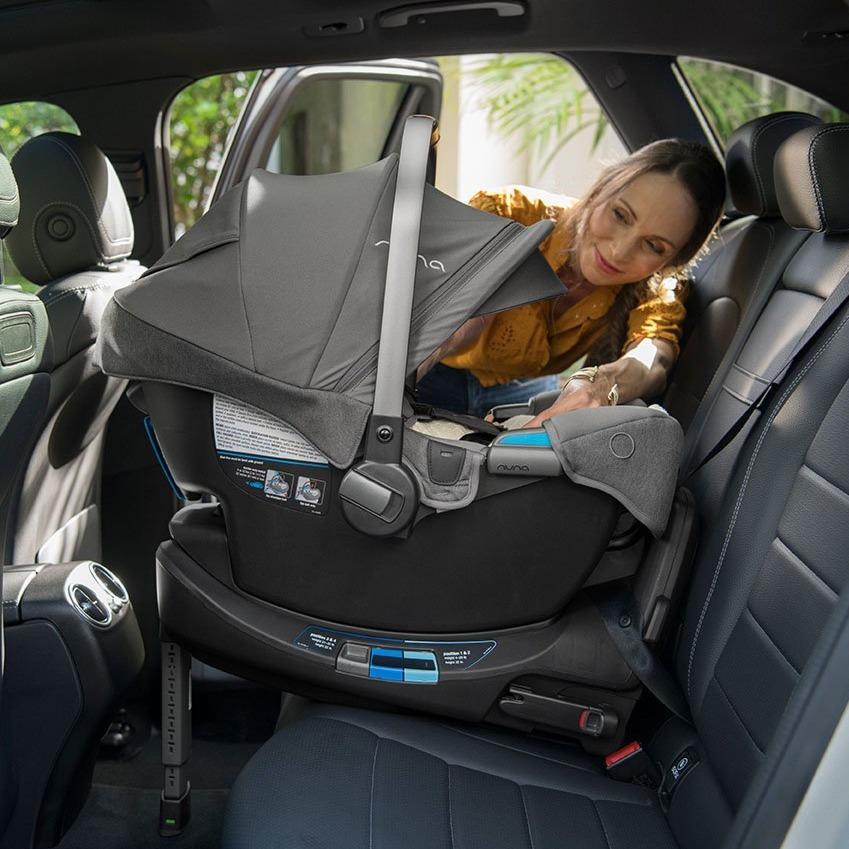
Most infant seats attach to a separate base. The base stays in the car, while the carrier clicks into it. Some infant seats can also be installed without the base by routing the vehicle belt through the carrier’s approved belt path.
1. Place the base rear-facing
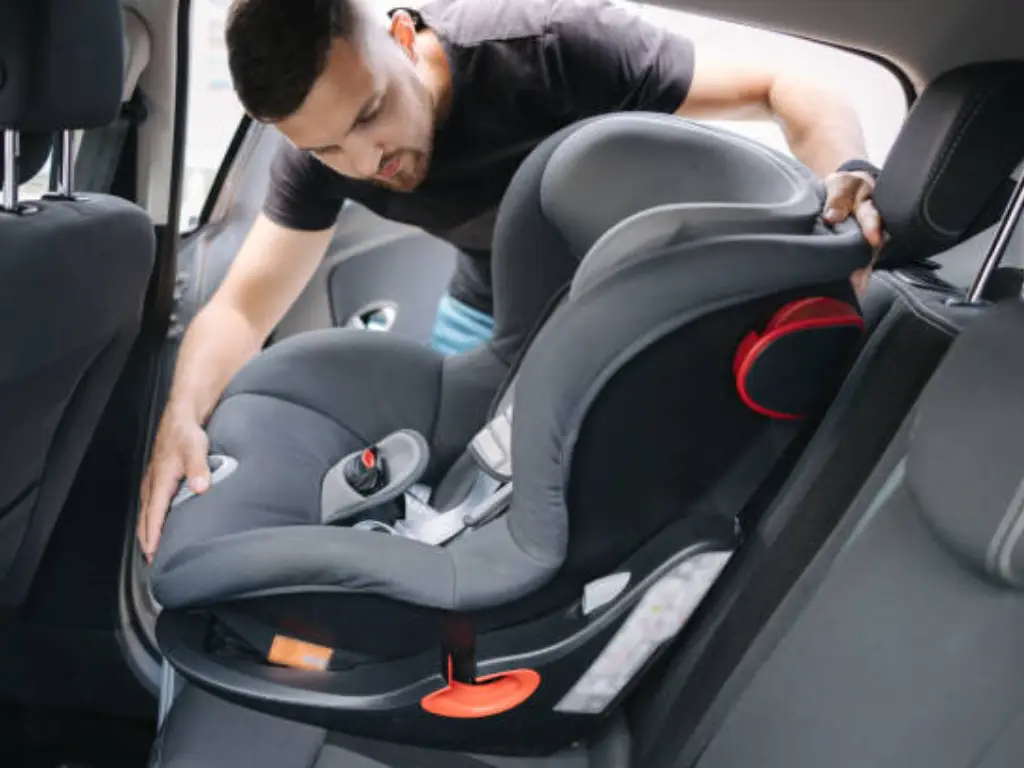
Set the base on the vehicle seat so the carrier will face the rear of the vehicle. Keep the base flat on the seat unless the manual shows a different setup.
Make sure the base does not hang so far over the edge of the vehicle seat that it conflicts with the car seat instructions. Some models allow a certain amount of overhang, while others do not. Check the manual instead of guessing.


2. Set the recline angle
use the built-in recline foot, adjustable base, or angle indicator. The indicator must show the correct range for your baby’s size and the vehicle’s slope.
A newborn needs the correct recline to help keep the head from falling forward. A very upright seat can affect the baby’s airway. A seat that reclines too far may not work as designed in a crash.
The correct angle varies by model. Do not place towels, pool noodles, or other items under the base unless the manufacturer specifically allows them. If the manual permits a tightly rolled towel or noodle, place it only where the instructions show.
3. Pick one approved attachment method
You can usually install the base with either:
- The vehicle seat belt, or
- The lower anchors, often called LATCH in the United States
Do not use both methods unless the car seat manufacturer specifically says you may. Using both does not automatically make the installation safer.
Option A: Install with the vehicle seat belt
- Open the belt path shown in the car seat manual.
- Route the lap belt, or the lap-and-shoulder belt, through the correct path.
- Make sure the belt is flat and not twisted.
- Lock the belt using the vehicle’s locking system, the base’s built-in lock-off, or another method approved in the manuals.
- Press down firmly on the base near the belt path.
- Pull the slack out of the belt.
- Close the lock-off if the base has one.
- Recheck the recline angle.
Many U.S. vehicles have a switchable retractor that locks when the belt is pulled all the way out and allowed to retract. Some bases have a lock-off that holds the belt without using the vehicle retractor. Read your vehicle manual to identify the correct method.
A locking clip may be needed in some installations, but it is not a general substitute for learning how the vehicle belt locks. If the manual requires one, place it correctly and close to the buckle. Do not use a locking clip casually or attach it in a place the manufacturer does not show.
Option B: Install with lower anchors
- Find the lower-anchor bars in the vehicle seat crease.
- Attach the base connectors to the approved anchors.
- Confirm that each connector is fully attached.
- Press the base down near the belt path.
- Pull the adjustment strap until the base is tight.
- Check that the strap is routed as shown in the manual.
- Confirm that the lower-anchor weight limit has not been exceeded.
Lower anchors are not the same as the top tether anchor. A rear-facing infant seat normally uses the lower anchors or a seat belt. Use a top tether only if the car seat manual specifically requires or permits it for that installation.
The allowed lower-anchor weight depends on the car seat and vehicle. Check both manuals and the labels on the seat. When the child’s weight, the car seat’s weight, or the combined limit reaches the stated maximum, change to a vehicle seat belt if the seat remains within its approved use.
4. Test the base
Hold the base at the belt path with your non-dominant hand. Move it from side to side and front to back.
The base should move no more than 1 inch in any direction at the belt path. Do not test movement by pulling on the end of the carrier or the handle. A small amount of movement at another part of the seat can be normal.


If the base moves too much:
- Remove slack from the belt or lower-anchor strap.
- Check that the belt is in the correct path.
- Confirm that the belt is locked.
- Check that the base is not resting on a bulky object.
- Try another approved seating position.
- Review the manual’s tightening method.
5. Attach the carrier
Place the infant carrier onto the base until it clicks. Pull up on the carrier to confirm that it is attached.
Some bases have a color indicator or audible click. These features can help, but they do not replace a manual check. Confirm that the carrier is level, fully attached, and positioned as the manual directs.
How to Buckle Your Baby Into an Infant Car Seat
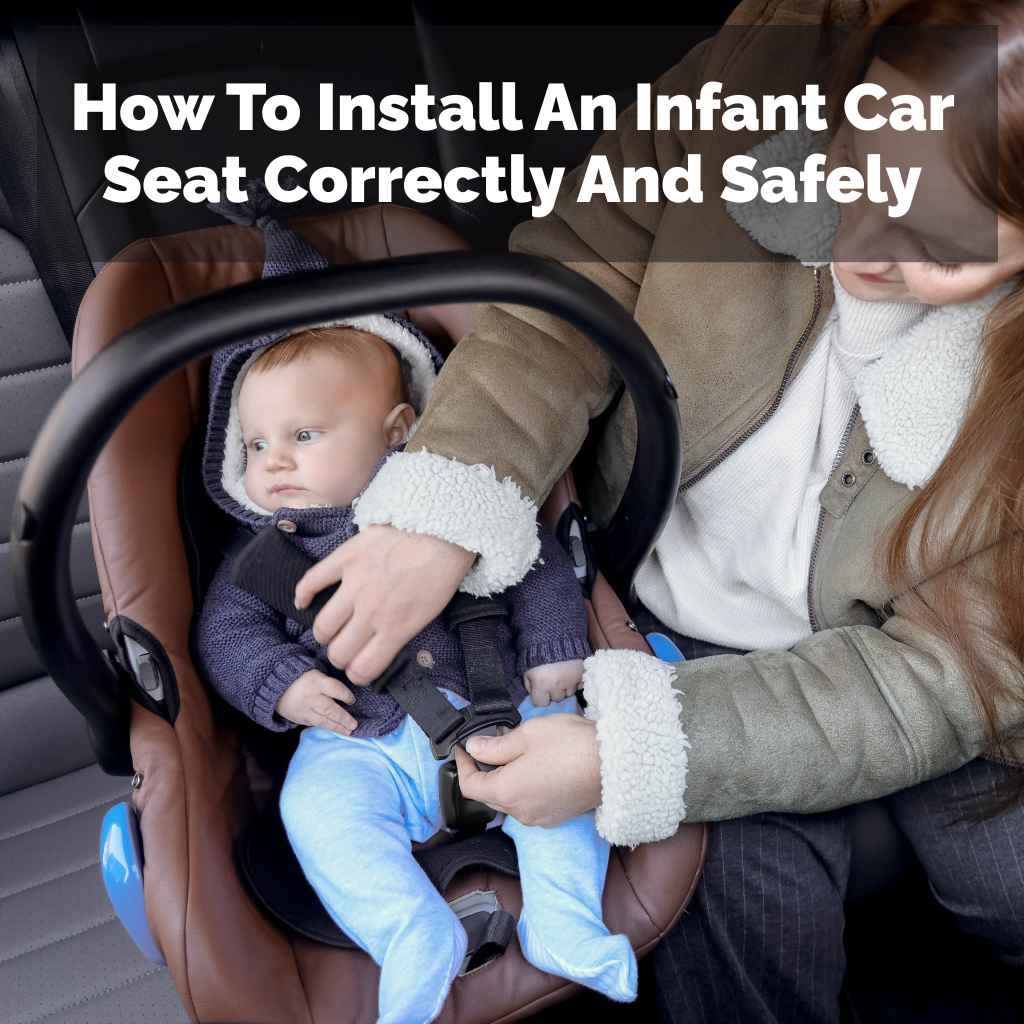
A properly installed base cannot protect a baby if the harness is loose or incorrectly positioned. Buckle your baby every time, even for a short trip.
Use the correct rear-facing position
Infant car seats are designed to face the rear of the vehicle. Keep your child rear-facing until the seat’s rear-facing height or weight limit is reached. The American Academy of Pediatrics recommends that children remain rear-facing as long as possible, within the limits of their seat.
Do not turn the seat forward because your baby’s legs touch the vehicle seat. Bent legs are common and are not, by themselves, a reason to change direction.
Place the harness straps correctly
For a rear-facing baby, the harness straps should usually come from slots at or below the shoulders. The exact rule depends on the seat design, so use the manual as the final authority.
Place the baby’s back and bottom flat against the seat. Remove thick clothing from under the harness. A bulky winter coat can compress in a crash and leave the harness too loose.
Instead, dress the baby in thin layers and place a blanket over the secured harness if needed. Never put a blanket, insert, head support, or cushion behind the baby unless it came with the seat or the manufacturer approves it.
Tighten the harness
- Place both shoulder straps over the baby’s shoulders.
- Buckle the crotch buckle.
- Connect the chest clip.
- Pull the harness adjustment strap until it is snug.
- Position the chest clip at armpit level.
- Perform the pinch test.
For the pinch test, try to pinch the harness webbing at the shoulder. If you can pinch extra material, tighten the harness. You should not be able to gather a fold of webbing between your fingers.
The chest clip helps keep the shoulder straps in position. It is not a substitute for a tight harness and should not rest on the belly or neck.
How to Install an Infant Car Seat Without the Base
Many infant seats allow a baseless installation with the vehicle seat belt. This can help when traveling in a taxi, rideshare, rental car, or another vehicle.
First, confirm in the car seat manual that baseless installation is allowed. Not every carrier can be installed this way.
Typical steps include:
- Place the carrier rear-facing on the vehicle seat.
- Set the carrier at the correct recline angle.
- Route the lap belt, or the lap portion of a lap-and-shoulder belt, through the carrier’s approved belt path.
- Lock the vehicle belt as directed by the vehicle manual.
- Press the carrier down while removing slack.
- Confirm that the carrier moves no more than 1 inch at the belt path.
- Check that the handle is in the position required by the car seat manual.


The handle position is not universal. Some models allow the handle to remain upright during travel. Others require it to be moved. Never assume that an upright handle is safe or unsafe without checking the manual.
If the vehicle has a lap-and-shoulder belt, do not route the shoulder portion across the baby or over the carrier unless the manufacturer specifically shows that method. Use only the approved belt path.
How to Install an Infant Car Seat on an Airplane
A child restraint can be used on an airplane only when it is approved for aircraft use. Look for the label or statement required by the Federal Aviation Administration, and check the car seat manual.
Before flying:
- Ask the airline about its child-restraint rules.
- Use a window seat or another position that does not block the aisle, unless the airline approves another location.
- Do not place a car seat in an emergency-exit row.
- Install it according to the aircraft and car seat instructions.
- Keep the child buckled during the flight as directed.
Aircraft seats generally use a lap belt, not a vehicle-style shoulder belt. A car seat base that depends on a vehicle-specific belt-locking system may not be suitable for airplane use. The carrier may be approved for aircraft use even when the base is not.
Common Infant Car Seat Installation Mistakes
Installing the seat too loosely
A loose seat can move well beyond the accepted limit. Tighten at the belt path, not by pulling on the carrier handle or the top of the seat.
Using the wrong belt path
Infant carriers often have different belt paths for base and baseless installation. A belt in the wrong path may not hold the seat correctly.
Using lower anchors in an unapproved center position
Lower anchors are placed for specific seating positions. Do not connect to anchors from neighboring seating positions unless the vehicle manual specifically permits that arrangement.
Leaving the harness loose
The straps should pass the pinch test. Clothing, blankets, and a baby’s movement can make a loose harness even less secure.
Adding aftermarket products
Unapproved inserts, padding, toys, strap covers, and head supports can change how the restraint performs. Use only parts supplied with the seat or approved in writing by the manufacturer.
Letting the baby slump forward
A correct recline angle helps reduce slumping, but it does not replace proper harness adjustment. If the baby’s head repeatedly falls forward, stop and check the angle, fit, harness position, and any added padding.
Assuming a click proves correct installation
A click may show that the carrier connected to the base. It does not prove that the base is tight, the angle is correct, or the baby is properly buckled.

What to Do If the Infant Car Seat Does Not Fit
If you cannot achieve a tight installation, stop using that seating position until you solve the problem.
Try this order:
- Read the installation section of both manuals again.
- Confirm that the seat is allowed in that vehicle position.
- Check the recline setting.
- Remove any unapproved padding or objects.
- Use the other approved installation method.
- Try another approved rear seating position.
- Contact the car seat manufacturer.
- Find a certified Child Passenger Safety Technician through the National Highway Traffic Safety Administration’s inspection-station directory.
A technician can often identify a twisted belt, incorrect lock-off use, poor recline adjustment, or a seating-position problem. A technician cannot override the instructions for your particular seat or vehicle, so keep both manuals with you.


A Quick Installation Checklist
Before driving, confirm all of the following:
- The seat faces the rear.
- The seat is in the rear row whenever possible.
- The passenger air bag is off if the seat is in front, although the front seat should generally be avoided.
- The base or carrier is installed with one approved method.
- The seat moves no more than 1 inch at the belt path.
- The recline indicator is in the correct range.
- The carrier is fully attached to the base.
- The baby’s back and bottom are against the seat.
- Harness straps are at or below the shoulders for rear-facing use.
- The harness passes the pinch test.
- The chest clip is at armpit level.
- No thick coat is under the harness.
- No unapproved insert or accessory is in the seat.
- The seat and vehicle manuals allow the exact setup.

Frequently Asked Questions
Should an infant car seat be behind the driver or passenger?
Either rear seating position can work if the car seat fits tightly and the vehicle manual allows it. Choose the position that gives the best installation and lets the driver maintain a safe position. Do not move the front seat so far back that it presses against the car seat unless the vehicle and car seat manufacturers allow that contact.
Can I use both LATCH and the seat belt?
Usually, no. Use one approved installation method unless the car seat manufacturer specifically permits both. Using both without approval can change how the restraint performs.
How tight should an infant car seat be?
At the belt path, the installed seat should move no more than 1 inch from side to side or front to back. The baby’s harness should be tight enough that you cannot pinch extra webbing at the shoulder.
Can a newborn wear a winter coat in a car seat?
A thick coat should not go under the harness. It can compress in a crash and make the harness too loose. Use thin layers and place a blanket over the buckled harness instead.
When should I replace an infant car seat after a crash?
Follow the car seat manufacturer’s crash-replacement policy. NHTSA advises replacing a child restraint after a moderate or severe crash. Even after a minor crash, check the manufacturer’s instructions and inspect the seat for damage.
Conclusion
The safe way to put an infant car seat in a U.S. vehicle is to install it rear-facing, follow both manuals, use one approved attachment method, set the correct recline, and test for less than 1 inch of movement at the belt path. Then secure your baby with a snug harness and a chest clip at armpit level.
If anything does not fit, do not force the installation. Change the method or seating position, contact the manufacturer, or ask a certified Child Passenger Safety Technician to check it before your next trip.