

Leather car seats can often be repaired at home when the damage is small, such as light scratches, surface cracks, scuffs, or a small tear. The key is to identify the seat material first, clean it well, use a repair compound that matches the finish, and let each layer cure before adding more.
This guide applies to vehicles sold and used in the United States. It covers common damage in cars, trucks, and SUVs, including seats exposed to dry air, summer heat, cold weather, sunscreen, denim dye, and daily wear. If the damage is near a side airbag, a heated-seat element, or a seat belt mount, professional repair is the safer choice.
First, identify the seat material and damage
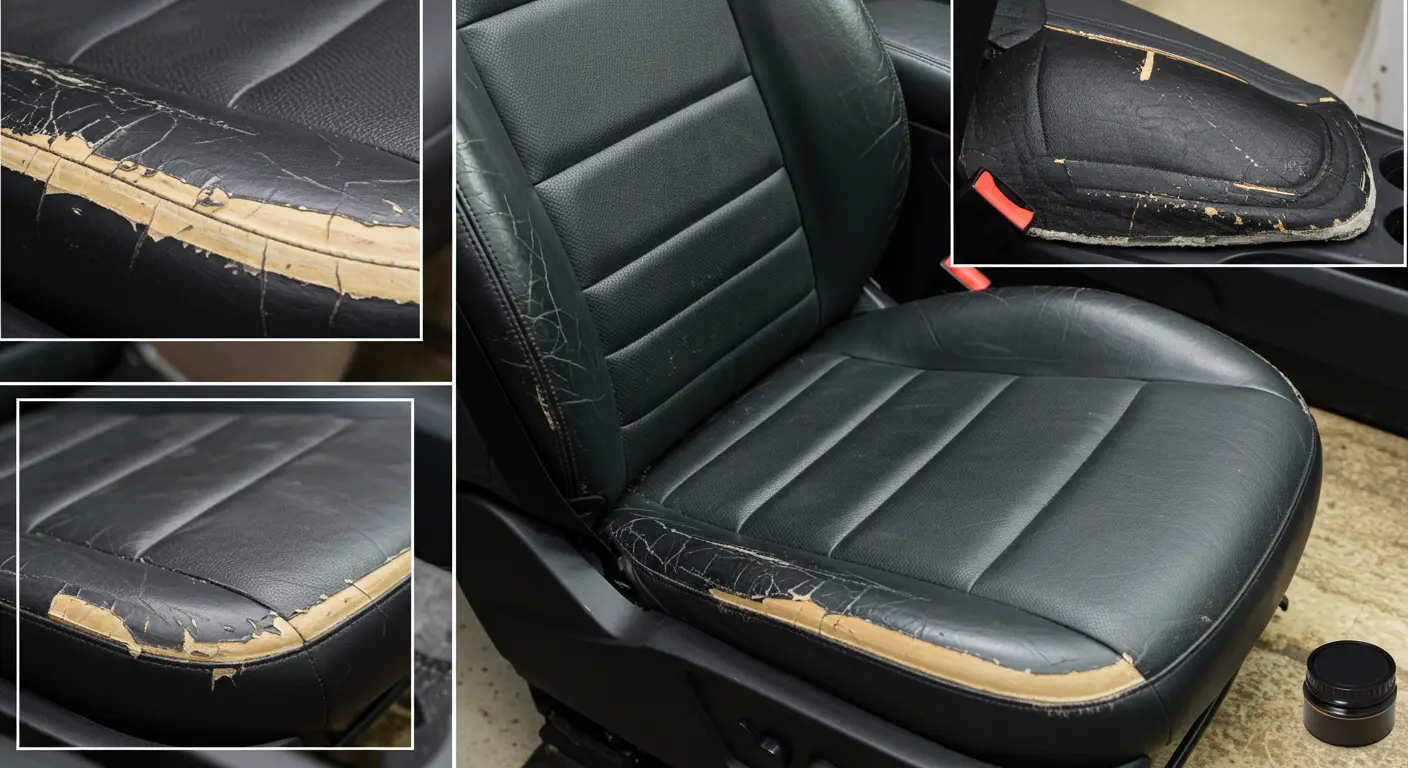
Most “leather” car seats are made from coated leather, vinyl, or a mix of materials. The repair method depends on both the material and the depth of the damage.
Modern automotive leather usually has a protective color coat on top. This coating helps resist stains but can crack, peel, or wear away. Some seats use leather only on the main seating panels.
The sides and backs may use vinyl or synthetic leather.

Look at the damaged area in bright light. Use the table below to choose the right approach.
| Damage | What it looks like | Best first approach |
|---|---|---|
| Surface scuff | Light mark with no open cut | Clean, condition, and use matching leather color if needed |
| Small scratch | A shallow line or mark | Clean, lightly smooth, then apply colorant |
| Dry crack | Fine lines or a rough surface | Clean, use flexible filler, then recolor |
| Deep crack | Open split with visible lower layers | Use backing fabric and flexible filler |
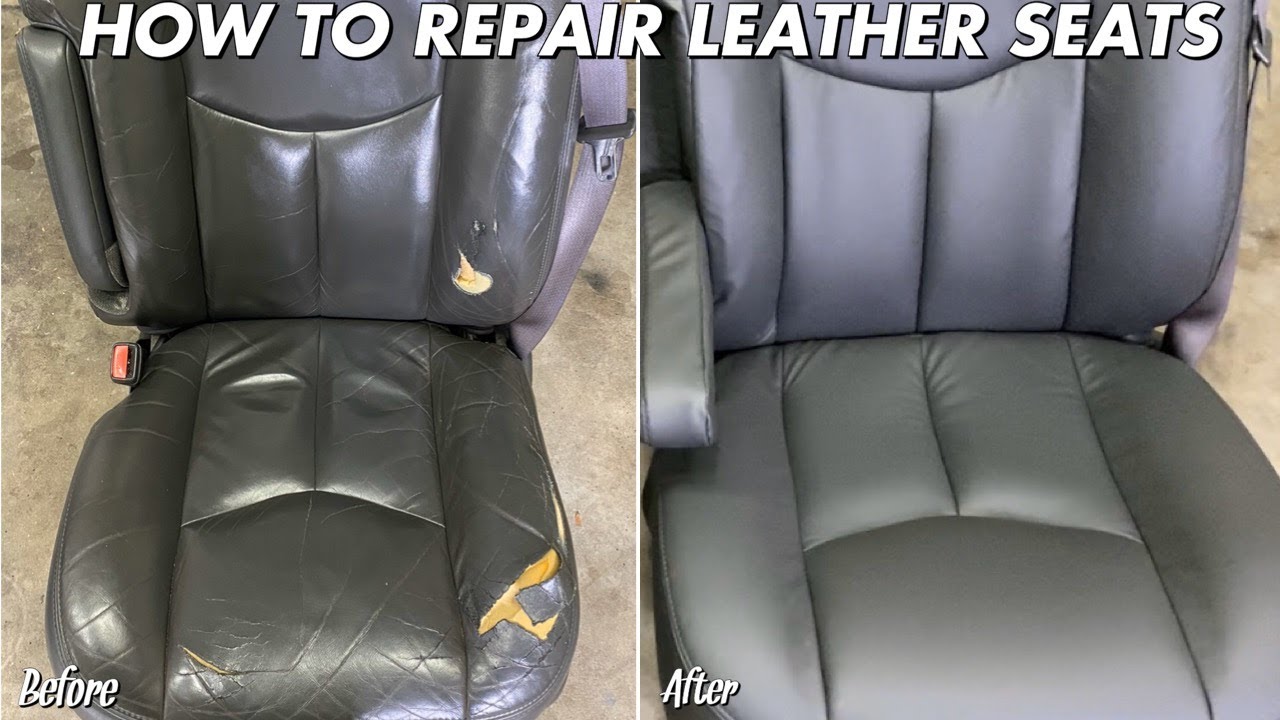
| Small hole | Material is missing | Patch from behind, fill, texture, and recolor |
| Torn seam | Stitching or panel edge has opened | Professional upholstery repair is often best |
| Peeling coating | Top finish is lifting in sheets | Remove loose coating and refinish, or replace the panel |
| Color transfer | Dark or blue marks from clothing | Try a mild cleaner before using dye or colorant |
Do not assume a dark seat is real leather. A simple test can help, but avoid heat, flame, or harsh chemicals. If the surface has a uniform plastic-like grain and feels thin, it may be vinyl. If the seat has perforations, ventilation holes, or a printed grain, take extra care. Filler can block these openings.
A small damaged spot is a good home project. A split that reaches the foam, a torn seam, or widespread peeling usually needs an upholstery shop.

Gather the right tools and materials
You do not need a large tool set, but the materials should be flexible and made for automotive use. A repair that looks good at first may fail if the filler dries hard or the color does not bond to the surface.
Basic supplies
Prepare these items:
- Vacuum with a soft brush attachment
- Microfiber towels
- Mild leather or automotive interior cleaner
- Isopropyl alcohol for careful surface preparation - Fine-grit abrasive pad or sandpaper
- Flexible leather and vinyl repair filler
- Backing fabric for holes and deep tears
- Small scissors
- Tweezers
- Palette knife or plastic spreader
- Leather colorant or automotive leather dye
- Matching topcoat or protective finish
- Nitrile gloves
- Painter’s tape
- Hair dryer set to low, if the product instructions allow it
Choose a repair kit that matches the seat material. A kit for furniture leather may not hold up well on a car seat. Automotive seats flex, warm up in direct sun, and receive repeated friction from people getting in and out.
How much material do you need?
For one small repair, a small kit is usually enough. For a cracked driver’s seat cushion, you may need more filler and colorant than a kit designed for a coin-sized tear.
Buy enough colorant to blend beyond the damaged area. Applying color only to the repair can leave a visible dark or light patch. A larger panel may need color matched across the entire section.
Before starting, read the product label. Check:


- Whether the product works on coated leather, vinyl, or both
- Whether it requires a primer
- How long it must dry between coats
- Whether heat is allowed
- Whether it needs a separate topcoat
- Whether it is safe for perforated or heated seats
Always test the cleaner, filler, and colorant in a hidden area first. The underside of the seat or a concealed edge can show whether the product changes the color or sheen.

How to repair a small scratch or scuff
A shallow scratch or scuff is the easiest leather car seat repair. Start with cleaning, not sanding. Dirt and body oil can make a small mark look worse than it is.
Step 1: Vacuum the seat
Remove loose dust and grit with a soft brush. Pay close attention to seams and perforations. Grit left on the surface can act like sandpaper during cleaning.
Step 2: Clean the damaged area
Apply a small amount of leather cleaner to a microfiber cloth. Do not soak the seat. Wipe the area with light pressure, then remove cleaner residue with a clean, damp cloth.
Let the surface dry fully. A damp surface can prevent colorant from bonding.
Step 3: Smooth only raised edges
If the scratch has a raised flap, trim only the loose material with small scissors. Do not enlarge the damage.
Use a fine abrasive pad to smooth rough edges. Work slowly. The goal is to blend the edge, not remove a large amount of the original coating.
Step 4: Apply colorant in thin coats
Use a small sponge, cotton swab, or artist’s brush. Apply a thin coat of matching color. Several light coats usually look better than one heavy coat.
Allow each coat to dry as directed. Keep the color inside the repair at first. Once the color is close, lightly blend it into the surrounding panel.
Step 5: Add the correct finish
Automotive leather may have a matte, satin, or low-gloss finish. Add a compatible topcoat if the repair product requires one. A glossy patch can stand out even when the color matches.
The repair is successful when the area feels smooth, does not transfer color to a clean cloth, and looks consistent from several angles.

How to repair cracks in leather car seats
Small cracks form when the protective coating loses flexibility. Heat, sunlight, friction, dry air, and neglected surface care can all contribute. Conditioner may improve a dry surface, but it cannot close a deep crack.
For fine surface cracks
- Clean the seat and let it dry.
- Lightly smooth loose edges with a fine abrasive pad.
- Apply a small amount of flexible filler.
- Push the filler into the crack.
- Wipe away excess filler from the surrounding surface.
- Let it cure according to the label.
- Apply additional thin layers if the crack remains visible.
- Recolor the area and add a compatible topcoat.
Do not apply a thick mound of filler. Thick filler can shrink, crack, or create a hard ridge. Thin layers take more time but usually move better with the seat.


For deep cracks
A deep crack may expose the fabric backing or foam below the leather. In this case, filler alone may sink into the opening.
Place a piece of backing fabric below the damaged area. Use tweezers to position it flat. Apply flexible adhesive or filler as directed by the repair system. Then build the surface with thin layers of filler.
Let each layer cure fully. Sand very lightly between layers if the product instructions allow it. Once the surface is level, restore the color and finish.
A repaired crack may remain visible under close inspection. The goal is a flexible, stable repair that blends into the seat, not a surface that looks like new plastic.
How to patch a hole or tear
A small hole needs support underneath. Filling the opening from the top may produce a weak repair that sinks or splits when the seat flexes.
Small hole repair
Use this process when the hole is small and the surrounding material is still strong:
- Clean and dry the area.
- Trim loose fibers without cutting sound material.
- Cut backing fabric slightly larger than the hole.
- Slide the fabric beneath the opening.
- Attach it with the repair adhesive or filler specified by the kit.
- Build the surface with thin layers of flexible filler.
- Recreate the grain with a texture paper or grain pad if supplied.
- Apply matching color in light coats.
- Add a compatible topcoat after the color cures.
The backing fabric should sit flat. A folded or wrinkled patch can create a lump that remains visible.
Small tear repair
For a short tear, bring the edges together without stretching them. Apply backing fabric below the tear, then use flexible filler to level the surface.
Do not pull hard on the torn edges. Stretching can make the tear longer and can distort the seat panel.
If the tear is on a seam, the panel edge is loose, or the opening is more than a few inches long, an upholstery professional may need to remove the seat cover and sew or replace the panel.
Rebuilding the grain
Leather has a surface pattern called grain. A smooth repair on a heavily textured seat can be easy to see.
Some kits include grain papers or texture sheets. Press the texture into the filler while it is still workable, following the product directions. Match the pattern as closely as possible. Do not press hard enough to flatten the surrounding grain.

How to match the color and finish
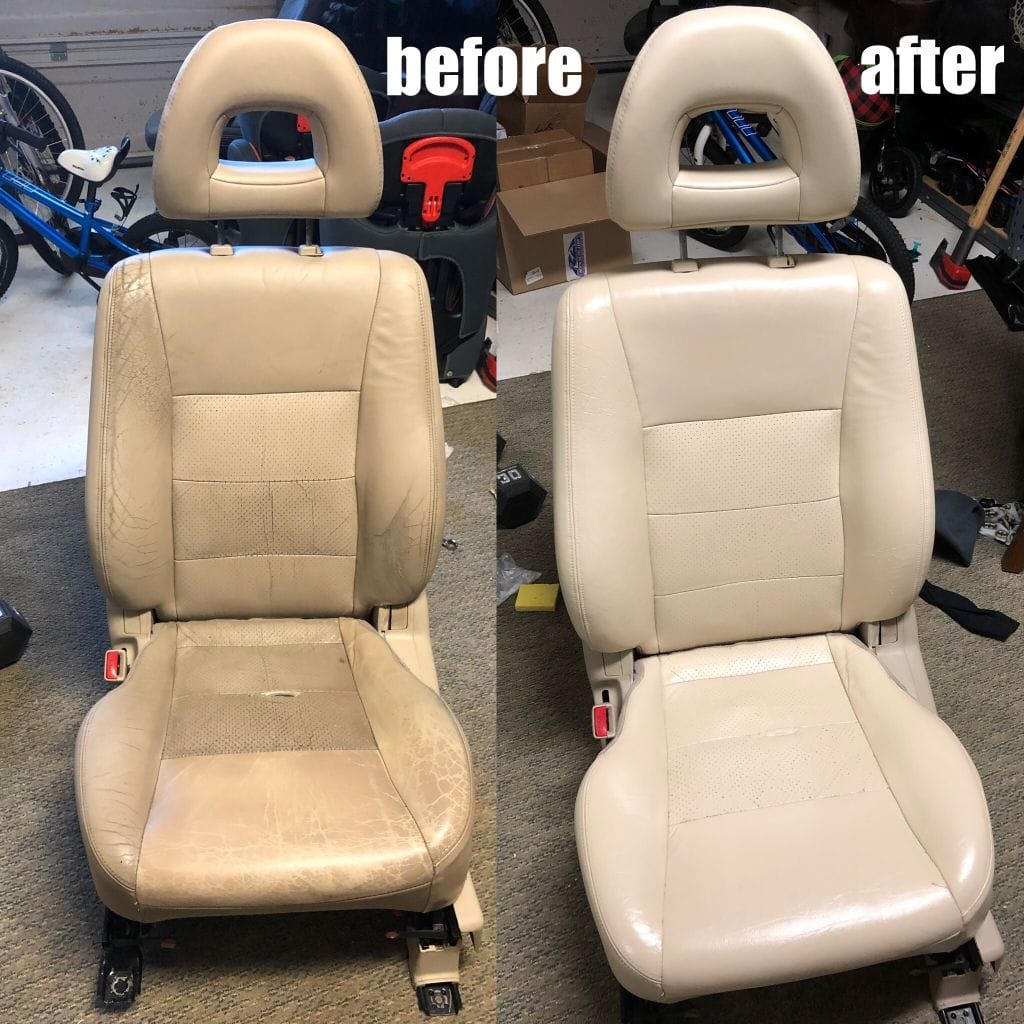
Color matching is often harder than filling the damage. Automotive leather can fade from sunlight, wear lighter on high-contact areas, or have different shades across the same seat.


Use the original seat as the color reference. Do not rely only on a generic label such as “black,” “tan,” or “gray.” Black seats may have blue, brown, or charcoal tones. Beige seats can range from cream to yellow-brown.
Better color-matching practice
- Test the color in a hidden spot.
- Apply a sample and let it dry fully.
- Compare it in daylight and in the vehicle’s interior light.
- Mix only products that the manufacturer says can be mixed.
- Blend color across the whole repair panel when possible.
- Match the sheen as well as the shade.
A repair may look right while wet and change as it dries. Wait until the sample is fully dry before judging it.
Do not apply a strong solvent to remove the old color unless the repair system specifically calls for it. Solvents can soften the original coating or spread the damage.
Special cases: heated seats, ventilated seats, and airbags
Some seat features change the safe repair method.
Heated seats
Heated seats contain wiring and heating elements below the upholstery. Avoid soaking the seat. Do not pierce the cushion with needles, staples, or sharp tools.
If the damage is deep enough to reach the foam or wiring, stop and seek professional help. A surface repair may be safe when done carefully, but opening the seat can damage the heating system.
Ventilated or perforated seats
Do not fill the ventilation holes. Blocked holes can reduce airflow and leave a visible repair spot.
Use a small applicator and keep filler away from the perforations. If the damage crosses many holes, panel replacement may provide a better result.
Side airbags
Many U.S. vehicles place side airbags in the outer seat bolster. The seat cover may have a designed tear seam so the airbag can deploy.
Do not sew, staple, glue shut, or heavily reinforce a seam marked for airbag deployment. If the damage is near the airbag label, seat-side seam, or outer bolster, use a qualified automotive upholstery or collision repair shop.
Never remove or disconnect an airbag system unless you have the correct service information and training. The vehicle owner’s manual may identify airbag locations, but it may not provide repair instructions.

Common mistakes that make leather repairs fail
Many poor repairs fail because the surface was not prepared or the product was applied too thickly.
Using household glue
Super glue and rigid craft glue can become hard and brittle. They may leave a shiny mark and crack when the seat bends.
Use a flexible automotive repair adhesive or filler made for the material.


Skipping the cleaning step
Oil, sunscreen, silicone dressing, and dirt can stop colorant from bonding. A clean surface gives the repair a better chance to hold.
Applying too much heat
Heat can shrink or distort leather and vinyl. It can also damage foam, wiring, or nearby trim.
Use heat only when the product instructions allow it. Keep the setting low and keep the tool moving.
Sanding too far
Aggressive sanding removes the original coating and can enlarge a shallow scratch. Stop as soon as the edge feels smooth.
Applying one thick coat
A thick coat may look smooth at first but can dry unevenly. It may also crack under normal seat movement.
Use thin coats and allow proper drying time.
Conditioning before color repair
Many conditioners leave oils or silicone on the surface. These products can interfere with filler and colorant.
Clean and repair first. Apply a suitable conditioner only after the repair has cured and the product instructions allow it.
Ignoring the cause of the damage
If a sharp object, belt buckle, pet claw, or rough clothing caused the damage, the same source may damage the repaired area again. Remove the cause before using the seat normally.

When should you replace the seat cover or hire a professional?
DIY repair makes sense when the damage is small, accessible, and limited to the surface. Professional repair or panel replacement is usually better when the seat has structural or safety-related damage.
Consider professional help when:
- The tear is on or near a side-airbag seam.
- The seat belt mount or frame is damaged.
- The cover has a large split.
- The foam is torn, crushed, or exposed.
- The seat has extensive peeling.
- The repair crosses perforations or stitching.
- A heated or ventilated seat has deep damage.
- The leather is badly stretched.
- The seat cover must be removed.
- The color must be matched across several panels.
An upholstery shop can replace one panel instead of replacing the entire seat cover. Ask whether the replacement material will match the rest of the interior and whether the shop will preserve airbag seams, heating elements, and ventilation features.
Do not use a cosmetic repair to hide damage that could affect occupant protection. Appearance is secondary to the seat’s safety systems.

How to care for repaired leather car seats
A repaired seat needs gentle care while the filler and topcoat finish curing. Follow the repair product’s cure time before cleaning or conditioning the area.
After curing:
- Wipe spills up soon after they happen.
- Use a clean microfiber cloth.
- Use a mild product made for automotive leather or vinyl.
- Avoid soaking the seat.
- Keep sharp objects off the seating surface.
- Use sun protection when practical.
- Avoid strong household cleaners.
- Do not scrub repaired areas with a stiff brush.
- Inspect the repair after a few weeks of normal use.


Routine cleaning helps remove body oil and grit before they wear the coating. However, more product is not always better. Heavy conditioners can leave a slippery or greasy film and may affect later repairs.

Key takeaways
- Identify whether the seat is coated leather, vinyl, or a combination.
- Clean and dry the area before repairing it.
- Use flexible automotive filler for cracks, holes, and tears.
- Apply thin layers and let each layer cure.
- Match both the color and the surface sheen.
- Keep filler out of perforations.
- Do not sew or glue near a side-airbag seam.
- Choose a professional repair when the damage reaches foam, wiring, seams, or safety equipment.
Frequently asked questions
Can I repair leather car seats without replacing them?
Yes, if the damage is limited to a small scratch, scuff, crack, or hole. A repair may not be suitable for a badly stretched seat, a large split, a torn seam, or damage near an airbag.
Can leather conditioner fix cracked car seats?
Conditioner can improve the feel of a dry surface, but it cannot rebuild missing material or close a deep crack. Use flexible filler and matching colorant for actual damage.
Is it better to repair or replace a leather seat?
Repair is usually more practical for small damage. Replacement or panel repair may be better when the cover has widespread peeling, deep tears, broken stitching, or damage near safety systems.
Can I use a furniture leather repair kit in my car?
You can, but check the product instructions first. Automotive seats flex, heat up, and receive more friction than most furniture. An automotive-rated product is generally the more appropriate choice.
How long does a leather car seat repair last?
The life of a repair depends on the damage, product, preparation, seat movement, sunlight, and daily use. A thin, well-bonded repair can last longer than a thick patch. No cosmetic repair is guaranteed to remain invisible or permanent.
Why is my repair still sticky?
The product may not have cured, the coat may be too thick, or the surface may contain oil or silicone. Stop using the seat, allow more cure time, and check the product instructions. Do not add more topcoat until the surface is dry and stable.
What should I do if the color does not match?
Let the sample dry fully before deciding. If it still differs, remove only loose or unsuitable material as directed by the product maker, then test a new color mix in a hidden area. For a large visible panel, professional color matching may save time and prevent a patchy result.
Sources and product guidance
This guide is based on common automotive upholstery repair practices and manufacturer instructions for leather and vinyl repair systems. Product formulas and cure times differ, so the label for the specific repair kit should control.
Useful reference points include:
- National Highway Traffic Safety Administration: Air Bags
- I-CAR: Collision repair technical resources
- The vehicle owner’s manual, especially sections covering airbags, heated seats, and seat upholstery
- The technical data sheet and safety instructions supplied with the chosen leather or vinyl repair product

Conclusion
Small leather car seat damage is often repairable with careful cleaning, flexible filler, color matching, and patience. Start with the least aggressive method, test every product in a hidden place, and build the repair in thin layers.
If the damage involves a seam, side airbag, heating element, ventilation system, seat belt mount, or exposed foam, stop the cosmetic repair and contact a qualified automotive upholstery professional. The best repair is one that restores the surface without compromising the safety features built into the seat.