

For drivers in the United States, car seats face daily messes from coffee, fast food, pets, road dust, snow, and spilled drinks. The safest way to shampoo car seats is to first identify the seat material, read the vehicle owner’s manual, vacuum loose dirt, use a mild cleaner, and control the amount of water. Then dry the seats fully before driving.
This guide explains how to clean fabric vehicle seats with shampoo or upholstery cleaner. It also covers leather, vinyl, heated seats, seat sensors, stains, odors, and child safety seats.
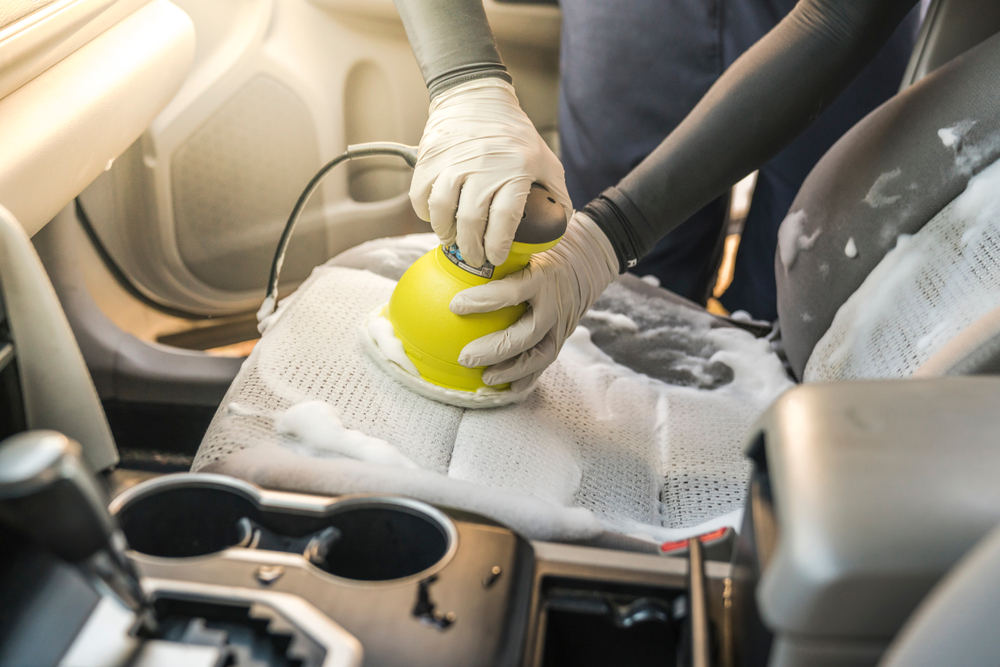
Before You Shampoo Your Car Seats
Check the seat material and the care instructions before using water or cleaner. Vehicle seats may use cloth, nylon, polyester, leather, vinyl, or synthetic leather. These materials do not all react to cleaners in the same way.
Your owner’s manual is the best source for model-specific advice. It may list approved cleaners, warn against certain chemicals, or explain where airbags, seat sensors, and heating elements are located.


What you need
Gather these items before you begin:
- A vacuum with a narrow crevice tool
- Two or three clean microfiber towels
- A soft interior brush
- A bowl or spray bottle
- Mild upholstery cleaner or a product approved for automotive fabric
- Warm water
- A soft toothbrush for seams
- A fan, if available
- A plastic bag for holding dirty towels
Use a dedicated automotive upholstery cleaner when possible. A small amount of mild soap may work for some cloth seats, but strong laundry detergent, bleach, ammonia, and harsh degreasers can leave residue or damage the fabric.
Read the seat material first
Use this basic guide:
| Seat material | Suitable method | Main caution |
|---|---|---|
| Cloth or fabric | Low-moisture upholstery shampoo | Do not soak the cushion |
| Leather | Leather cleaner and conditioner | Do not use fabric shampoo |
| Vinyl | Damp cloth and mild cleaner | Avoid abrasive scrubbing |
| Synthetic leather | Product approved for that material | Test a hidden area |
| Child safety seat | Follow the seat maker’s manual | Do not use the vehicle-seat method |
If the seat has visible wiring, a control panel, an airbag label, or electronic controls, keep liquid away from those areas.
Safety check
Park outdoors or in a well-ventilated garage. Turn the vehicle off and remove the keys. Do not smoke or use an open flame near cleaning products.
Never spray cleaner directly into seat belt buckles, power-seat switches, vents, speakers, or electrical connectors. If a seat has a tear, exposed wire, a warning light, or a strong chemical smell, stop and arrange a professional inspection.
How to Shampoo Fabric Car Seats
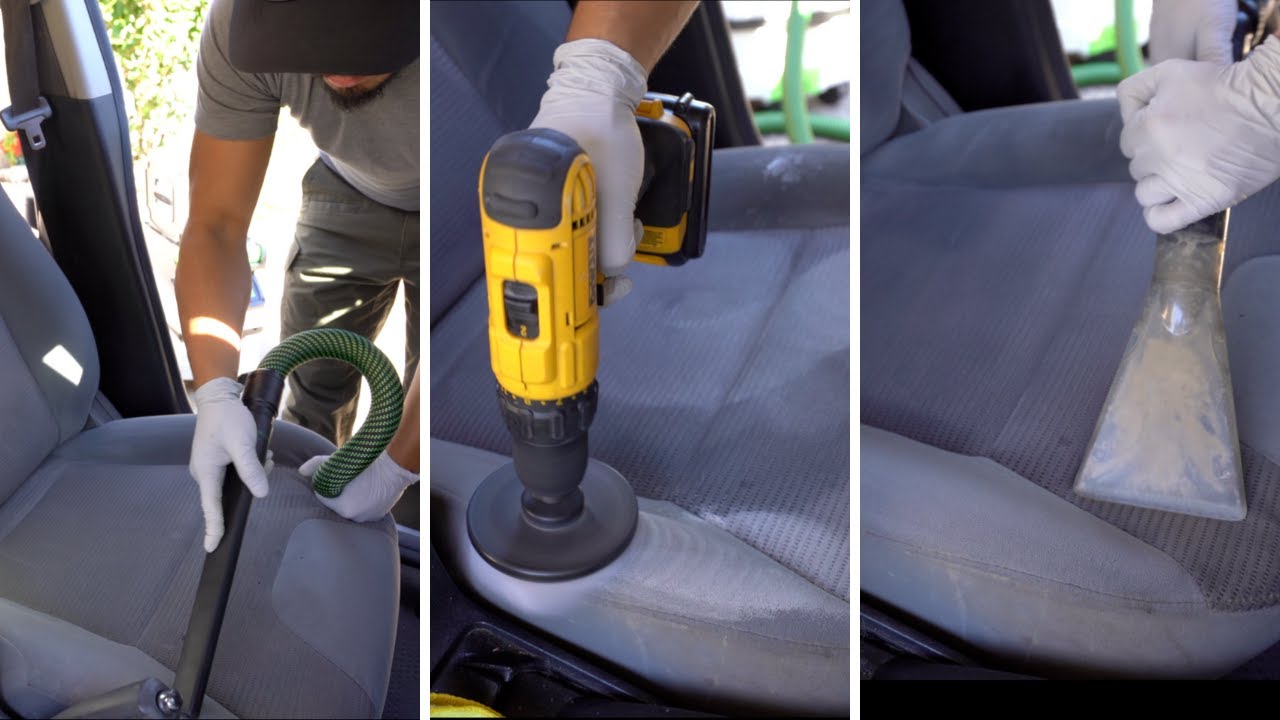
The best method is to use a small amount of cleaner, work in sections, and remove as much moisture as you add. Flooding the seat can push dirt deeper into the foam and may create a long-lasting damp smell.
1. Remove loose items
Take out floor mats, seat covers, toys, papers, and other items. Move the front seats forward and backward so you can reach the gaps.
If the seats are badly stained, take photos first. This can help you track progress and avoid scrubbing too hard.
2. Vacuum the seats well
Vacuum the seat surface, seams, folds, and gaps. Use the crevice tool around the seat belt buckle and between the backrest and cushion.


Do not skip this step. When dry dirt mixes with liquid, it can turn into mud. That makes stains harder to remove and can spread grit across the fabric.
For pet hair, use a rubber brush or a slightly damp rubber glove. Gather the hair into small piles, then vacuum it.
3. Test the cleaner
Choose a hidden spot, such as the lower side of the seat or an area under the cushion edge. Apply a small amount of cleaner and wait until it dries.
Check for:
- Color transfer
- Fading
- Bleeding
- Stiffness
- A ring or water mark
- A change in texture
If the test area changes, do not use that product on the rest of the seat. A care label or owner’s manual may require a different cleaner.
4. Prepare a mild cleaning mix
Follow the product label if you use an automotive upholstery cleaner. Do not make the mixture stronger than directed.
For a simple test solution, mix a small amount of mild soap with warm water. The solution should feel lightly soapy, not thick or foamy. Excess soap is hard to remove and may leave a sticky surface that attracts more dirt.
5. Work on one small section
Divide the seat into sections of about one square foot. Lightly apply the cleaner to the brush or towel rather than soaking the seat.
Gently brush in one direction, then use small crosswise strokes on stubborn areas. Avoid aggressive scrubbing. Hard scrubbing can roughen the fabric, spread a stain, or damage the cushion surface.
Clean the front, back, and sides of the seat only when the material and seat design allow it. Keep liquid away from controls and seams that contain electrical parts.
6. Lift the dirty solution
Use a clean, damp microfiber towel to pick up the loosened dirt. Rinse the towel often in clean water and wring it out well.
If you have a wet-dry vacuum with an upholstery tool, use it to extract moisture. Move slowly, but do not press hard enough to force water deep into the cushion.
A carpet extractor can help with cloth seats, but use low moisture and the correct upholstery attachment. Avoid saturating seats with built-in heating elements, pressure sensors, or side airbags.
7. Repeat only when needed
Let the area partly dry before deciding whether it needs another pass. A wet seat can look cleaner than it really is, and repeated cleaning adds more moisture.
For a fresh spill, one or two light passes may be enough. Old grease, ink, dye, or milk stains may need a professional cleaner. Some stains cannot be removed without changing the fabric color.


8. Dry the seats fully
Leave doors or windows open in a safe, dry place. Use a fan to move air across the seats.
Do not use a high-heat hair dryer close to the fabric. Heat can damage some synthetic materials and may drive a stain deeper. Do not return the vehicle to normal use until the seats feel dry and no damp odor remains.
Drying time depends on the amount of water, humidity, airflow, and seat foam. A lightly damp surface may dry quickly. A saturated cushion can stay wet much longer.

How to Clean Leather, Vinyl, and Synthetic Leather Seats
Do not shampoo leather seats in the same way as cloth seats. Leather has a surface finish that can become dull, sticky, or cracked when exposed to excess water or harsh soap.
Leather seats
Start by vacuuming with a soft brush attachment. Wipe the seat with a cleaner made for finished automotive leather. Apply the product to a microfiber towel, not directly to the seat.
Clean a small area at a time. Then wipe away residue with a second cloth. Use conditioner only if the leather maker or vehicle manual allows it. Too much conditioner can leave a slippery film.
Keep cleaner away from perforations. Liquid can enter the holes and reach the cushion beneath.
Vinyl seats
Vinyl usually needs only a damp microfiber towel and a mild cleaner approved for automotive vinyl. Wipe gently, then dry the surface.
Avoid abrasive pads and strong solvent cleaners. They can remove the surface finish and make the material look faded.
Synthetic leather seats
Synthetic leather may be called leatherette, faux leather, vinyl, or another brand name. The correct cleaner depends on the coating.
Treat it as a separate material rather than assuming leather products are safe. Test the cleaner first, and follow the vehicle manufacturer’s care instructions.

How to Remove Common Car Seat Stains
Treat the stain based on its source. Always blot first. Rubbing can spread liquid into a larger area.
| Stain | First step | What to avoid |
|---|---|---|
| Coffee or soda | Blot with a clean towel, then use mild upholstery cleaner | Hot water and heavy soaking |
| Grease or fast-food oil | Lift surface oil with a clean towel, then use an approved fabric cleaner | Scrubbing dry grit into the fabric |
| Pet urine | Blot, then use an enzyme product labeled for automotive upholstery | Mixing several chemicals |
| Vomit | Remove solids safely, blot moisture, then clean and ventilate | Bleach or unapproved disinfectants |
| Ink | Blot carefully and seek product-specific guidance | Rubbing alcohol without a spot test |
| Road salt | Use a lightly damp cloth, then blot dry | Leaving a wet ring around the stain |
| Milk | Clean promptly and dry fully | Masking the smell with fragrance |
Enzyme cleaners may help with organic odors, but they are not safe for every seat material. Check the label and test the product first.
Do not mix cleaners. In particular, never combine bleach with ammonia or other cleaning products. Chemical mixtures can create dangerous fumes.
If a stain reaches the foam, surface cleaning may not remove the odor. A professional detailer may need to extract the seat with controlled moisture.


Special Care for Heated Seats, Airbags, and Seat Sensors
Modern car seats may contain more than foam and fabric. They can include heating elements, ventilation parts, occupancy sensors, side airbags, wiring, and power controls.
Use less liquid when cleaning these seats. Do not press hard into seams that may contain an airbag. Never remove seat covers or disconnect wiring unless the vehicle service instructions specifically allow it.
If the airbag warning light turns on after cleaning, do not ignore it. Stop using methods that involve more moisture and have the vehicle checked by a qualified repair professional.
The same caution applies to an occupancy sensor warning. Cleaning cannot safely repair a damaged sensor or wiring harness.
Do not shampoo a child safety seat this way
A child safety seat is not the same as a vehicle seat. Do not use this guide to clean a car seat made for a child.
Follow the child-seat manufacturer’s manual. Many child safety seats allow only mild soap and water on the cover. The harness straps and buckle often have separate cleaning rules. Do not use bleach, harsh chemicals, or solvents unless the manufacturer expressly permits them.
The National Highway Traffic Safety Administration provides general child passenger safety information, but the seat maker’s instructions control the cleaning method for that specific model.

Common Mistakes When Shampooing Car Seats
Avoiding a few errors can save the fabric and shorten drying time.
Using too much water
More water does not always mean a cleaner seat. It can push dirt into the foam, create water rings, and increase the chance of odor or mildew.
Use controlled moisture and extract or blot it after each small section.
Skipping the spot test
A cleaner that works on one fabric may bleach or stiffen another. Always test an unseen area first.
Using household carpet cleaner without checking
Some carpet products contain strong detergents, solvents, fragrances, or brighteners. A product made for household carpet is not automatically safe for vehicle upholstery.
Scrubbing too hard
Aggressive brushing can damage fibers and spread stains. Let the cleaner loosen the dirt, then lift it with a towel or extractor.
Closing the car while the seats are damp
A closed cabin traps humidity. That can leave the vehicle smelling sour and make the seats take much longer to dry.
Masking odors with fragrance
Air freshener may hide an odor for a short time. It does not remove the source. Clean the spill, dry the seat, and inspect the surrounding carpet and floor area.


Ignoring a large spill
If a drink reaches the seat controls, wiring, floor electronics, or airbag area, stop cleaning and seek professional help. Water damage may not be visible right away.

When to Use a Professional Detailer
A professional detailer may be the better choice when:
- The seat foam is saturated
- A strong odor remains after drying
- Mold-like growth is visible
- The stain is old, large, or oily
- The seat contains complex electronics
- You cannot ventilate the vehicle well
- The upholstery is expensive, delicate, or badly damaged
Ask the detailer what method will be used. A useful answer should explain how they will protect electronics, control moisture, extract dirty water, and dry the vehicle.
Professional cleaning cannot always restore a bleached, burned, torn, or permanently dyed seat. In those cases, repair or upholstery replacement may be more suitable.

Key Takeaways
- Identify the material before cleaning.
- Read the vehicle owner’s manual.
- Vacuum first.
- Test every cleaner in a hidden area.
- Use mild cleaner and limited moisture.
- Work in small sections.
- Blot or extract dirty water.
- Dry the seats fully before normal use.
- Keep liquid away from electronics, buckles, controls, and airbag seams.
- Use the child safety seat manual for a child seat.
FAQs About Shampooing Car Seats
Can I use dish soap to clean car seats?
You can use a very small amount of mild dish soap on some fabric seats, but it is not the first choice. Dish soap can leave residue and may be too strong for certain materials. Test a weak solution in a hidden area and rinse the towel well as you clean.
Can I use a carpet cleaner on car seats?
You can use a carpet or upholstery extractor only if the product and machine are suitable for automotive fabric. Use low moisture, avoid sensitive electronic areas, and remove as much water as possible.
How often should I shampoo car seats?
Clean seats when they are visibly dirty, stained, or developing an odor. Light vacuuming every few weeks can reduce the need for deep cleaning. Families with pets or young children may need more frequent spot cleaning.
Why do my car seats smell after cleaning?
The seats may still contain moisture, soap residue, or the original spill. Improve airflow, extract remaining water, and inspect nearby carpet and floor mats. If the smell remains, a professional may need to treat the foam.
Can I steam-clean car seats?
Steam can damage some fabrics, adhesives, coatings, and electronic parts. Use it only when the vehicle and equipment instructions permit it. Low-moisture cleaning is often easier to control.
How do I prevent water rings?
Clean the whole cushion or a clearly defined section rather than making one small wet spot. Use limited moisture, remove residue evenly, and dry the seat with good airflow.
Conclusion
The safest way to shampoo car seats is to clean gently and use less water than you think you need. Vacuum first, test the product, work in small areas, remove dirty moisture, and let the seat dry completely.
For cloth seats, mild automotive upholstery cleaner is usually the right starting point. For leather, vinyl, heated seats, electronic seats, and child safety seats, follow the material-specific instructions instead of using a general shampoo method.