How To Press Out Ball Joints: Easy Repair Guide
Pressing out a ball joint usually requires a ball-joint press, the correct adapters, and a stable way to hold the steering knuckle or control arm. Remove the retaining ring, nuts, bolts, or rivets first. Then apply slow, even pressure with the press until the joint leaves its bore.
The exact method depends on the vehicle. Many American cars and trucks use press-in ball joints, but some use bolt-in joints, riveted joints, or control arms with a factory-installed ball joint. Always check the service manual for your specific year, make, and model before taking apart the suspension.
This guide focuses on common U.S.-market vehicles and covers the tools, setup, removal steps, safety limits, and troubleshooting points that matter most.

What a Press-In Ball Joint Is
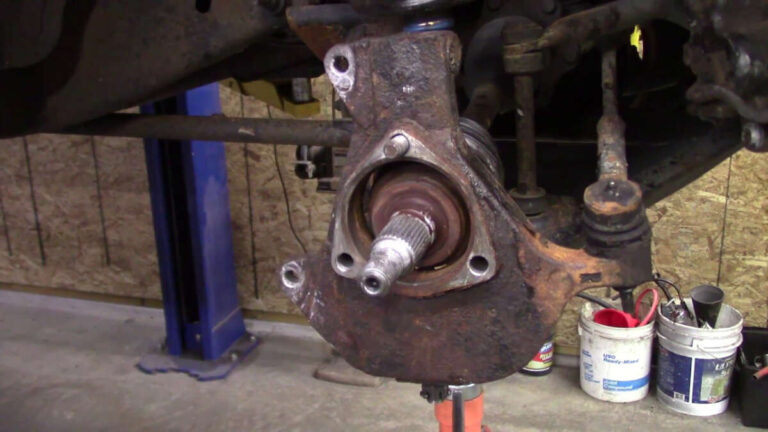
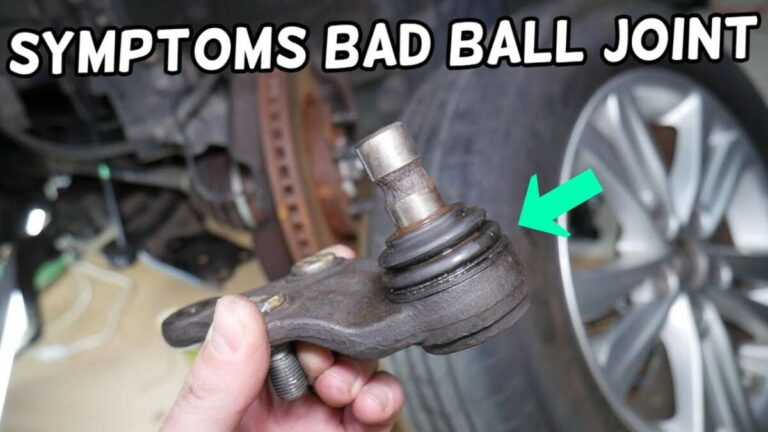
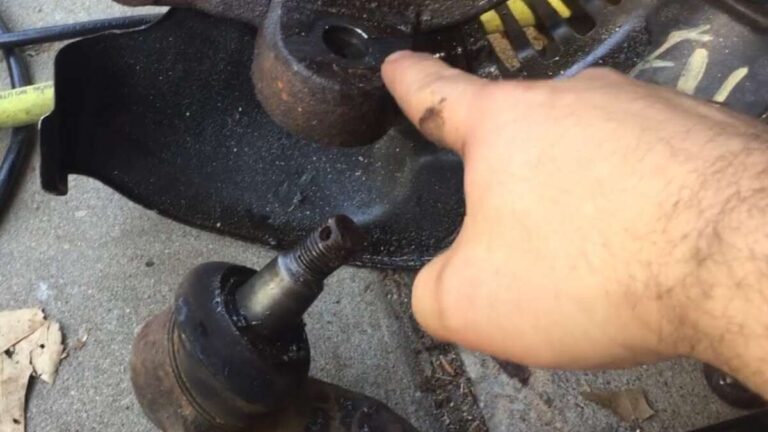
A press-in ball joint fits tightly inside a machined hole in the steering knuckle or control arm. The joint has a metal housing, a tapered stud, and a socket that lets the steering and suspension move together.
The housing is held in place by a tight interference fit. Some designs also use a snap ring, circlip, or retaining ring. The press must push on the joint housing, not the threaded stud.
Do not confuse a press-in joint with these other designs:
| Ball-joint design | How it is held | Usual removal method |
|---|---|---|
| Press-in | Tight fit in a bore, often with a snap ring | Ball-joint press |
| Bolt-in | Bolts and nuts | Remove bolts |
| Riveted | Factory rivets | Drill or grind rivet heads, then drive out |
| Integrated control arm | Joint built into the arm | Replace the complete arm |
| Threaded | Screws into a knuckle or control arm | Vehicle-specific socket or tool |
A press cannot remove a joint that is threaded into place. It also cannot safely replace a ball joint that the manufacturer designed as part of the entire control arm.

Tools and Parts You Need
Gather the correct tools before lifting the vehicle. A poorly supported vehicle or a badly aligned press can cause more harm than a worn ball joint.
Basic tools
You will usually need:
- A vehicle-specific repair manual
- Floor jack and properly rated jack stands
- Wheel chocks
- Lug wrench or impact wrench
- Ratchet and socket set
- Breaker bar
- Torque wrench
- Ball-joint press or heavy-duty C-frame press
- Press adapters or receiver cups
- Snap-ring pliers
- Pry bar
- Wire brush
- Penetrating oil
- Safety glasses
- Mechanic’s gloves
- Paint marker
- New cotter pins and single-use fasteners, when required
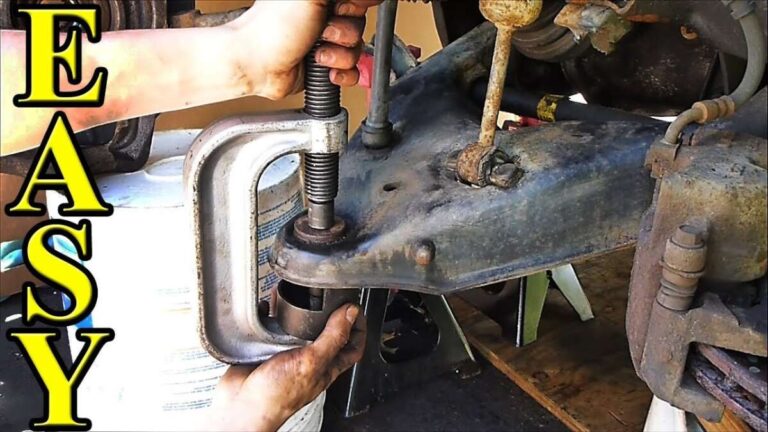
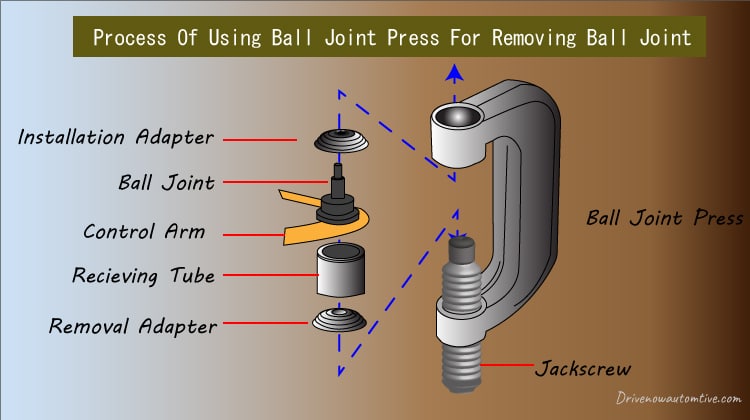
A ball-joint press kit often resembles a large C-clamp with several cups and adapters. The receiver cup must be large enough for the joint to enter. The forcing adapter must contact the joint housing squarely.
Check the replacement joint
Before removing the old part, compare the new ball joint with it. Check:
- Housing diameter
- Housing length
- Stud taper
- Stud direction
- Grease fitting location
- Snap-ring groove
- Dust boot shape
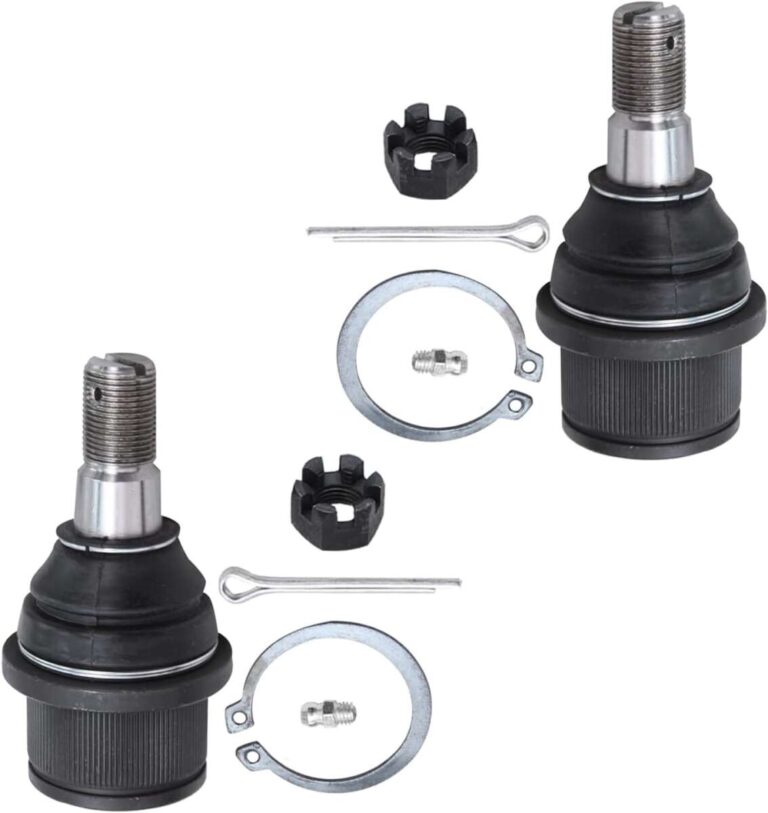
- Included nut, cotter pin, and ring
A joint can look similar but still have the wrong taper or height. Do not force an incorrect part into the bore.
Confirm the vehicle is safe to lift
park on a firm, level surface. Set the parking brake and block the wheels that remain on the ground. Support the vehicle by the manufacturer’s approved lift points.
Never rely on a floor jack alone. A jack can lower, tip, or lose pressure while you work.
Before You Press: Inspect the Suspension Design
Identify the ball-joint design before removing parts. Look at how the joint is attached to the control arm or steering knuckle.
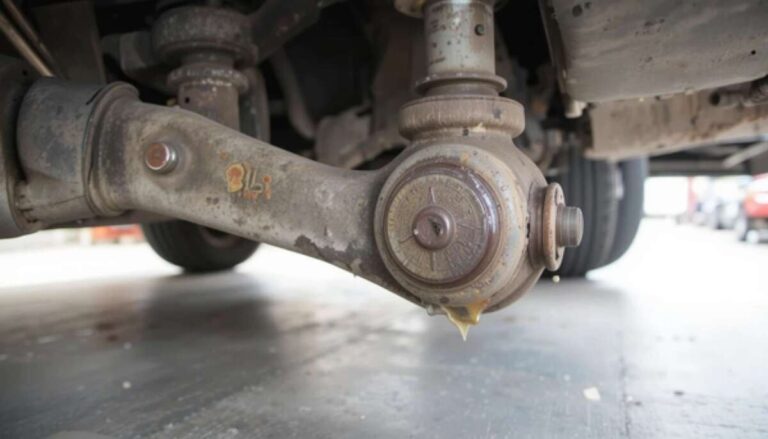
A press-in joint often has a visible shoulder and a snap ring. A bolt-in joint usually has three or four bolts around its flange. A riveted joint has large factory rivets through the control arm.
Also check whether the coil spring is mounted near the joint. On many vehicles, the spring pushes against the control arm even when the wheel is off the ground. That stored force can move the arm suddenly if you remove a joint or fastener.
Mark the original position
Use a paint marker to mark:
- The direction of the grease fitting
- The position of the ball-joint housing
- Any eccentric washers or alignment cams
- The control-arm location
- The direction of the joint stud
These marks do not replace an alignment. They simply help you understand how the parts were positioned.
Support the control arm when needed
If the coil spring loads the control arm, place a floor jack under the arm before disconnecting the ball joint. Raise the jack only enough to support the arm.
Do not place your body under a control arm that is held only by a jack. Use approved stands and follow the service manual’s spring-removal procedure if the spring must come out.
Remove the brake and steering components carefully
Depending on the vehicle, you may need to remove or move:
- Brake caliper
- Brake rotor
- ABS wire brackets
- Tie-rod end
- Sway-bar link
- Axle shaft
- Upper or lower ball-joint nut
- Steering knuckle
Hang the brake caliper with wire or a proper hanger. Do not let it hang by the flexible brake hose.
If you disconnect an ABS sensor or wire, keep it away from the press and protect it from twisting or crushing.

How to Press Out a Ball Joint
The following method applies to a common press-in ball joint after the control arm or knuckle is accessible. Your repair manual may require a different order.
1. Remove the wheel and expose the joint
Chock the wheels, loosen the lug nuts, raise the vehicle, and place it on jack stands. Remove the wheel.
Clean dirt from the ball-joint area so you can see the snap ring, housing edge, and surrounding metal. Dirt can hide cracks or prevent the press cup from sitting flat.
2. Separate the tapered stud
Remove the cotter pin and loosen the ball-joint nut. Leave the nut threaded on a few turns if the joint is still under load.
Use a ball-joint separator or suitable puller to release the tapered stud. Avoid striking the threaded stud with a hammer. A damaged thread may prevent the new nut from seating correctly.
If the joint is being replaced, some technicians use a hammer on the side of the knuckle to loosen the taper. This must be done with care and with the manufacturer’s procedure in mind. Do not hit the stud itself.
3. Remove the retaining ring
If the ball joint has a snap ring or circlip, remove it before pressing.
Clean the groove first. Rust and packed dirt can make the ring hard to see. Use snap-ring pliers and wear eye protection because a ring under tension can fly out.
Never try to press through a retaining ring. The force can damage the press, control arm, or receiver cup.
4. Choose the correct press cups
Set the receiving cup on the side where the joint will exit. The cup must be wide and deep enough to accept the old joint.
Place the forcing adapter on the opposite side. It should contact the outer housing or shoulder of the ball joint.
The press must push in a straight line:
Forcing screw
     ↓
[forcing adapter]
     ↓
[ball-joint housing]
     ↓
[control arm or knuckle]
     ↓
[receiver cup]
Do not place the forcing adapter on the ball-joint stud. Do not allow the press screw to push against a thin dust boot, grease fitting, or unsupported edge.
5. Tighten the press slowly
Apply pressure with a hand ratchet or breaker bar. Keep your face and hands away from the cups and press screw.
Pause after each small turn. Check that:
- The cups remain centered
- The control arm is stable
- The press screw stays straight
- The joint is moving out of the bore
- No part is bending or cracking
A loud snap can occur when corrosion breaks free. This does not always mean something failed, but stop and inspect the setup before applying more force.
6. Remove the old joint
Continue pressing until the ball-joint housing clears the bore. Do not keep tightening after the joint has bottomed inside the receiver cup.
Remove the joint and inspect the bore. Look for:
- Elongation
- Cracks
- Deep rust
- Metal pulled from the bore
- A raised or distorted edge
- Damage from a previous repair
The bore must hold the new joint tightly. If the control arm or knuckle is damaged, pressing in a new joint may not be safe.

How to Press in the New Ball Joint
Installing the replacement joint requires the same care as removal. The new joint must enter straight and stop at the correct position.
1. Clean the bore
Use a wire brush and approved cleaner to remove rust and debris. Do not remove sound metal from the bore.
Compare the new joint’s diameter with the old part and the service information. A light coating of lubricant may be allowed by the manufacturer, but do not grease the joint housing unless the instructions permit it.
2. Align the joint correctly
Some ball joints have a notch, flat, shoulder, or grease-fitting position that must face a certain direction. Use your paint mark and the repair manual.
If the new joint has a directional feature, align it before pressing. Do not rotate the joint after it becomes tight in the bore.
3. Press on the correct surface
The press adapter should contact the joint housing or installation shoulder. The receiver cup should support the opposite side of the control arm or knuckle.
Never press on:
- The tapered stud
- The dust boot
- The grease fitting
- The plastic or rubber socket area
- A thin unsupported flange
Tighten the press slowly and keep checking alignment. The joint should enter without tilting.
4. Seat the joint fully
Press until the joint reaches the stop or the position specified by the service manual. Install the snap ring if the design uses one.
The ring should sit completely in its groove. If it will not fit, the joint may not be fully seated, the ring may be damaged, or the replacement part may be incorrect.
Install the new dust boot, grease fitting, nut, cotter pin, or other supplied parts as directed. Use a new cotter pin whenever the fastener design calls for one.
5. Reassemble and torque the suspension
Reconnect the steering knuckle, control arm, tie-rod end, sway-bar link, brake hardware, ABS brackets, and wheel.
Torque each fastener to the vehicle’s specified value. Do not use a generic torque number. Values vary by vehicle, joint design, fastener size, and whether the joint is tightened at normal ride height.
If a rubber-bushed control arm was loosened, the final torque may need to be applied at normal ride height. This prevents twisting the bushing beyond its intended range.

Signs the Ball Joint Was Pressed Out Correctly
A successful removal and installation has several clear signs:
- The old joint exited without bending the control arm
- The new joint entered straight
- The housing is fully seated
- The snap ring is fully installed
- The dust boot is not pinched or torn
- The grease fitting is accessible
- The stud moves smoothly through its working range
- No cracks or distortion are visible
- All fasteners are torqued to the vehicle specification
- The wheel turns freely without brake or ABS interference
After assembly, pump the brake pedal until it feels firm if the hydraulic system was disturbed. Grease the joint only if the replacement joint requires it and use the specified grease.
Perform a careful road test at low speed. Listen for clunks, grinding, or rubbing. Check the wheel and suspension again after the test.
A wheel alignment is often needed after ball-joint or control-arm work. Even when the original marks are restored, suspension geometry may have changed.
What to Do If the Ball Joint Will Not Press Out
A stuck joint usually needs a better setup, not more force. Stop if the press begins to bend or shift.
| Symptom | Likely cause | Safer next step |
|---|---|---|
| Press slips sideways | Cups are not centered | Reset the cups and support the control arm |
| Joint does not move | Retaining ring remains installed | Clean the groove and remove the ring |
| Joint moves partway, then stops | Rust, burr, or damaged bore | Inspect the bore and apply approved penetrant |
| Control arm bends | Adapter is pushing on a weak area | Use the correct receiver and forcing cups |
| Press screw binds | Press is off-center | Release pressure and realign it |
| Joint turns but does not exit | Wrong cup or damaged housing | Verify the exit path and adapter size |
| New joint will not start | Bore or part is incorrect | Stop and compare dimensions and orientation |
Do not heat a control arm near a rubber bushing, grease, brake hose, ABS sensor, or fuel component unless the manufacturer specifically permits that method. Heat can damage nearby parts and alter the properties of suspension components.
Do not weld a homemade adapter to the suspension unless you have the engineering knowledge and equipment to ensure it will not fail. A commercial press kit rated for the task is usually the safer choice.
If the joint requires extreme force, the bore may be rusted, distorted, or damaged from a previous repair. At that point, remove the assembly and take it to a qualified repair shop or replace the affected control arm or knuckle.

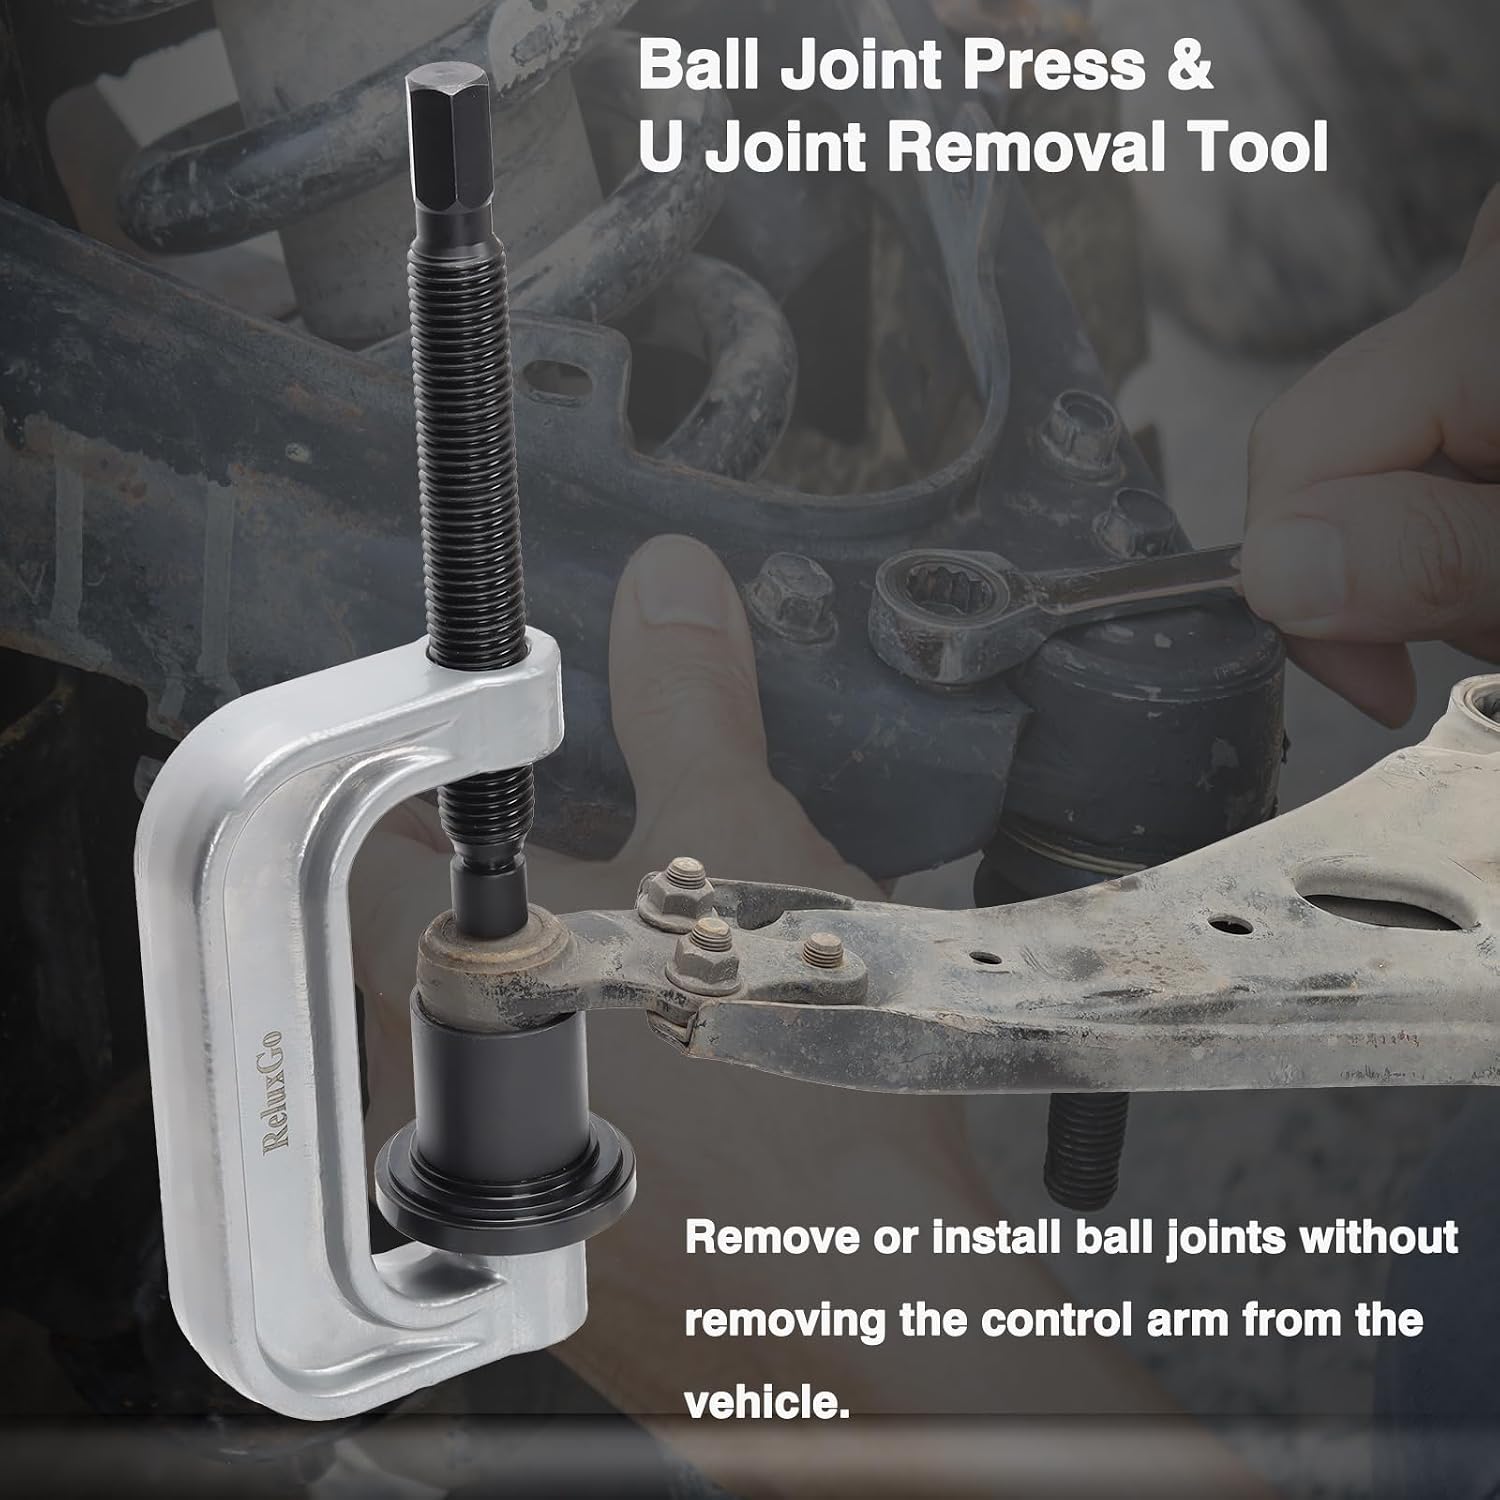
Pressing Out a Ball Joint Without Removing the Control Arm
Some vehicles allow the joint to be pressed out while the control arm remains installed. Others do not.
The deciding factors include:
- Available clearance around the arm
- The direction the joint must travel
- Access for the receiver cup
- Spring load on the arm
- Whether the steering knuckle blocks the press
- Whether the press can stay square
If the press cannot sit straight, remove the control arm or steering knuckle. A press that is tilted can slip or damage the bore.
Never remove a loaded ball-joint fastener without controlling the spring and control-arm movement. Coil springs store substantial energy. Follow the vehicle service manual’s procedure for spring compression or arm support.

Can You Press Out a Ball Joint With a Hammer?
A hammer may work on some separated or riveted components, but it is not the preferred method for a tight press-fit ball joint.
Repeated hammer blows can:
- Mushroom the stud
- Damage the control arm
- Distort the ball-joint bore
- Shock nearby bearings and sensors
- Send metal fragments into the air
- Move the vehicle or suspension unexpectedly
A ball-joint press applies controlled force along the correct axis. If a press is unavailable, the safer option is usually to remove the assembly and have a shop perform the work.
Do not strike the threaded stud directly. If a manufacturer-approved procedure allows impact on the joint housing or knuckle, use eye protection and keep all body parts clear of the impact path.

Common Mistakes to Avoid
The most costly mistakes come from using the wrong part, skipping a retaining device, or applying force in the wrong place.
Pressing against the stud
The stud is not the press surface. Pressing on it can bend the stud or damage the new joint.
Leaving the snap ring installed
A snap ring can look like part of the joint housing when covered with rust. Clean the area and confirm that it is removed.
Using the wrong receiver cup
A cup that is too small can crush the joint or control arm. A cup that is too large may not support the arm properly.
Ignoring spring energy
A control arm can move rapidly when the joint separates. Support the arm and follow the factory procedure.
Reusing one-time fasteners
Some manufacturers specify new ball-joint nuts, axle nuts, tie-rod nuts, or control-arm bolts. Replace them when required.
Skipping the alignment
A ball-joint replacement can change camber, caster, or toe. A post-repair alignment protects the tires and helps keep the vehicle tracking correctly.
Assuming all joints need grease
Some replacement joints are pre-lubricated and sealed. Others have a grease fitting. Follow the part maker’s instructions.

When to Use a Repair Shop
Professional help is the right choice when:
- The spring cannot be safely controlled
- The press will not fit or remain square
- The control arm or knuckle is cracked
- The bore is badly rusted or enlarged
- The joint is part of a non-serviceable control arm
- You do not have a rated press
- You cannot verify the torque specifications
- The vehicle has complex electronic suspension or alignment requirements
A shop can also press the joint with a hydraulic shop press after removing the assembly. That does not eliminate the need for correct adapters and alignment, but it may provide better stability for severely seized parts.

Frequently Asked Questions
How much force does it take to press out a ball joint?
The force varies widely with the vehicle, joint size, corrosion, and bore condition. There is no safe universal force number. Use a press rated for automotive suspension work and stop if the arm, cup, or screw begins to bend.
Should I replace the upper and lower ball joints together?
Replace both when inspection shows wear, when the manufacturer recommends paired service, or when labor access makes separate repairs impractical. A good lower joint does not need replacement solely because the upper joint failed.
How do I know if the ball joint needs replacement?
Common signs include looseness, clunking, uneven tire wear, wandering, or movement found during a proper suspension inspection. These symptoms can also come from tie-rod ends, control-arm bushings, wheel bearings, or struts. Confirm the source before buying parts.
Can I reuse the old snap ring?
Use the old ring only if the manufacturer or replacement-joint instructions allow it and the ring is undamaged. A bent, rusty, stretched, or weak ring should be replaced.
Do I need an alignment after replacing a ball joint?
Often, yes. The need depends on the vehicle and the parts removed, but an alignment check is a sensible final step after suspension work. It can identify toe or camber changes before they wear the tires.
Final Takeaway
To press out a ball joint, first identify whether it is truly a press-in design. Remove the retaining hardware, support any spring-loaded suspension parts, use the correct receiver and forcing cups, and apply pressure in a straight line.
The new joint must be fully seated, correctly oriented, and secured with its retaining ring or specified hardware. Finish with the correct torque settings, a safety check, and an alignment check when needed.
If the press slips, the joint refuses to move, or the control arm starts to bend, stop. A damaged suspension bore can make the vehicle unsafe, and a qualified shop is the better next step.