How To Rotate Tires At Home: Easy DIY Guide
Introduction
Rotating your tires at home can help promote even tread wear and extend the useful life of your tire set. For most cars, SUVs, and light trucks in the United States, tire rotation is often needed about every 5,000 to 8,000 miles, or as listed in the owner’s manual.
The job is simple in principle: move each tire to a different wheel position according to the correct rotation pattern. The safety work matters most. You must lift the vehicle on a firm, level surface, support it with jack stands, and tighten the lug nuts to the vehicle maker’s torque setting.
This guide explains how to rotate tires at home, which pattern to use, what tools you need, and when you should leave the job to a tire shop.
What You Need to Rotate Tires at Home
You need the right tools before lifting the vehicle. A factory scissor jack may lift the car, but it is not a safe replacement for jack stands during a tire rotation.
Gather these items:
- Floor jack rated for your vehicle’s weight
- Four jack stands, or a safe lifting plan that lets you work on one axle at a time
- Lug wrench or impact wrench for removal only
- Torque wrench
- Correct socket for the lug nuts
- Wheel chocks
- Work gloves
- Safety glasses
- Tire pressure gauge
- Vehicle owner’s manual
- Chalk or masking tape for marking tire positions
A small brush can help clean dirt from the wheel and hub. A wire brush may be useful for light rust on the hub face, but do not remove large amounts of metal or alter the wheel mounting surface.
Why a torque wrench matters
The torque wrench lets you tighten lug nuts to the vehicle manufacturer’s specification. Under-tightened lug nuts can loosen. Over-tightened lug nuts can damage wheel studs, rotors, or the wheel.
The correct value is not universal. It may vary by vehicle, wheel type, and model year. Find it in the owner’s manual or a manufacturer service guide. Do not rely on a generic torque chart.
Can you rotate tires with one jack?
You can move tires one at a time with a careful lifting plan, but using four jack stands makes the process faster and reduces repeated lifting. Never place any part of your body under a vehicle supported only by a jack.
Check the Tires and Vehicle Before You Start
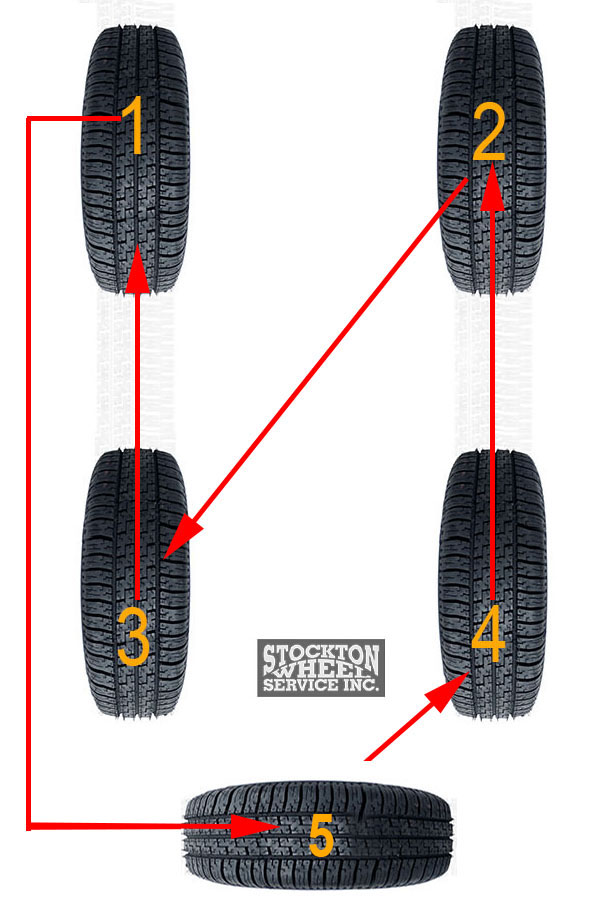
Inspect the tire type and the vehicle layout before removing a wheel. The correct rotation pattern depends on whether the tires are directional, whether the front and rear tires are different sizes, and whether the wheels have different offsets.
Check each tire sidewall for these markings:
- Directional arrow: Shows the direction the tire must rotate
- “Outside” or “Inside” marking: Shows how an asymmetric tire must face
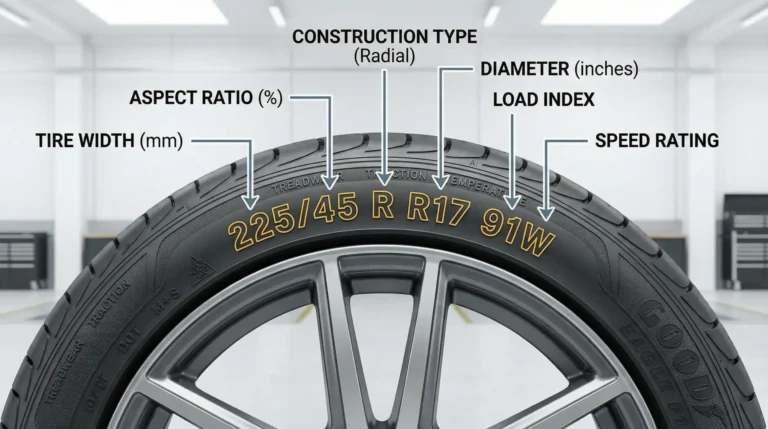
- Tire size, such as
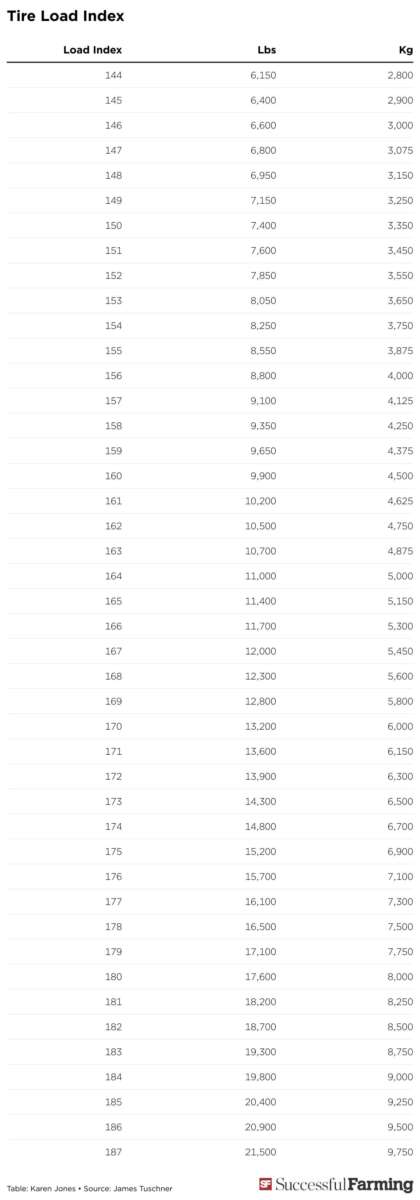
225/55R17 - Load and speed ratings
- Uneven wear, cracks, bulges, exposed cords, or damage
Also check the owner’s manual for the recommended rotation pattern. The manual takes priority over a general diagram.
Do not rotate damaged tires
A tire rotation is not a repair. Stop and arrange a professional inspection if you find:
- A bulge in the sidewall
- Exposed steel or fabric
- A deep cut
- A puncture near the sidewall
- Severe tread separation
- Tread depth that is very low
- Cords showing through the tread
- Irregular wear that may signal a suspension or alignment problem
If one tire has much less tread than the others, moving it may not solve the problem. It may also affect traction balance, especially in rain or snow.
Check for a staggered setup
Some performance cars use a staggered setup. The front and rear tires have different sizes, so front-to-rear rotation may not be possible.
You may still be able to rotate the tires from side to side if they are non-directional and the wheel sizes allow it. Many staggered tires cannot be rotated at all. Confirm the approved method in the manual or with the tire maker.
Check the spare tire
Most compact spare tires are not part of the normal rotation. A full-size spare may be included, but only use it in a rotation if the vehicle maker provides a five-tire rotation pattern and the spare matches the other tires.
Choose the Correct Tire Rotation Pattern
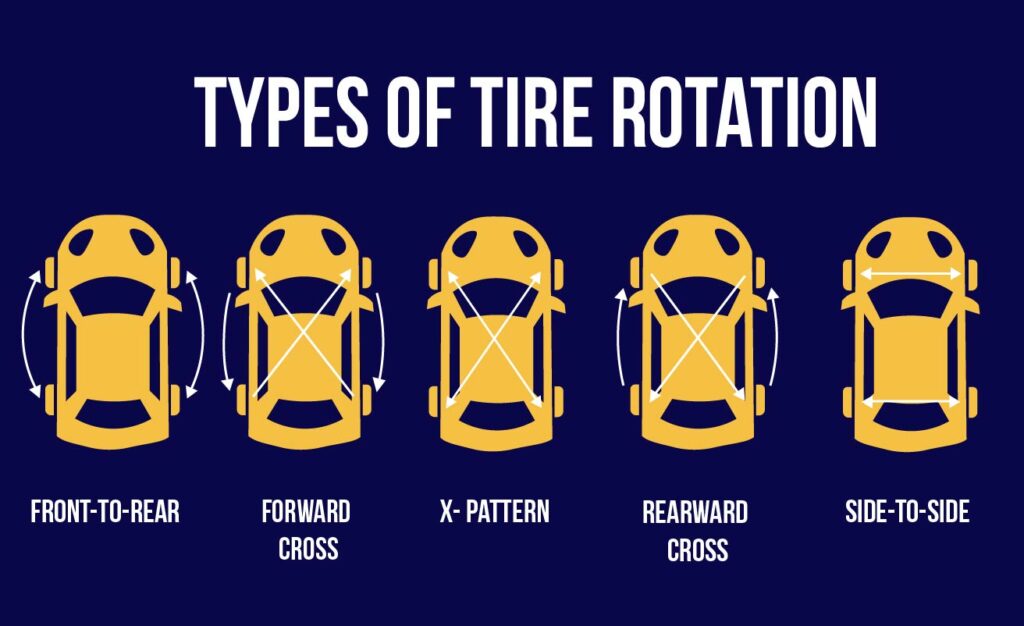
Use the pattern that matches your tire design and vehicle. The wrong pattern can place a directional tire backward or move a tire onto a wheel that cannot accept it.
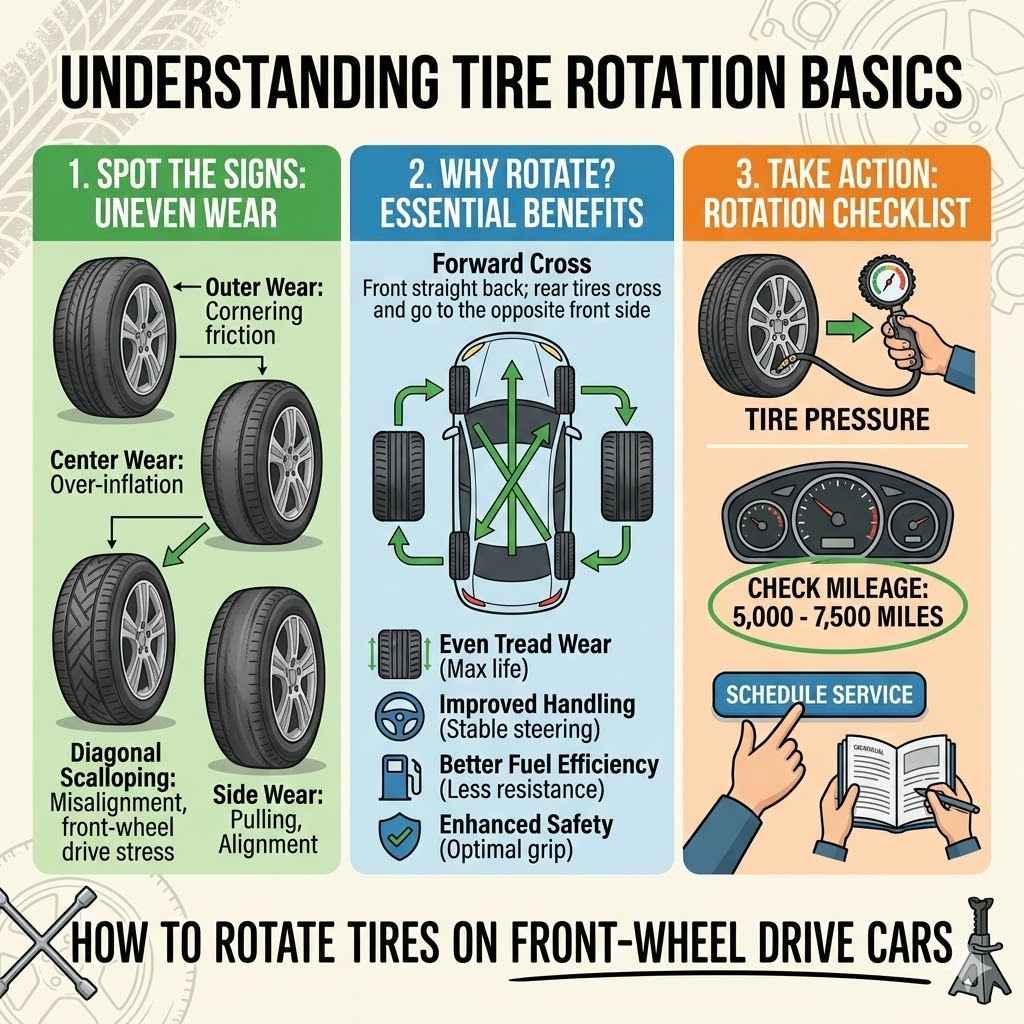
Forward cross
Use the forward-cross pattern for many front-wheel-drive vehicles with non-directional tires.
- Front left moves to rear left
- Front right moves to rear right
- Rear left moves to front right
- Rear right moves to front left
In plain terms, the rear tires cross to the front, while the front tires move straight back.
Rearward cross
Use the rearward-cross pattern for many rear-wheel-drive and four-wheel-drive vehicles with non-directional tires.
- Rear left moves to front left
- Rear right moves to front right
- Front left moves to rear right
- Front right moves to rear left
Here, the front tires cross to the rear, while the rear tires move straight forward.
X-pattern
An X-pattern moves every tire to the opposite corner.
- Front left moves to rear right
- Front right moves to rear left
- Rear left moves to front right
- Rear right moves to front left
This pattern may suit some vehicles with non-directional tires. Follow the vehicle maker’s instructions when available.
Side-to-side rotation
Use side-to-side rotation only when the tire and wheel setup allows it. It is common for:
- Directional tires
- Staggered tire sizes
- Vehicles with different front and rear wheel widths
A directional tire must stay on the same side of the vehicle unless it is removed from the wheel and remounted by a tire professional.
| Tire setup | Typical rotation approach |
|---|---|
| Non-directional, same-size tires | Forward cross, rearward cross, or X-pattern |
| Directional tires | Front-to-back on the same side |
| Staggered tire sizes | Side-to-side only if approved |
| Different wheel widths | Follow the vehicle manual |
| Full-size spare | Use only with an approved five-tire pattern |
How to Rotate Tires at Home
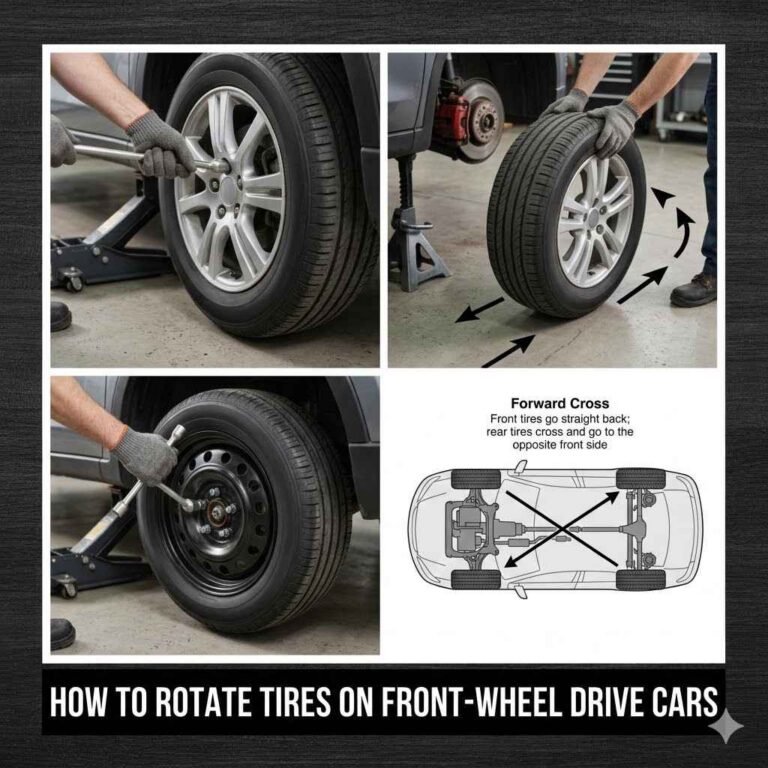
Follow these steps in order. Keep the vehicle on a firm, level surface throughout the job.
1. Park and secure the vehicle
Park on a concrete driveway or another firm, level surface. Avoid grass, gravel, slopes, and soft ground.
Put the transmission in:
- Park for an automatic transmission
- First gear or reverse for a manual transmission
Set the parking brake. Turn off the engine and remove the key. Place wheel chocks on the wheels that will stay on the ground.
If you work on the front first, chock the rear wheels. If you work on the rear first, chock the front wheels.
2. Record the original positions
Mark each tire before removing it. Simple labels work well:
- FL = front left
- FR = front right
- RL = rear left
- RR = rear right
Then write the destination position beside each label. This prevents confusion when the tires look similar.
3. Loosen the lug nuts slightly
Before lifting the vehicle, loosen each lug nut by about a quarter turn. Do not remove the nuts while the tire is on the ground.
If a lug nut will not move, do not use a long pipe or excessive force that could damage the stud. A shop may need to remove a seized or cross-threaded fastener.
4. Lift the vehicle at the correct jack point
Find the approved jack points in the owner’s manual. They are often reinforced areas near the wheels or along the vehicle’s pinch welds.
Lift only until the tire clears the ground. Place a jack stand under a manufacturer-approved support point, then lower the vehicle gently onto the stand. Keep the jack in place as a secondary support if the setup allows it, but do not treat the jack as the primary support.
If you are lifting one end at a time, never place yourself under the vehicle.
5. Remove the wheels
Remove the loosened lug nuts and pull each wheel straight off. If the wheel sticks to the hub, tap the tire sidewall with a rubber mallet or kick the tire gently from the back while standing clear of the vehicle.
Do not strike the wheel with a steel hammer. Do not place fingers between the wheel and hub while forcing it loose.
6. Move each tire to its new position
Follow the selected pattern. Check the sidewall markings again before installation.
For directional tires, confirm that the arrow points toward the front of the vehicle on both sides. For asymmetric tires, make sure the side marked “Outside” faces outward.
7. Install the lug nuts by hand
Set each wheel onto the hub. Thread every lug nut by hand for several turns.
If a lug nut does not turn easily by hand, remove it and start again. A cross-threaded lug nut can damage the wheel stud.
Tighten the lug nuts in a star or crisscross pattern. This helps seat the wheel evenly.
8. Lower the vehicle and torque the lug nuts
Lower the vehicle until the tires touch the ground but still cannot spin freely. Tighten the lug nuts in a star pattern with a torque wrench.
Use the torque value listed by the vehicle manufacturer. Do not guess based on the size of the lug nut.
After reaching the specified torque, lower the vehicle completely and remove the jack stands. Torque each lug nut again in the star pattern.
9. Check tire pressure
Set the pressure when the tires are cold. Use the pressure listed on the driver’s door-jamb label or in the owner’s manual.
Do not use the maximum pressure molded into the tire sidewall as the normal vehicle setting. That number is a limit related to the tire, not usually the recommended pressure for your vehicle.
10. Reset the tire pressure monitoring system
Some vehicles learn tire positions automatically. Others need a TPMS relearn procedure after rotation.
Look for instructions in the owner’s manual. The procedure may involve:
- Driving for a short distance
- Using the vehicle’s dashboard menu
- Using a TPMS scan tool
- Following a specific sensor activation order
If the TPMS warning light stays on after checking the pressure, have the system inspected.

Confirm the Job Was Done Correctly
A successful tire rotation ends with more than four tight lug nuts. Perform these checks before driving normally:
- Every tire is on an approved wheel position
- Directional arrows point forward
- “Outside” markings face outward
- Lug nuts are torqued to specification
- Tire pressures match the door-jamb label
- No wheel rocks or sits unevenly on the hub
- The TPMS warning light is off, if applicable
- The brake rotor, caliper, and valve stem are not damaged
- No tools or chocks remain near the vehicle
Take a short, slow test drive in a safe area. Listen for clicking, rubbing, grinding, or vibration. Stop if the steering wheel shakes, the vehicle pulls sharply, or a warning light appears.
After driving about 25 to 50 miles, recheck the lug nut torque. This is a useful precaution, especially after installing wheels that were removed for service. Follow the vehicle or wheel maker’s instructions if they specify a different check.

When Tire Rotation Will Not Fix the Problem
Uneven wear often points to another issue. Rotation can move the symptom, but it does not correct the cause.
| Symptom | Possible cause |
|---|---|
| Wear on one shoulder | Incorrect alignment, low pressure, or worn suspension part |
| Wear in the center of the tread | Overinflation |
| Wear on both shoulders | Underinflation |
| Cupping or scalloping | Worn shock absorber, wheel imbalance, or suspension issue |
| Steering wheel vibration | Wheel imbalance, bent wheel, tire damage, or loose wheel |
| Vehicle pulls after rotation | Alignment problem, tire conicity, unequal pressure, or brake issue |
| One tire loses pressure | Puncture, valve leak, bead leak, or wheel damage |
A qualified tire or repair technician should inspect the vehicle if the same wear returns after rotation. You may need a wheel alignment, balance check, suspension repair, or tire replacement.
Do not keep driving on a tire with a bulge, exposed cord, serious cut, or rapid air loss.

Tire Rotation Schedule and Maintenance Tips
Follow the service interval in the owner’s manual first. If the manual does not give a clear interval, many tire makers use a range of about 5,000 to 8,000 miles as general guidance.
Rotate tires sooner when the vehicle maker requires it for a maintenance plan or warranty. You may also want to inspect the tires more often if you:
- Drive on rough roads
- Carry heavy loads
- Tow a trailer
- Drive many highway miles
- Use winter and summer tire sets
- Notice steering pull or vibration
- See uneven tread wear
- Frequently drive in rain, snow, or ice
Record the date, mileage, tire positions, tire pressure, and any wear pattern. A simple note in your phone can help you track service.
Rotation does not replace alignment checks, wheel balancing, pressure checks, or tire inspections. It is one part of tire maintenance.

Common Mistakes to Avoid
Using only the vehicle jack
A jack can fail or shift. Use jack stands on a solid surface, and never work under a vehicle supported only by a jack.
Choosing a pattern from memory
Front-wheel-drive and rear-wheel-drive vehicles often use different patterns. Directional and staggered tires add more limits. Check the manual instead of guessing.
Mixing tire sizes by accident
Do not place a larger rear tire on a front wheel position unless the vehicle is designed for it. Check the sidewall size and the vehicle’s approved fitment.
Tightening lug nuts in a circle
A circular tightening pattern can pull the wheel unevenly against the hub. Use a star pattern, then finish with a torque wrench.
Using an impact wrench for final tightening
An impact wrench can over-tighten lug nuts. Use it only for removal or light installation, then use a calibrated torque wrench for the final setting.
Ignoring tire pressure
Tire pressure may need adjustment after tires move to a different axle. Set pressure by the door-jamb label, not by the tire’s maximum sidewall pressure.
Forgetting the TPMS
A tire rotation can change the position of tire-pressure sensors. Follow the vehicle’s relearn procedure if required.
Rotating tires with severe wear
Moving a damaged or badly worn tire does not make it safe. Have it inspected before driving.

FAQs About Rotating Tires at Home
How often should I rotate my tires?
Use the interval in your owner’s manual. If no interval is listed, a common general range is every 5,000 to 8,000 miles. Check the tires more often if you drive on rough roads or notice uneven wear.
Can I rotate directional tires myself?
Yes, if the tires stay on the same side of the vehicle. Move the front tire to the rear on the same side and the rear tire to the front. Changing sides requires removing and remounting the tire on the wheel.
Can I rotate staggered tires?
Sometimes. If the front and rear tires have different sizes, front-to-back rotation may be unsafe or impossible. Side-to-side rotation may work only when approved for that tire and wheel setup.
Do I need to rebalance tires after rotating them?
Not automatically. Rotation alone does not normally require balancing. Have the wheels balanced if you feel vibration, if a wheel has lost a balance weight, or if a tire shop recommends it after inspection.
Do I need an alignment after rotating tires?
Not usually. Rotation does not change alignment angles. An alignment check may be useful when the vehicle pulls, the steering wheel is off-center, or the tires show one-sided wear.
Why is my tire pressure light still on after rotation?
Check all four tire pressures when the tires are cold. If the light stays on, the vehicle may need a TPMS relearn, or one sensor may have a fault. Follow the owner’s manual or have a tire shop scan the system.
What should I do if a lug nut will not come off?
Stop if the lug nut is seized, rounded, or cross-threaded. A tire or repair shop can use the correct removal method without damaging the wheel stud or wheel.
Conclusion
You can rotate tires at home when you have a level work area, safe lifting equipment, the correct rotation pattern, and a torque wrench. Start by checking the owner’s manual and tire sidewalls. Then mark the tire positions, use jack stands, follow the approved pattern, set tire pressure, and complete any TPMS reset.
The safest next step is to inspect your tire type and vehicle manual before lifting the car. If the tires are directional, staggered, damaged, or badly worn, confirm the procedure with a qualified tire professional first.
Sources and Further Reading
- National Highway Traffic Safety Administration: Tire Safety
- NHTSA: Tire Pressure Monitoring Systems
- U.S. Tire Manufacturers Association: Tire Care and Safety
- Your vehicle owner’s manual and tire manufacturer’s maintenance instructions are the controlling sources for rotation patterns, lifting points, torque values, and TPMS procedures.