

Painting a car well requires clean preparation, safe spraying, correct products, and patience between coats.
Learning how to paint a car can save money and give an old vehicle a fresh life. The job is more than spraying color onto metal. It involves repair, sanding, masking, priming, paint mixing, controlled spraying, curing, and polishing. This guide explains the full process in clear steps, with practical tips that help you avoid common body shop mistakes.

What You Need to Paint a Car
Before learning how to paint a car, gather the right tools and materials. Good equipment does not guarantee a perfect finish, but poor equipment makes success much harder.
You can paint a small panel with basic tools. A full vehicle, however, needs a clean spray area, an air compressor, and proper personal protective equipment.
Essential tools
• Air compressor with enough airflow for your spray gun
• HVLP or compliant spray gun
• Moisture filter and air regulator
• Sandpaper from about 80 to 2,000 grit
• Sanding blocks and abrasive pads
• Body filler and plastic spreaders
• Wax and grease remover
• Tack cloths and lint-free wipes
• Masking tape and automotive masking paper
• Mixing cups, strainers, and stir sticks
• Primer, sealer, basecoat, and clearcoat
• Respirator approved for the products you use
• Chemical-resistant gloves and safety glasses
• Clean work lights
• Polishing compound and finishing pads
Check the technical data sheet for every product. Paint brands differ in mixing ratios, flash times, reducer speed, and application methods. The product label is more reliable than a general internet rule.
Choosing the paint system
Most modern automotive finishes use a basecoat and clearcoat system. The basecoat provides color, while the clearcoat adds gloss and protection.
Other options include:
• Single-stage urethane, which combines color and gloss in one coating
• Acrylic enamel, which is simple but often less durable
• Waterborne basecoat, which many professional shops use because of lower solvent emissions
• Solvent-based basecoat, which remains common in many repair settings
Do not mix products from different systems unless the manufacturers approve the combination. Incompatible products can wrinkle, lift, crack, or lose adhesion.

Prepare a Safe and Suitable Work Area
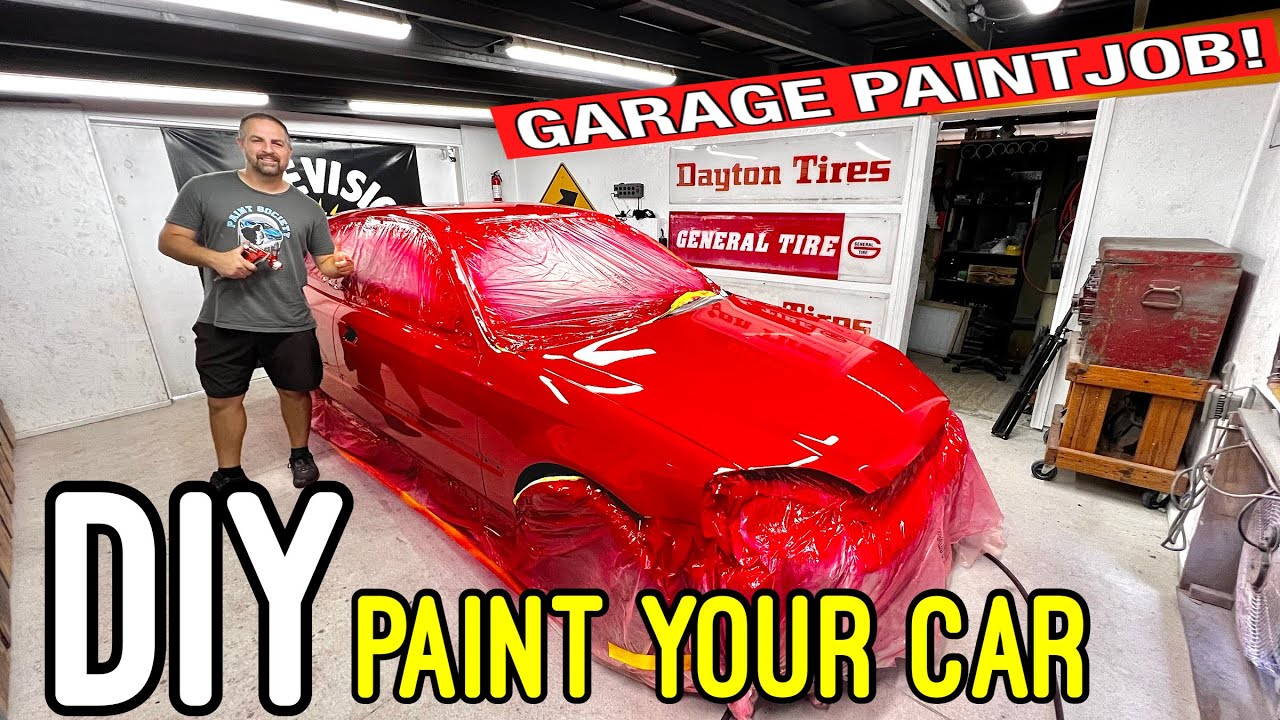
A clean work area is one of the most important parts of learning how to paint a car. Dust, oil, moisture, and poor airflow can ruin a finish before you notice the problem.
Never spray automotive coatings in a living area, attached garage, or enclosed space without proper ventilation. Many automotive paints release flammable vapors and hazardous chemicals. Isocyanates in some two-part urethane products can cause serious health effects.
Use a legal, well-ventilated spray booth when possible. If you work at home, check local fire, environmental, and building rules first. Some products require professional application.
Work area checklist
• Keep the floor clean and slightly damp if appropriate to reduce dust
• Remove cardboard, fuel, heaters, pilot lights, and other ignition sources
• Use bright lighting that shows surface defects
• Keep pets, children, and bystanders away
• Use filtered airflow that moves overspray away from your breathing zone
• Store paint and solvents in approved containers
• Wear the correct respirator and replace filters as directed
• Read the safety data sheet before opening each product
A common mistake is using a cheap dust mask. A dust mask does not protect you from paint vapors. Use respiratory protection designed for the coating, and follow OSHA or local workplace safety guidance.

Inspect and Wash the Car
Start with a full inspection. Look for rust, dents, peeling paint, stone chips, cracked plastic, and old repairs. Run your hand over the panels after washing them. Your fingers can find waves and edges that your eyes miss.
Wash the vehicle with automotive soap. Remove road film, wax, silicone, tar, and grease. A clean surface helps you see damage and prevents sanding contaminants into the panel.
Remove parts that can cause poor edges or overspray. Depending on the project, this may include:
• Emblems and badges
• Door handles
• Trim
• Headlights and taillights
• Mirrors
• Grilles
• Weather seals
• License plates
• Bumpers and moldings
Take photos before removing parts. Label hardware in small bags. This simple habit saves time during reassembly.
After washing, use wax and grease remover. Apply it with one cloth and wipe it away with another clean cloth before it dries. Do not allow dirty solvent to spread across the surface.

Repair Dents, Rust, and Surface Damage
Paint cannot hide major damage. It often makes defects easier to see. Treat the body like a wall before painting a room: repair the cracks before applying the finish.
For shallow dents, straighten the metal as much as possible. Use body filler only to refine the surface, not to replace proper metal repair. Apply filler to clean, sanded material according to the manufacturer’s instructions.
Basic repair process
- Remove loose paint and corrosion.
- Straighten the panel as far as practical.
- Clean the area with the recommended surface cleaner.
- Mix and apply a thin layer of body filler.
- Allow it to cure fully.
- Shape it with a sanding block.
- Apply a guide coat to reveal low spots.
- Repeat only when needed.
Rust needs special care. Sanding the visible bubble may not remove corrosion under the paint. Cut out serious rust or repair it with a proven corrosion-control system. Any rust left below the coating can return and spread.
Plastic bumpers need flexible repair materials and plastic adhesion products. Do not treat flexible plastic like steel. Product instructions matter here because different plastics react differently to heat, solvents, and primers.

Sand the Existing Finish
Sanding creates a surface that the new coating can grip. It also removes gloss, rough edges, and minor defects.
The correct grit depends on the coating and repair. A common sequence may include:
• 80 to 120 grit for shaping body filler
• 180 to 240 grit for refining repairs
• 320 to 400 grit for preparing old paint
• 500 to 600 grit for many primer or sealer surfaces
• 800 grit or finer for certain blend areas
• 1,000 to 2,000 grit for wet sanding cured clearcoat
These ranges are general examples, not universal rules. Always follow the paint manufacturer’s technical sheet.
Use a sanding block on broad panels. Sanding with your fingers can create grooves and uneven areas. Keep the block flat and use even pressure. Change direction between sanding stages so you can see which scratches remain.
A guide coat is useful. Spray or rub a thin contrasting coat over the sanded primer. When the dark color disappears, the surface is closer to level. If it remains in small spots, those areas are low.
A lesson I learned early is that sanding time is never wasted when it improves the panel. Rushing this stage usually creates more work after paint.
Apply Primer and Sealer
Primer helps with adhesion, corrosion resistance, filling, and color coverage. It is not a substitute for body repair.
Common primer types include:
• Epoxy primer, which offers strong adhesion and corrosion protection
• Urethane primer surfacer, which helps fill fine sanding marks
• Self-etching primer, which is designed for certain bare metal applications
• Plastic primer, which supports adhesion on suitable plastic parts
Do not apply primer over oil, silicone, moisture, or unstable old paint. The surface must be clean and properly abraded.
Mix the primer exactly as directed. Strain it into the spray gun to catch lumps and debris. Apply several light, even coats rather than one heavy coat. Allow the proper flash time between coats.
After the primer cures, block sand it. Use a guide coat to identify scratches, pinholes, and low areas. Apply more primer if necessary, then sand again.
A sealer can create a uniform base before color. It is especially helpful when the panel has different shades of primer, old paint, or repaired areas. A consistent undercoat can improve color match and reduce the number of basecoat layers.

Mask the Vehicle Carefully
Masking protects glass, tires, trim, door openings, and nearby surfaces. Poor masking can create sharp paint edges, overspray, and hours of cleanup.
Use automotive masking tape and paper. Household tape may leave adhesive, bleed paint, or fail under solvent exposure. Press the tape edge down firmly, but avoid stretching it too much.
Cover the vehicle in this order:
- Mask deep openings and door jambs.
- Cover glass and large trim areas.
- Protect wheels, tires, and the floor.
- Seal gaps where overspray could enter.
- Check the tape edge under strong light.
If you are blending color into an adjacent panel, avoid creating a hard line in the middle of the panel. A blend area needs careful preparation and a clearcoat plan. Beginners often get better results by painting the full panel instead of attempting a small, visible blend.
Mix and Test the Paint
Read the label and technical data sheet before mixing. A common ratio may be 4:1 or 2:1, but never guess. Some products also require a reducer or activator.
Use clean mixing cups with printed ratios. Measure accurately. Stir the coating gently so you do not introduce excessive air. Strain the mixture before it enters the gun.
Test the spray pattern on masking paper or a test panel. Check for:
• Even fan shape
• Fine atomization
• Correct fluid flow
• No large droplets
• No dry, dusty edges
• No excessive overspray
Set the air pressure at the gun according to the product instructions. Pressure measured at the compressor may not match pressure at the gun.
Temperature and humidity affect drying. High humidity can cause blushing, cloudiness, or slow cure. Low temperature can make the paint thick and slow to flow. Avoid painting when conditions fall outside the product’s recommended range.
How to Paint a Car With a Spray Gun
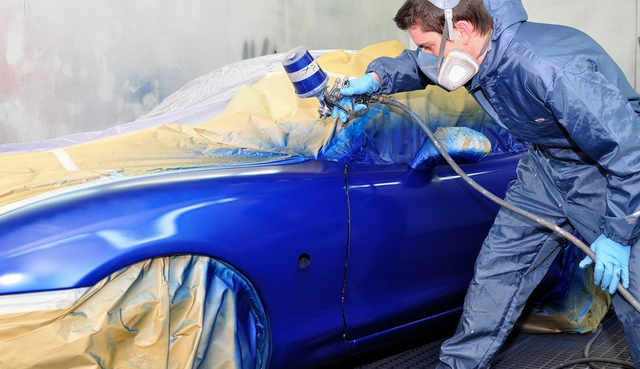
The actual spraying stage requires steady movement and control. Hold the gun about 6 to 8 inches from the surface unless the product instructions specify otherwise. Keep the gun square to the panel.
Start moving before pulling the trigger. Release the trigger before stopping the gun. This prevents heavy spots at the beginning and end of each pass.
Overlap each pass by about 50 percent. Keep your speed steady. A slow pass may create runs, while a fast pass may create dry spray and weak coverage.
Recommended spraying method
- Begin with edges and hard-to-reach areas.
- Spray the first light coat.
- Allow the stated flash time.
- Apply the next coat with even overlap.
- Inspect the color and surface after each coat.
- Apply additional coats only when coverage requires them.
- Clean or adjust the gun if the pattern changes.
Basecoat often looks dull or uneven before clearcoat. Do not judge final gloss at this stage. Focus on coverage, color uniformity, and a smooth surface.
Avoid chasing one small defect with a heavy spray. That choice often creates a run. Let the coating cure, then correct the defect during the appropriate sanding stage.
Apply Clearcoat
Clearcoat protects the color and creates gloss. It also reveals surface defects more clearly, so preparation must be complete before this step.
Apply clearcoat within the product’s recoat window. If you wait too long, the surface may need sanding before another coat. If you spray too soon, solvent may become trapped.
A typical process includes:
• One medium coat for coverage
• A proper flash period
• One full wet coat
• An optional final coat when the product allows it
Follow the product sheet instead of copying a fixed number of coats. Clearcoat thickness affects drying, durability, and the risk of solvent pop.
Watch for runs, sags, dry spray, and orange peel. Orange peel looks like the texture of a citrus skin. Some texture is normal, but heavy orange peel may result from low fluid flow, incorrect pressure, poor technique, high temperature, or the wrong reducer.
Do not touch a wet run. Let the clearcoat cure fully, then level it carefully with a suitable abrasive. Fresh paint is soft and easy to damage.
Let the Paint Cure
Dry to the touch does not mean fully cured. The coating may feel firm while solvents remain inside. Follow the product’s drying and curing schedule.
Keep the vehicle in a clean, stable environment. Avoid water, dust, extreme heat, and direct contact during early curing. Do not install trim or wash the car until the product allows it.
Curing time depends on:
• Product type
• Temperature
• Humidity
• Film thickness
• Air movement
• Use of a paint booth or heat system
Forced drying should only be done according to the coating manufacturer’s instructions. Too much heat can trap solvent or damage plastic parts.
Wet Sand and Polish the Finish
After the clearcoat cures, inspect it under strong light. Look for dust nibs, orange peel, minor runs, and uneven texture.
If correction is needed, wet sand with a fine abrasive and a soft block. Begin with the least aggressive grit that can solve the problem. Use clean water and keep the surface free from particles that may cause deep scratches.
A typical correction sequence may move from 1,000 or 1,500 grit to 2,000 or 3,000 grit, followed by compound and polish. The exact process depends on clearcoat thickness and the defect.
Use a dual-action polisher if possible. It is generally easier for beginners to control than a rotary polisher. Keep the pad moving, use moderate pressure, and check the surface often.
Do not polish through the clearcoat. If the color layer appears, you have removed too much clear. Modern clearcoats are not unlimited, so correction should be measured rather than aggressive.
Common Car Painting Problems
Understanding defects helps you correct them without panic. Most paint problems come from contamination, poor preparation, incorrect application, or unsuitable conditions.
Runs and sags
Runs happen when too much wet material collects in one area. Causes include moving too slowly, holding the gun too close, or applying a coat that is too heavy.
Let the coating cure. Then level the run with a hard block and fine abrasive before polishing.
Orange peel
Orange peel is a rough, textured finish. It may result from incorrect spray pressure, poor atomization, high viscosity, fast reducer, or an incorrect gun distance.
Follow the product sheet and test your settings before spraying the vehicle.
Fish eyes
Fish eyes look like small craters. Silicone, oil, wax, grease, or contaminated air lines often cause them.
Stop spraying and find the contamination source. Sanding over fish eyes without cleaning the surface usually causes them to return.
Dry spray
Dry spray feels rough and looks dusty. It can happen when the gun is too far away, the air pressure is too high, or the reducer evaporates too quickly.
Adjust your distance, overlap, and product choice. Do not try to fix a dry area with a single heavy coat.
Blushing
Blushing creates a cloudy or milky appearance, often in humid or cool conditions. Better ventilation, suitable temperature, and the correct reducer may prevent it.
How Much Does It Cost to Paint a Car?
The cost of learning how to paint a car varies widely. A small DIY panel may cost a few hundred dollars when you already own the tools. A complete home project can cost much more after adding a compressor, spray gun, safety gear, abrasives, masking supplies, primer, color, and clearcoat.
Professional prices vary by vehicle size, damage, paint type, location, and repair quality. A basic respray is very different from a high-end restoration.
DIY painting may reduce labor costs, but it increases your time and risk. A poor result can require sanding and repainting. If the car has major rust, extensive body damage, or valuable original paint, professional work may be the better financial choice.
Mistakes to Avoid When Painting a Car
The following mistakes appear often in first-time projects:
• Skipping rust repair
• Painting over wax or silicone
• Using household masking tape
• Spraying in poor ventilation
• Ignoring the technical data sheet
• Applying coats that are too heavy
• Sanding with bare fingers on large panels
• Failing to strain mixed paint
• Using a dirty air compressor line
• Touching the surface between coats
• Polishing before the clearcoat cures
• Removing too much clearcoat during correction
One of the biggest lessons from real paint work is that speed rarely saves time. A rushed repair may look acceptable from a distance but show waves, scratches, and color problems in bright sunlight.
Frequently Asked Questions About How to Paint a Car
Can I paint a car at home?
You can paint some automotive parts at home, but a full car requires serious attention to ventilation, fire safety, waste disposal, and respiratory protection. Check local rules and use a professional spray booth when the coating or project demands it.
How long does it take to paint a car?
A simple panel may take one to three days when you include repair, sanding, painting, curing, and polishing. A complete car can take several days or weeks, especially when rust and bodywork are involved.
Do I need to sand a car before painting it?
Yes, the existing finish must be clean, stable, and properly abraded. Sanding removes gloss and gives primer or paint a surface to grip.
How many coats of paint should I apply?
The number of coats depends on the product, color, coverage, and manufacturer instructions. Apply light, even coats and allow the correct flash time instead of relying on a fixed number.
Can I paint over old car paint?
You can paint over old automotive paint when it is sound, clean, and properly sanded. Peeling, cracked, swollen, or unstable paint must be removed or repaired first.
What is the best paint for a car?
There is no single best paint for every project. A basecoat and clearcoat system offers strong color options and a durable finish, while single-stage products may suit some restorations or budget repairs.
How do I prevent dust in fresh car paint?
Clean the work area, wear clean clothing, control airflow, use a tack cloth correctly, and avoid unnecessary movement near the vehicle. A professional booth provides the best control.
Conclusion
Learning how to paint a car takes careful preparation, safe work habits, and controlled application. Clean the vehicle, repair damage, sand with a block, use compatible products, follow the technical data sheet, and allow each coating to flash and cure properly.
The finish is usually decided before the spray gun is even loaded. Work slowly, test your settings, and treat every stage as part of the final result. Start with a small panel if you are new to the process, then build your skill with practice. Explore more automotive refinishing guides, and share your own project lessons in the comments.