How To Fix A Bike Tire: Quick Repair Guide
Introduction
To fix a bike tire, remove the wheel, take out the inner tube, find the leak, patch or replace the tube, and reinstall the tire. Most roadside flats in the United States can be repaired with tire levers, a pump, and a spare tube or patch kit.
The job gets easier when you first identify the problem. A soft tire may have a small puncture, a damaged valve, a pinched tube, or a tubeless sealant issue. This guide covers standard tube-type bicycle tires, plus basic advice for tubeless tires.

What You Need Before You Start
Gather the right tools before removing the wheel. A small tool kit can turn a long walk home into a short repair stop.
You may need:
- A bicycle pump with the correct valve head
- Two or three plastic tire levers
- A spare inner tube that matches your tire
- A patch kit
- A small piece of chalk or a marker
- A wrench or hex key, if your wheel uses bolt-on axles
- A clean cloth
- A bowl of water, if you are repairing the tire at home
Most bikes use one of two common valve types:
| Valve type | Common features | Where you may see it |
|---|---|---|
| Schrader | Wider valve with a small center pin | Many mountain bikes, comfort bikes, and children’s bikes |
| Presta | Narrow valve with a small screw tip | Road bikes, gravel bikes, and many performance bikes |
Check the number range printed on the tire sidewall. It may show pressure in pounds per square inch, or PSI. Inflate the tire within that range unless the bicycle or rim maker gives a more specific limit.
Do not use a tire lever, pump, or patch kit that is damaged. A sharp metal tool can harm the tube or rim tape. Plastic tire levers are usually the safer choice for modern rims.
For a replacement tube, match all three of these details:
- The tire diameter, such as 26, 27.5, 29, or 700c.
- The tire width range, such as 700 × 28–35 mm.
- The valve type and valve length.
A tube that is too wide may fold inside the tire. A tube that is too narrow may stretch and fail sooner. A valve that is too short may not extend far enough through a deep rim.
How to Remove the Wheel
Remove the wheel before trying to take off the tire. The process depends on the type of bicycle and axle.
Remove a wheel with a quick-release skewer
- Shift the chain onto the smallest rear cog if you are removing the rear wheel.
- Open the brake if the brake design blocks the tire.
- Flip open the quick-release lever.
- Hold the bike steady and guide the wheel out of the fork or rear dropouts.
For a rear wheel, pull the rear derailleur back gently. This creates room for the cassette to pass the chain. Avoid forcing the wheel sideways.
Remove a wheel with a thru-axle
Many newer mountain, gravel, and road bikes use a thru-axle. Open the axle lever or use the correct hex key. Turn the axle counterclockwise, then slide it out while supporting the wheel.
Keep the axle, springs, and small parts together. Do not place them in grass or dirt.
Remove a wheel with axle nuts
Some bicycles use nuts on both sides of the axle. Use the correct wrench to loosen them. You may need to open the brake or disconnect a coaster-brake arm.
If the wheel will not come out, check for a hidden brake connection, fender stay, or derailleur position. Do not hammer the axle or pry against the frame.

How to Find the Puncture
Find the cause of the flat before installing a new tube. A sharp object left in the tire can puncture the replacement tube within minutes.
Start with a visual inspection:
- Look for glass, wire, thorns, nails, or metal shards.
- Run your fingers slowly over the outside of the tire.
- Check the tread and both sidewalls.
- Look for a cut, bulge, or section pulled away from the rim.
- Inspect the valve for cracks or damage.
Use care when checking the inside of the tire. A tiny piece of wire can cause a deep cut. Move a cloth around the inside rather than using bare fingers if you suspect broken glass or metal.
Use air bubbles to locate a slow leak
At home, inflate the tube slightly. Place it in a bowl of water and watch for a steady stream of bubbles. Mark the leak with chalk.
If you do not have water, listen for escaping air. You can also apply a small amount of soapy water to the tube. Bubbles often reveal a slow puncture.
The location of the hole gives useful information:
| Tube damage | Likely cause |
|---|---|
| One small hole on the outer side | Glass, thorn, wire, or another road object |
| Two close holes, like a snake bite | Pinched tube from low pressure or a hard impact |
| Hole near the valve | Damaged valve, loose valve stem, or poor installation |
| Hole on the rim side | Sharp spoke end, damaged rim tape, or debris inside the rim |
| Long split or torn tube | Overstretched, aged, or severely damaged tube |
Match the damaged tube to the tire. If the tube has a hole on the rim side, inspect the rim tape before you install another tube. Rim tape covers the spoke holes inside the rim. If it has shifted, split, or worn thin, it may expose the tube to sharp edges.
How to Remove the Tire and Inner Tube
Release all remaining air before removing the tire. For a Presta valve, unscrew the small valve tip and press it briefly. For a Schrader valve, press the center pin with a blunt tool.
Then follow these steps:
- Push the tire bead toward the center of the rim.
- Start on the side opposite the valve.
- Insert one plastic tire lever under the bead.
- Hook the lever onto a spoke if its design allows it.
- Insert a second lever a few inches away.
- Slide the lever around the rim until one side of the tire is free.
- Pull the valve out of the rim.
- Remove the tube from inside the tire.
The bead is the stiff edge of the tire that sits inside the rim. Moving the bead into the rim’s center channel creates extra slack. This is the key to removing a tight tire.
Do not use screwdrivers or metal levers. They can scratch the rim, damage a tubeless rim seal, or pinch the tube.
Before patching, inspect both the tube and the tire. Rotate the tire so the tire’s label lines up with the valve hole. This helps you compare the tube’s puncture location with the same area on the tire.
For example, if the tube has a puncture beneath the tire label, inspect that section of tread. If the tube has damage on the rim side, inspect the corresponding section of rim tape.
How to Patch a Bike Tube
A patch works when the hole is small and the tube has no major damage. A tube with a torn valve, long split, or several large holes should be replaced.
For a standard vulcanizing patch kit:
- Dry the area around the hole.
- Lightly roughen the tube with the sandpaper in the kit.
- Make the prepared area larger than the patch.
- Apply a thin layer of vulcanizing cement.
- Let the cement become tacky according to the kit instructions.
- Press the patch firmly over the hole.
- Hold pressure for the time listed by the kit.
- Check that every edge is sealed.
Do not apply the patch to a wet, dirty, or shiny tube. The patch needs clean rubber and proper cement to bond well.
Some kits use self-adhesive patches. These are convenient for an emergency repair, but they still need a clean, dry surface. Press the patch firmly and check its edges before reinstalling the tube.
After patching, add a small amount of air. The patch should stay flat, and the tube should not hiss. This test does not replace a full inspection, but it can reveal a poor bond.
When to replace the tube instead
Replace the tube when:
- The valve base is torn.
- The tube has a long split.
- The tube has several patches or many punctures.
- The rubber feels brittle or badly stretched.
- The hole is too close to another patch.
- The tube size does not match the tire.
A spare tube is often faster than a patch beside the road. You can patch the punctured tube later at home.

How to Reinstall the Tube and Tire
Install the tube carefully. Most new leaks happen because the tube gets pinched during installation or because the original cause remains in the tire.
- Check the tire’s direction arrow, if it has one.
- Fit one tire bead fully onto the rim.
- Add a small amount of air to the tube so it holds a round shape.
- Insert the valve through the rim.
- Place the tube inside the tire.
- Start fitting the second bead by hand.
- Work around the rim in both directions.
- Finish opposite the valve.
- Push the valve slightly into the tire as you finish.
Keep the tube inside the tire. Do not let it sit between the bead and the rim.
Before using a tire lever for the final section, inspect both sides of the wheel. Pinch the tire inward and look for any tube trapped under the bead. If you see the tube, push it back into the tire.
Inflate the tire partway. Stop and inspect the bead around the full rim. The molded line near the tire bead should sit at an even distance from the rim. If one section dips low, deflate the tire, correct the tube, and try again.
Once the bead is even, inflate the tire to a suitable pressure within the sidewall range. Check that:
- The tire spins without a large wobble.
- The bead remains even.
- The valve stands straight.
- The tire feels firm.
- No air escapes.
Tighten a Presta valve nut only enough to hold the valve steady. Do not use pliers. A removable valve nut is not what seals the valve.
Reinstall the wheel and secure the axle. Test both brakes before riding. Spin the wheel to confirm that it does not rub the brake pads or frame.

What to Do if the Repair Fails
A repaired tire that goes flat again usually points to one of five causes:
| Symptom | Most likely cause | Next check |
|---|---|---|
| Flat soon after installation | Tube was pinched | Inspect the tube for a long cut |
| Same spot keeps puncturing | Object remains in tire | Inspect and mark the matching tire area |
| Tube fails on the rim side | Rim tape problem | Check for exposed spoke holes or sharp edges |
| Air escapes at the valve | Damaged valve or loose valve core | Replace the tube or tighten a removable core carefully |
| Tire will not seat evenly | Tube is trapped or bead is not centered | Deflate and reinstall |
If the tire has a large sidewall cut, a bulge, exposed casing threads, or a damaged bead, do not rely on a tube alone for normal riding. A tire boot may help you reach home in an emergency, but it is not a permanent repair.
A tire boot can be made from a purpose-built boot or, in an emergency, a strong piece of packaging. It sits inside the tire over the cut and keeps the tube from pushing through. Ride slowly and replace the tire as soon as possible.
If the wheel, rim, axle, or brake is damaged, stop riding until it is inspected. A flat tire is usually a simple repair. A cracked rim or loose wheel can create a serious crash risk.
How to Fix a Tubeless Bike Tire
Tubeless tires do not use a traditional inner tube. They rely on an airtight rim, tubeless tape, a tubeless valve, and liquid sealant.
For a small puncture:
- Leave the tire mounted if it still holds enough air.
- Rotate the puncture to the lower part of the wheel.
- Add sealant if the system needs it.
- Rotate the wheel and tire to spread the sealant.
- Inflate the tire again.
- Check whether the sealant closes the hole.
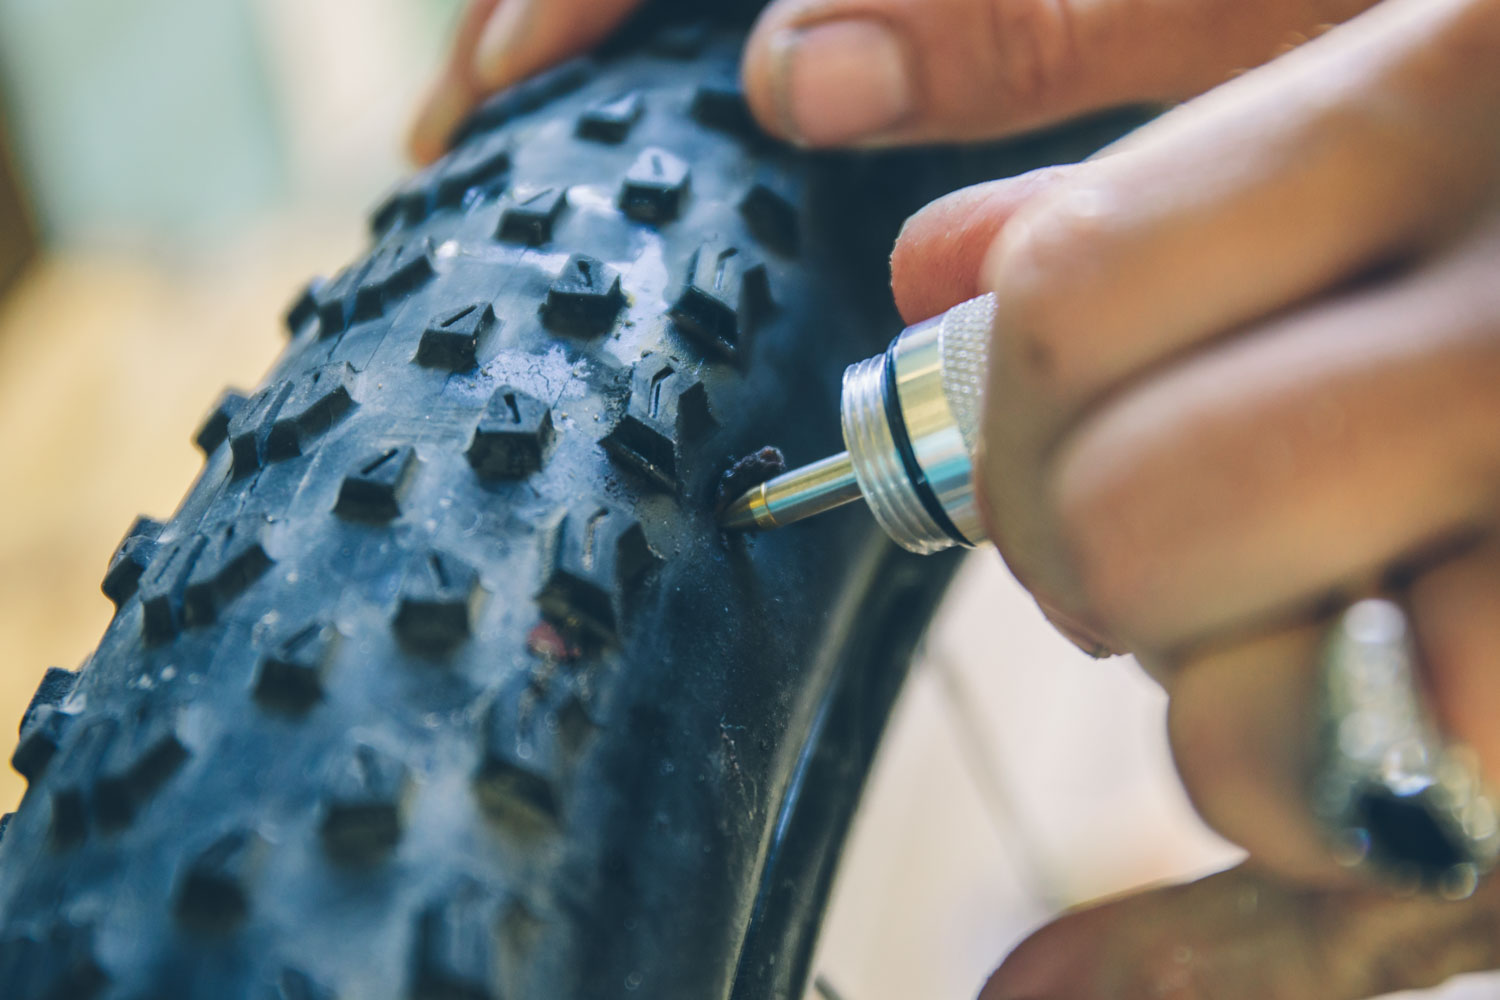
A larger hole may need a tubeless plug. Insert the plug with the tool made for that tire system. Trim the excess plug only if the plug instructions allow it.
If the tire will not hold air, remove it and check:
- The tubeless tape
- The valve core and valve seal
- The tire bead
- The amount and age of the sealant
- The rim for dents or cracks
Tubeless sealant dries over time. Follow the sealant maker’s service guidance and inspect it on a regular schedule, especially in hot or dry conditions.
Do not install a tube in a damaged tubeless tire and continue normal riding without checking the tire. An emergency tube can help you get home, but a cut casing or damaged rim still needs attention.
Common Mistakes to Avoid
Replacing the tube without checking the tire
The thorn or wire may still be inside. Always inspect the tire and match the tube puncture to the tire location.
Using too much force
A tight tire usually needs the bead moved into the rim’s center channel. More force can damage the rim or tube.
Inflating an unseated tire fully
If the bead is uneven, high pressure can push it off the rim. Inflate in stages and watch the bead line.
Ignoring the pressure range
Underinflation can cause pinch flats and poor handling. Overinflation can make the ride harsh and may exceed the tire or rim limit. Use the lower limit as a starting point, then adjust for rider weight, tire size, surface, and handling.
Forgetting the brake check
After reinstalling the wheel, test the brake lever and spin the wheel. Confirm that the axle is fully secured before riding.
Patching a damaged valve
A patch cannot repair a torn valve base. Replace the tube.

How to Prevent Future Flat Tires
You can reduce, but not eliminate, the chance of another flat.
- Keep the tires within the pressure range marked on the sidewall.
- Check pressure before longer rides.
- Replace worn tires before the tread and casing become badly damaged.
- Remove glass, wire, and thorns from the tread.
- Check rim tape when changing tubes.
- Carry a spare tube, tire levers, and a pump.
- Avoid riding through visible glass and sharp road debris.
- Use a properly sized tire and tube.
Tire pressure is a trade-off. More pressure can reduce the risk of pinch flats on some setups, while too much pressure can reduce grip and comfort. The best pressure depends on the tire, rim, rider, load, and riding surface. Stay within the printed limits and change pressure in small steps.
FAQs About Fixing Bike Tires
Can I fix a flat bike tire without removing the wheel?
Sometimes. If the tire is easy to access, you may be able to remove one bead, replace the tube, and inflate it while the wheel remains on the bike. Removing the wheel usually gives you better access and makes it easier to inspect the tire.
How long does a bike tire repair take?
An experienced rider may replace a tube in about 10 to 20 minutes. A first repair can take longer, especially when locating a slow leak or dealing with a tight tire. A patch repair at home may take extra time because the cement must become tacky before the patch is applied.
Should I patch a tube or replace it?
Patch a small puncture when the tube is otherwise sound. Replace the tube when the valve is damaged, the rubber is brittle, the tube has a large tear, or several patches are close together.
Why does my bike tire keep going flat?
The most common causes are a sharp object left in the tire, low pressure that causes a pinch flat, damaged rim tape, a faulty valve, or a tube pinched during installation. Compare the location of the tube damage with the tire and rim to find the cause.
Can I ride on a bike tire with a sidewall cut?
Do not use a tire with a large sidewall cut, bulge, exposed casing, or damaged bead for normal riding. A temporary tire boot may help you reach a safe place, but replace the tire before riding again.
What should I carry for a roadside flat?
Carry a pump, tire levers, a correctly sized spare tube, and a patch kit. A small multitool may help with axle or brake adjustments. Test your pump and check your spare tube before a long ride.
Conclusion
Fixing a bike tire is usually a careful inspection followed by a tube patch or replacement. Remove the wheel, find the leak, inspect the tire and rim, install the tube without pinching it, and check the bead before riding.
For your next ride in the United States, carry a pump, tire levers, and a spare tube that matches your bike. If the tire, rim, valve, or wheel has major damage, use a bicycle shop rather than treating a temporary roadside fix as a permanent repair.