

Place your car jack under the vehicle’s marked factory jack point, usually near each wheel behind the front or rear tire.
Knowing where do I place a jack on a car is vital for safe lifting and tire changes. The wrong spot can bend the body, damage suspension parts, or make the car slip. This guide explains how to find the correct jack point, how to use a jack safely, and which mistakes to avoid.

Why the Correct Jack Point Matters
A car’s weight is not spread evenly across every part of its body. The frame, pinch welds, and reinforced lifting points are built to support that weight. Thin floor panels, plastic covers, exhaust parts, and suspension arms may look strong, but they can bend or break under a jack.
When people ask, “Where do I place a jack on a car?” they are usually asking about the safest place to lift one corner. The answer depends on the vehicle. Your owner’s manual is always the best source because jack points vary by make, model, year, and body style.
Using the correct point helps you:
• Lift the vehicle without damaging the body
• Keep the jack stable
• Protect brake lines, fuel lines, and suspension parts
• Reduce the risk of the car falling
• Make room to install a jack stand
A jack is a lifting tool, not a support system. Never rely on a hydraulic floor jack or the small emergency jack alone while working beneath a vehicle.

Where Do I Place a Jack on a Car?
In most cars, the correct jack point is close to the wheel you want to remove. Look behind the front wheel or in front of the rear wheel for a reinforced area. Many vehicles use a strong pinch weld along the lower edge of the rocker panel.
Common factory jack points include:
• A reinforced pinch weld under the side sill
• A marked notch in the rocker panel
• A solid frame rail
• A front subframe lifting point
• A rear axle housing on some rear-wheel-drive vehicles
• A designated differential point on certain trucks and SUVs
Do not assume that every solid-looking part is safe. A suspension arm may carry the vehicle during normal driving but still be unsuitable for a jack. The owner’s manual may show a diagram with arrows, notches, or small symbols.
If you still cannot identify the location, check behind the plastic rocker-panel trim and look for a flat, reinforced metal section. Do not place the jack on painted body panels, plastic trim, the oil pan, transmission pan, exhaust system, or floor pan.

How to Find the Factory Jack Points
The easiest way to learn where do I place a jack on a car is to inspect the vehicle before an emergency happens. Park on level ground, turn off the engine, and use a flashlight to examine the underside.
Look for these signs:
• Two small notches in the pinch weld
• A thicker section of metal
• A round or square lifting pad
• An embossed triangle or arrow
• A flat section shown in the owner’s manual
Many modern cars have a seam running along the bottom edge of the body. This seam is the pinch weld. It may be designed for a special jack saddle with a slot. The slot holds the weld and helps prevent it from folding.
Some cars have plastic covers that hide the lifting points. The manual may explain how to remove a small cover or identify an opening in the trim. Never force the jack against plastic parts.
A useful habit is to take a photo of each jack point before you need it. Store the image with your vehicle documents. This small step can save time during a night-time tire problem.
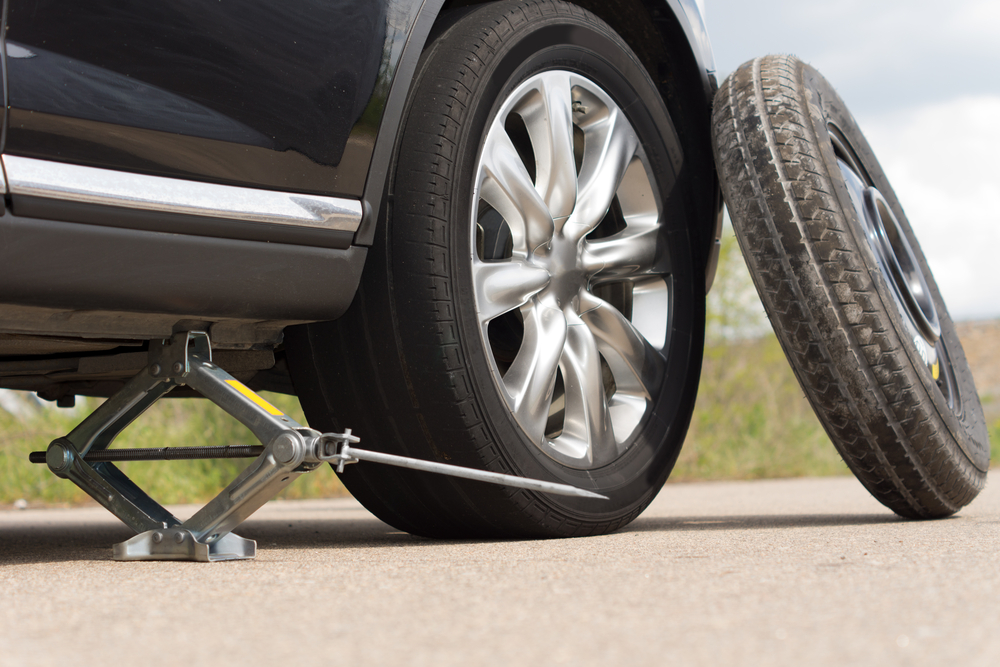
Jack Placement for the Front of a Car
For a front tire change, place the jack at the reinforced point behind the front wheel. If you need to raise both front wheels, some vehicles allow lifting at a central front crossmember or subframe point.
Only use a central point if the manufacturer lists it as safe. The center of the engine, oil pan, or transmission is not automatically a lifting point.
Before raising the front:
Park on a firm, level surface.
Put the transmission in Park or first gear.
Apply the parking brake.
Turn on the hazard lights if you are near traffic.
Place wheel chocks behind the wheels that stay on the ground.
Loosen the wheel nuts slightly before lifting.
Position the jack under the marked front jack point.
Raise the vehicle slowly and watch the jack saddle.
The jack should contact the reinforced point squarely. If it begins to tilt, stop lowering the vehicle and reposition it. Do not try to correct a leaning jack while the car is high in the air.

Jack Placement for the Rear of a Car
For a rear tire change, the jack point is often in front of the rear wheel. It may be a reinforced pinch weld, frame section, or marked lifting pad.
Some rear-wheel-drive vehicles can be lifted from the rear axle housing or differential. However, this is not safe for every vehicle. Aluminum differential housings, independent rear suspensions, and some electric vehicle systems require special care.
Never place a jack under a differential unless the owner’s manual or a trusted repair guide confirms that location. The differential may support the vehicle in some trucks, but it can also be damaged by an incorrect saddle position.
When lifting one rear corner, keep the jack close to the wheel. When lifting the whole rear, use the approved central rear point and support both sides with jack stands at the recommended locations.
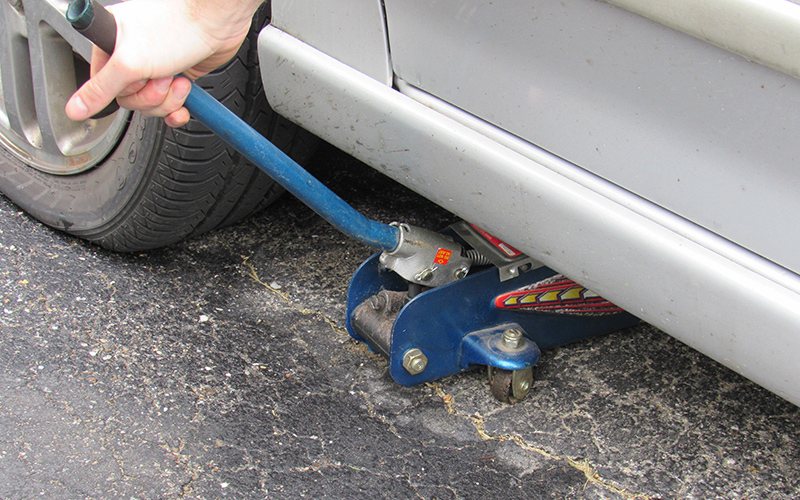
How to Use a Floor Jack Safely
Knowing where do I place a jack on a car is only one part of safe lifting. The surface, jack position, and support method matter just as much.
Follow this process:
Choose a hard, level surface such as concrete.
Avoid gravel, grass, mud, steep driveways, and soft asphalt.
Block the wheels that remain on the ground.
Keep people away from the vehicle.
Place the jack saddle under the approved point.
Pump the handle slowly.
Stop when the tire is just clear of the ground.
Place a jack stand under the manufacturer-approved support point.
Lower the vehicle gently onto the stand.
Give the vehicle a light shake from a safe position to check stability.
Do not work under a vehicle supported only by a jack. If the vehicle must be lifted higher, use two properly rated jack stands. The stands must sit on firm, level ground and should match the vehicle’s weight.
A hydraulic jack can lose pressure without warning. That is why professional technicians use stands even for short jobs.

How to Position a Car Jack on a Pinch Weld
Pinch welds are common on unibody cars. They are formed where sections of the body shell are joined. Many have a small reinforced area made for the factory jack.
A standard floor jack may crush the seam if its saddle does not fit correctly. A rubber jack pad with a center slot can help protect the pinch weld and keep the metal centered.
Place the jack so:
• The saddle supports the reinforced section
• The pinch weld sits in the saddle groove
• The jack is straight up and down
• The wheels of the jack can roll slightly as the car rises
• No brake line, fuel line, cable, or plastic trim touches the jack
Do not put the jack on the thin edge of the pinch weld unless the vehicle is designed for that contact. If the seam begins to fold, stop immediately and lower the car. Damage to the pinch weld can affect future lifting and may cause rust.
Where Not to Place a Jack
Knowing where do I place a jack on a car also means knowing where not to place one. Many expensive repairs begin with a jack placed on a part that looks strong but was never designed to carry the vehicle.
Avoid these areas unless your manufacturer specifically approves them:
• Oil pans
• Transmission pans
• Exhaust pipes and mufflers
• Plastic splash shields
• Floor panels
• Door sills
• Body panels
• Brake lines
• Fuel tanks
• Steering or suspension links
• Battery packs on electric vehicles
• A vehicle’s high-voltage components
Electric vehicles need special attention. Their large battery pack is mounted under the floor, and the battery case is not a general-purpose lifting point. Use only the jack locations shown in the vehicle manual.
Also avoid lifting on a sloped surface. Even a correct jack point cannot make an unstable location safe.
Common Jacking Mistakes to Avoid
One mistake I often see is placing the jack too far under the car. The handle then hits the bumper or rocker panel, and the user pulls the jack sideways. A jack should roll forward as it rises, not slide across the ground.
Other common errors include:
• Failing to set the parking brake
• Leaving the car in neutral
• Using a jack on soft ground
• Removing wheel chocks
• Lifting before loosening the lug nuts
• Putting a jack stand on a weak body panel
• Working beneath a car supported only by a jack
• Using a jack with a lower weight rating than the vehicle
• Reaching under the vehicle while it is rising
• Placing hands or feet beneath the tire
The lesson is simple: slow down. A tire change may take a few extra minutes when done correctly, but rushing creates serious risk.
A Practical Example: Changing One Flat Tire
Suppose the driver-side front tire is flat. First, move the car away from traffic if possible. Keep the vehicle on firm, level ground and turn on the hazard lights.
Then follow these steps:
Put the transmission in Park or in first gear for a manual vehicle.
Apply the parking brake.
Chock the wheel diagonally opposite the flat tire.
Remove the jack and lug wrench.
Find the front jack point behind the flat tire.
Loosen the lug nuts by about one turn.
Raise the car until the tire clears the ground.
Place a jack stand under the approved support point if you will work beyond a quick tire change.
Remove the lug nuts and tire.
Install the spare tire.
Tighten the lug nuts by hand.
Lower the car until the tire touches the ground.
Tighten the lug nuts in a star pattern.
Fully lower the car and torque the lug nuts to the vehicle’s specification.
The spare tire may have a lower speed limit and a short driving range. Check the label on the spare and repair or replace the damaged tire as soon as possible.
What I Learned From Real-World Jacking Problems
A common problem in older cars is rust around the pinch weld. Rust can make the approved point too weak to support the car. Before lifting, inspect the metal for deep corrosion, cracks, or flaking sections.
Another lesson is that the emergency scissor jack is meant for roadside tire changes, not repeated repair work. It is narrow and less stable than a quality floor jack. For home repairs, use a properly rated floor jack and strong jack stands on a concrete floor.
I also recommend checking the jack before an emergency. Make sure the handle fits, the saddle is not cracked, and the release valve works smoothly. A jack that has been stored in a trunk for years may be rusty or damaged.
If the car shifts, creaks, or leans while lifting, stop. Lower it if you can do so safely, move to a better surface, and reassess the jack point.
Choosing the Right Jack and Jack Stands
A jack’s capacity should exceed the amount of weight it must lift. A two-ton jack may lift one corner of many small cars, but a larger truck or SUV may need a three-ton or higher-rated jack.
Consider these features:
• A wide base for better stability
• A saddle that fits the vehicle’s jack point
• A long handle for controlled lifting
• A low profile for sports cars
• A lifting height that suits the vehicle
• Jack stands with a matching or higher capacity
Do not confuse maximum capacity with recommended working capacity. A tool rated for a certain weight should be used within its limits and on a stable surface.
For vehicles with unusual frames, air suspension, or low ground clearance, follow the manufacturer’s lifting instructions. A repair shop may be the safer option if you lack the correct equipment.
Frequently Asked Questions About Where Do I Place a Jack on a Car
Can I place a jack under the car frame?
You can place a jack under the frame only if that frame section is approved as a lifting point. Check the owner’s manual because some frame areas contain fragile lines, wiring, or components.
Can I jack up a car from the axle?
Some solid rear axles are approved lifting points, especially on trucks and rear-wheel-drive vehicles. Do not use an axle, differential, or suspension part unless the manufacturer confirms it is safe.
Can I use the emergency jack for repairs?
The emergency jack is designed mainly for changing a tire. It should not support the car while you work underneath it; use properly rated jack stands on firm ground.
How high should I lift a car with a jack?
Raise the vehicle only high enough to remove the tire or perform the task. Extra height increases instability and creates more risk if the jack or stand moves.
What should I do if I cannot find the jack point?
Stop and check the owner’s manual, the factory repair guide, or a reliable vehicle-specific service source. Do not guess or lift from a nearby flat surface.
Is it safe to jack a car on asphalt?
Firm asphalt may support a jack in mild conditions, but it can soften in hot weather. Concrete is safer, and soft ground, gravel, grass, and slopes should be avoided.
Conclusion
The safest answer to where do I place a jack on a car is the manufacturer-marked jack point near the wheel you need to lift. These points are usually reinforced pinch welds, frame sections, subframes, or approved axle locations.
Park on firm, level ground, set the brake, block the wheels, and use jack stands whenever you work beneath the vehicle. Never lift from the oil pan, exhaust, plastic trim, battery pack, or an unapproved suspension part.
Find your car’s jack points before you need them, and inspect your equipment now. For more practical vehicle safety guides, explore your owner’s manual and share your own tire-changing tips in the comments.