How To Change A Car Tire: Easy Step-By-Step Guide
If you get a flat tire on a U.S. road, you can often change it with a spare tire, jack, and lug wrench. Park on firm, level ground, secure the car, loosen the lug nuts, lift the vehicle at the correct point, install the spare, and tighten the nuts in a star pattern.
Do not change a tire in a travel lane or on a narrow highway shoulder if traffic makes the work unsafe. Move as far from traffic as you can, turn on your hazard lights, and call 911 or a roadside service if needed. The National Highway Traffic Safety Administration (NHTSA) advises drivers to use care around disabled vehicles because roadside traffic can be deadly.
This guide applies to most cars, SUVs, and light trucks in the United States. Your owner’s manual remains the final guide for jack points, lug-nut torque, spare-tire limits, and tire pressure.

What you need before changing a tire
You need a safe work area and the right tools before you lift the car. Most vehicles with a spare tire include a jack and lug wrench, but some newer vehicles include only an inflator and tire-sealant kit.
Check that you have:
- A properly inflated spare tire
- The vehicle jack
- A lug wrench
- The owner’s manual
- Wheel chocks, if available
- A flashlight or headlamp
- Gloves
- A reflective vest or warning device
- A tire-pressure gauge
- Your phone
Many spare tires sit under the cargo floor, below the rear of the vehicle, or inside the trunk. Find these items before an emergency. Some vehicles also need a special key to remove locking lug nuts.
Check the tire and the road first
A flat tire is not always safe to change yourself. Stop and call for help if:
- You are on a bridge, curve, hill, or narrow shoulder.
- Traffic passes close to the car.
- The ground is soft, muddy, icy, or sloped.
- The vehicle has heavy cargo or a trailer.
- The car is damaged after a crash.
- You smell fuel or see leaking fluid.
- The jack or spare is missing.
- You cannot find the correct lifting point.
If the tire is losing air but the car is still moving, slow down and steer smoothly. Do not drive far on a flat tire. Driving on it can damage the wheel and tire sidewall.
Know what type of spare you have
A full-size spare may match the other tires. A compact temporary spare, often called a “donut,” is different. It may have limits for speed, distance, traction, and use on a drive axle.
Read the writing on the spare-tire sidewall. Also check the owner’s manual. Do not assume that every temporary spare has the same speed or distance limit. Many have a 50 mph limit, but the label and manual control.
A compact spare is an emergency tool. Replace or repair the damaged tire as soon as practical.

How to change a car tire step by step
Follow these steps in order. Keep the car stable, and never put any part of your body under a vehicle held up only by a jack.
1. Park safely
move the car away from traffic if you can do so without damaging the wheel. Choose flat, solid ground. Avoid grass, loose gravel, steep slopes, and soft shoulders.
Set the parking brake. Put an automatic transmission in Park. Put a manual transmission in first gear or reverse. Turn off the engine.
Turn on the hazard lights. If you have warning triangles or another approved warning device, place them only when you can do so without entering a traffic lane.
2. Secure the vehicle
Ask all passengers to leave the vehicle and stand well away from traffic. Remove heavy items only if doing so is safe.
Place a wheel chock in front of and behind a tire that will stay on the ground. If you do not have chocks, use solid blocks that cannot roll. Do not use loose objects such as small rocks.
Before lifting the vehicle, confirm that the jack will stand straight on firm ground.
3. Remove the spare and tools
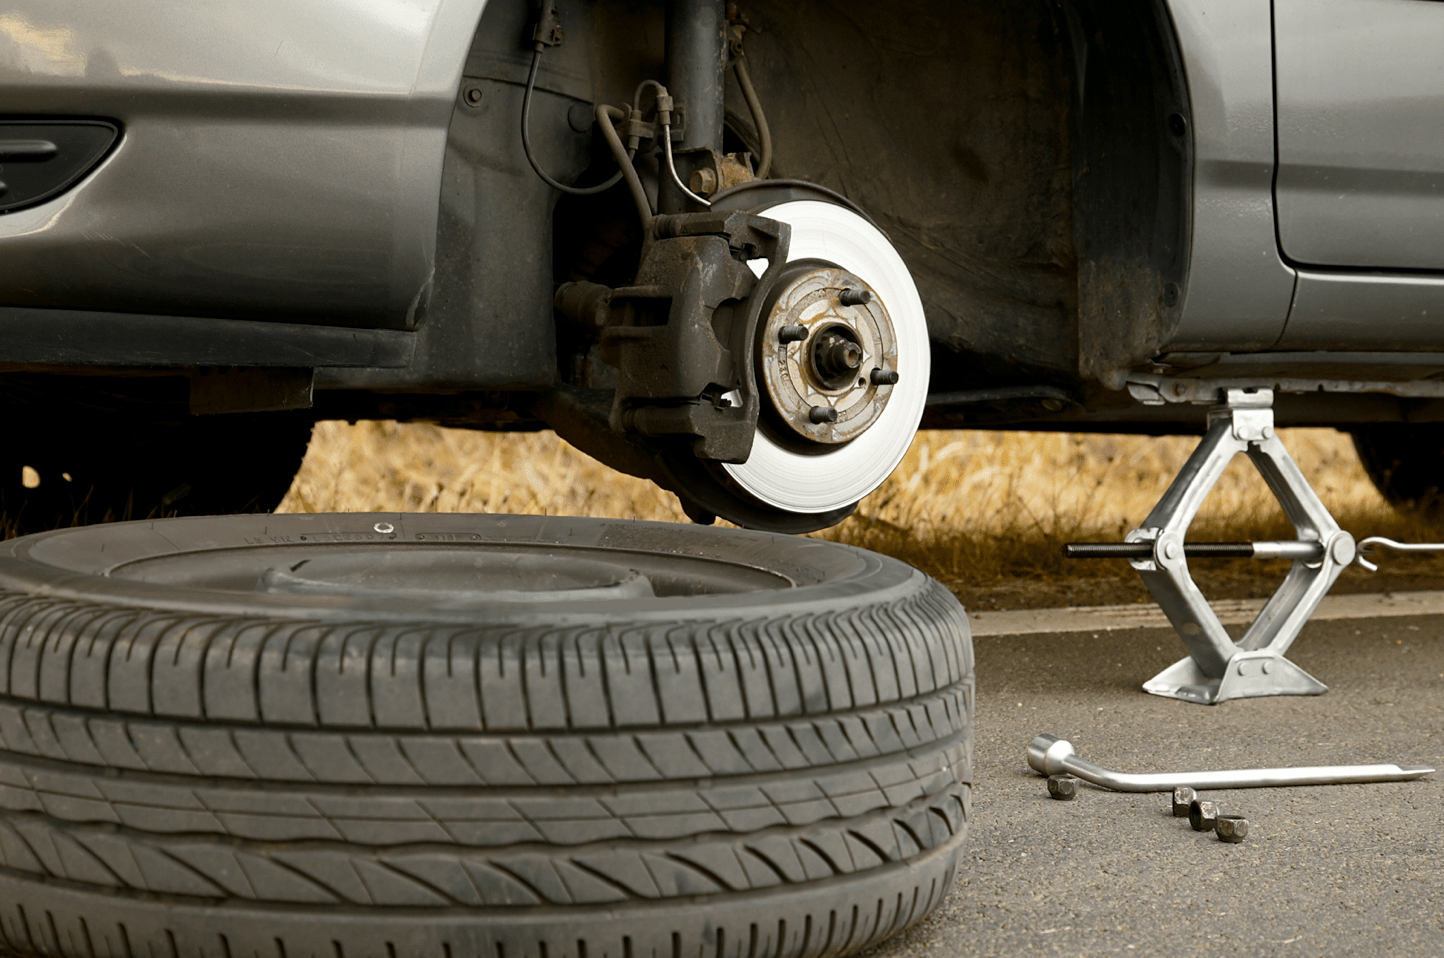
Take out the spare, jack, and lug wrench. Keep the spare near the wheel you will change, but do not place it where it could roll into traffic.
Read the jack instructions in the owner’s manual. Some jacks have a specific head shape that must fit a notch or reinforced point under the vehicle.
4. Loosen the lug nuts
Remove the wheel cover or hubcap if it blocks the lug nuts. Use the flat end of the lug wrench or the tool supplied with the car.
Turn each lug nut counterclockwise. Loosen each nut about one turn. Do not remove them yet.
This step works best while the tire still touches the ground. The ground holds the wheel still. If you lift the car first, the wheel may spin.
If a lug nut will not move, keep the wrench level and press with controlled force. Do not jump on the wrench. Do not use an extension pipe unless the vehicle maker allows it. If the nut is rounded, cross-threaded, or locked in place, call for help.
5. Find the correct jack point
Use the owner’s manual to find the lifting point. Many cars have a reinforced area behind the front wheel or ahead of the rear wheel. Some have a marked notch in the pinch weld.
Place the jack only at the approved point. A wrong position can bend body panels, damage the underbody, or make the car fall.
Keep the jack base flat. Make sure the jack is vertical before lifting.
6. Raise the vehicle
Pump or turn the jack slowly. Lift the car until the flat tire is about 2 inches, or 5 centimeters, off the ground. You need enough space to remove the tire and fit the spare.
Stop if the car shifts, the jack tilts, or the base sinks. Lower the car if needed and choose a safer position. Never place a hand, foot, or body under the vehicle while it is raised.
A jack is for changing a tire. It is not a substitute for jack stands during repair work.
7. Remove the lug nuts and flat tire
Finish removing the lug nuts by hand. Keep them together so none roll away.
Pull the wheel straight toward you. If it will not move, hold the tire at the top and bottom and rock it gently. Do not strike the wheel with your foot or hammer. A stuck wheel may need professional help, especially if corrosion has joined it to the hub.
Place the flat tire under the vehicle near the jack. This does not make the car safe if the jack fails, but it may reduce damage in a low drop.
8. Install the spare
Align the spare’s center hole with the wheel hub. Push it on until it sits flat.
Install the lug nuts by hand. The tapered end usually faces the wheel, but lug-nut shapes differ. Check the manual if you are unsure.
Turn each nut clockwise until it is snug. Do not fully tighten one nut while the others are loose.
9. Tighten the lug nuts in a star pattern
Use a crisscross pattern rather than moving around the circle. For a five-lug wheel, tighten one nut, then the nut across from it, then continue across the center. For four or six lugs, use a similar alternating pattern.
The star pattern helps seat the wheel evenly. Hand-tightening with the car raised is not the final step.
10. Lower the vehicle and tighten again
Lower the car slowly until the spare touches the ground but the full weight is not yet on it. Tighten the lug nuts in the same star pattern.
Lower the car fully. Remove the jack and chock. Tighten each lug nut again in the star pattern.
Use a torque wrench when possible. Set it to the torque value listed in the owner’s manual or service information. Do not use a guessed value. Torque depends on the vehicle, wheel, and lug-nut design.
Replace the wheel cover only if it fits the spare. Some temporary spares are not designed to use the original cover.

What to do after installing the spare tire
Check the spare’s air pressure before driving. Use the pressure printed on the spare’s sidewall or listed in the vehicle manual. Do not use the pressure on the door label if it differs from the temporary spare’s required pressure.
Drive slowly at first. Listen for rubbing, shaking, or unusual noise. Stop if the car pulls sharply, the wheel feels loose, or the tire-warning light flashes with another warning.
A temporary spare may change:
- Braking distance
- Steering feel
- Cornering grip
- Traction in rain or snow
- Anti-lock braking behavior
- Stability-control behavior
- Available ground clearance
Avoid hard braking, quick turns, and high speed. Follow the spare’s printed limit and the vehicle manual. If the spare is smaller, do not use it on a drive axle when the manual forbids that setup. Some cars require the temporary spare on the rear axle, which may mean moving a good tire.
Check the lug nuts again
After driving a short distance, stop in a safe place and check that the lug nuts still feel secure. The proper check is with a torque wrench set to the manufacturer’s value.
Do not keep driving if a lug nut is missing or the wheel moves. A loose wheel can separate from the vehicle.
Repair or replace the damaged tire
A tire shop should inspect the damaged tire. A puncture in the tread may be repairable if the tire has not been driven while flat and the damage meets industry repair limits.
A puncture in the sidewall or shoulder usually requires tire replacement. So does severe tread separation, exposed cords, a large cut, or damage from driving with no air.
Replace the temporary spare with the repaired or correct replacement tire as soon as possible. Store the jack and tools in their proper places.

What to do if the tire will not come off
A wheel can stick to the hub because of rust or corrosion. This is common in regions that use road salt, but it can happen anywhere.
Keep the vehicle supported by the jack only as long as needed. Do not climb under it or use force that could knock the car off the jack. If gentle rocking does not release the wheel, lower the vehicle and call roadside assistance or a tire shop.
Do not:
- Strike the tire sidewall with a metal tool.
- Heat the wheel near the tire.
- Spray unknown chemicals near the brakes.
- Drive with loose lug nuts.
- Use a second jack in an improvised way.
- Place a body part beneath the raised car.
If a lug nut is stripped, a locking key is missing, or the wheel stud turns with the nut, stop. These problems need the correct tools and often professional service.
Common mistakes to avoid
The most dangerous mistakes involve traffic, poor support, and incorrect tightening.
Changing the tire too close to traffic
A flat tire can feel urgent, but a risky location can be worse than the flat. If traffic is close or fast, stay in the vehicle with your seat belt on when safe to do so and call for help. Follow local emergency guidance.
Using the wrong jack point
The jack may lift the car but still damage it if placed in the wrong spot. The manual shows the approved locations for your exact vehicle.
Removing lug nuts before loosening them
If the wheel spins, the nuts may not turn. Loosen them before lifting the car.
Using the jack on soft ground
A jack can sink or tilt. Use firm, level ground. If the surface is not safe, do not improvise with unstable boards or objects.
Over-tightening the lug nuts
Too much force can stretch studs, damage threads, warp a brake rotor, or make the next removal difficult. Use the maker’s torque value.
Forgetting the spare’s limits
A donut spare is not a normal tire. Its limits can affect speed, distance, handling, and traction.
Ignoring tire pressure
A spare can lose air while stored. Check it during routine vehicle maintenance, not only after a flat.
Full-size spare, temporary spare, or tire-sealant kit?
The correct response depends on the equipment in your vehicle.
| Equipment | What it can do | Main limit |
|---|---|---|
| Full-size spare | Replaces the damaged tire for normal use if it matches the vehicle | It may still differ in age, tread, or pressure |
| Temporary spare | Gets the vehicle to a tire shop | It has special speed, distance, and handling limits |
| Tire-sealant kit | May seal a small tread puncture | It usually cannot fix sidewall damage or a large cut |
| Portable inflator | Adds air to a tire with a slow leak | It cannot repair structural tire damage |
| Roadside service | Provides safe help when the location or damage is risky | Response time and coverage depend on the service plan |
A sealant kit is not a universal replacement for a spare. Read its instructions before use. Some sealants can affect tire-pressure monitoring sensors and may require later cleaning or replacement.
How long does it take to change a tire?
A prepared driver may complete the job in about 15 to 30 minutes under safe conditions. The time can be longer in darkness, rain, cold weather, heavy traffic, or when the wheel is stuck.
Time is not the main goal. A slow, stable job is better than a fast mistake. If the location is unsafe, skip the repair and call roadside assistance.
FAQs about changing a car tire
Can I change a tire on the highway shoulder?
Only if the location is clearly safe and you can get far from moving traffic. A narrow shoulder, curve, bridge, or high-speed road may be too dangerous. Call 911 or roadside service when you cannot safely work outside the vehicle.
Can I drive on a flat tire to reach a tire shop?
Usually, no. Driving on a flat can destroy the tire and damage the wheel. Some vehicles have run-flat tires, but they have specific limits listed by the tire maker and vehicle manual.
Should I use a torque wrench?
Yes, when one is available. Tighten the lug nuts to the vehicle maker’s specified torque. A lug wrench can make the nuts snug, but it cannot measure torque accurately.
Why is the tire-pressure light still on after I install the spare?
The spare may not have a tire-pressure sensor, or the system may need time or a reset. Check the manual. First confirm that the spare has the correct pressure and that all lug nuts are tight.
Can I use a different car’s jack or spare?
Only if it is confirmed to fit the vehicle, wheel, tire size, load rating, and jack points. A spare that fits over the hub may still have the wrong diameter, bolt pattern, load rating, or brake clearance.
Final safety check
Before driving, confirm that:
- The spare is fully seated.
- Every lug nut is installed.
- The lug nuts are tightened in a star pattern.
- The jack and tools are removed.
- The spare has the correct air pressure.
- The spare’s speed and distance limits are clear.
- The flat tire and loose items are secured.
- The vehicle has no new warning signs.
If any part of the job feels unsafe, stop and call a qualified roadside service. A tire can be replaced later. Your safety comes first.
Sources and further reading
- National Highway Traffic Safety Administration: Tires
- NHTSA: Tire Safety
- U.S. Tire Manufacturers Association: Tire Care and Safety
- Your vehicle owner’s manual and the instructions printed on the spare tire sidewall