How To Make A Tire Swing: Easy DIY Guide
A tire swing is a simple backyard project for many U.S. homes. You need a sound support, a used tire in good condition, outdoor-rated hardware, and enough clear space for the swing to move safely. The safest setup uses a strong tree limb or a purpose-built frame, a rated swivel, and three or four suspension chains.
Before you begin, check local rules, inspect the support, and plan for falls. A tire swing can create strong downward and sideways forces, especially when a child swings hard or more than one person climbs on it.
Key Takeaways
- Use a healthy, living tree limb or a frame designed to carry a swing.
- Never use a dead branch, fence post, utility pole, or unverified structure.
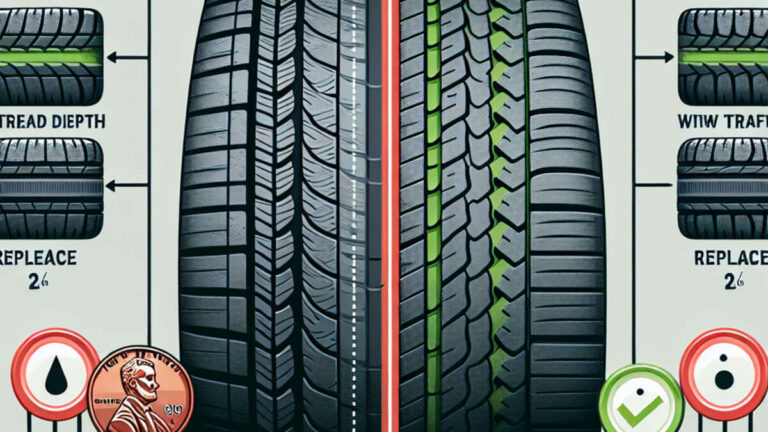
- Choose a tire with no exposed cords, deep cracks, or sharp damage.
- Use rated, galvanized or stainless outdoor hardware.
- Drill drainage holes in the bottom of a horizontal tire.
- Keep the swing away from walls, fences, driveways, pools, and other hazards.
- Inspect the tire, chains, fasteners, and support before each use.
- An arborist or qualified builder should assess any support you cannot confidently verify.
Introduction
The basic method is to hang a clean tire horizontally from three or four equal-length chains. Join the chains to a rated swivel or central connector, then attach that connector to a strong tree limb or a properly built swing frame. The tire should hang level, move freely, and have a clear fall and swing area.
This guide focuses on a horizontal tire swing, which is usually more stable than hanging a tire vertically. It covers materials, support checks, hardware choices, assembly, installation, testing, maintenance, and common mistakes.

What You Need Before You Start
Gather the parts and inspect the site before drilling or cutting anything. A careful setup usually takes longer than the assembly itself because the support and fall zone matter more than the tire.
Materials
You will need:
- One passenger-vehicle tire in good condition
- Three or four lengths of outdoor-rated chain
- One rated swivel or swing hanger
- One rated eye bolt, shackle, or connector for the support
- Outdoor-rated washers, nuts, and locking hardware
- A drill and drill bits suitable for rubber and metal
- Wrenches or sockets
- A tape measure
- A level
- A file or emery cloth
- Mild soap, water, and a stiff brush
- A ladder or lift that can be used safely
- A soft measuring tape or rope for marking the swing area
Use hardware that is designed for outdoor loads. Zinc-plated hardware may resist rust for a time, but hot-dip galvanized or stainless steel parts are often better choices outdoors. Do not mix parts with unknown load ratings.
A chain’s working load limit should exceed the expected total load, including the rider, tire, hardware, and movement. Swinging creates dynamic force, so do not choose parts based only on the rider’s body weight.
Choose the Right Tire
A used passenger tire can work well if it is sound and clean. Do not use a tire with:
- Exposed steel belts or cords
- Large cuts or holes
- Severe sidewall cracking
- Bulges or major distortion
– Sharp metal, glass, or embedded objects - Heavy oil, chemical, or fuel contamination
Avoid tires that are unusually heavy unless the support and hardware are designed for that added weight. A large truck tire can create more force and may be harder to inspect and handle.
Remove loose dirt and wash the tire with soap and water. Let it dry fully. Do not use harsh solvents that could weaken or damage the rubber.
Select a Safe Support
A suitable tree limb should be:
- Healthy and living
- Large enough to carry the swing and its movement
- Free from decay, large cracks, cavities, and loose bark
- Far enough from the trunk for the tire to move without striking it
- Clear of power lines and other overhead hazards
A branch can look thick and still be weak inside. Do not attach a swing to a dead limb, a narrow branch, a damaged tree, or a branch near a target that could cause serious injury.
A purpose-built swing frame is another option. It must be braced, anchored, and designed for swing loads. A simple garden arch, pergola, fence, or deck railing is not automatically strong enough.
If you have any doubt about a tree, ask a qualified arborist to inspect it. If you are building a frame, seek advice from a qualified builder or engineer when the design, ground, or loads are uncertain.
Plan the Clear Area
Measure the space before installation. The tire should not reach:
- A house or porch
- A fence or retaining wall
- A tree trunk or large root
- A driveway or road
- A pool, pond, or fire pit
- Play equipment with hard edges
- Garden tools, rocks, tables, or other fixed objects
The U.S. Consumer Product Safety Commission recommends protective surfacing and an adequate use zone around home playground equipment. A tire swing has unusual movement, so follow the equipment manufacturer’s instructions when available and use more space when the swing can travel farther.
Grass and bare soil do not provide reliable impact protection. Loose-fill materials or tested playground surfacing may reduce injury risk, but no surface removes the need for supervision and inspection.

How to Make a Tire Swing
The steps below describe a three-point or four-point horizontal suspension. Four chains can keep the tire level, while three chains can give the swing a little more movement. Use one design consistently and follow the hardware manufacturer’s instructions.
1. Wash and Inspect the Tire
Scrub the tire with mild soap and water. Look closely at both sidewalls, the tread, and the inner opening.
Run a gloved hand over the rubber. Stop if you find exposed wire, sharp objects, or broken rubber. A tire that fails inspection should not be used for a swing.
Let the tire dry before drilling. Mark the bottom of the tire so you can place drainage holes in the lowest section.
2. Mark the Suspension Points
For a three-chain design, mark three points around the tire’s upper sidewall. Space them as evenly as possible.
For a four-chain design, mark four points at roughly equal spacing. Keep each point the same distance from the tire’s center. Uneven spacing can make the tire tilt or twist.
Do not place the holes close to a damaged area, the bead, or a thin edge. The tire’s bead is the stiff area near the rim opening. Drilling through it can weaken the tire and make installation harder.
3. Drill Drainage Holes
Drill several small drainage holes in the bottom sidewall or lower surface of the tire. These holes let rainwater escape.
Standing water adds weight and can create a place for insects to breed. Drainage holes do not replace routine cleaning. Turn the tire over during inspections and make sure water is not collecting inside it.
Use a drill bit that makes a clean hole. Remove loose rubber around each opening. Do not leave sharp metal edges or exposed fasteners where a rider could touch them.
4. Attach the Chains
Connect one chain to each suspension point with a rated bolt, shackle, or connector. Place washers against the rubber when the hardware design allows it. Washers spread pressure and help keep the hardware from pulling through the sidewall.
Tighten the fasteners firmly, but do not crush or cut the rubber. Use lock nuts, cotter pins, or another approved locking method. The correct method depends on the hardware.
Keep all chain ends and connectors outside the seating area. Cover or shield sharp projections. A rider should not contact a threaded end, open hook, or sharp chain link during normal use.
5. Make the Chains Equal in Length
Lay the chains side by side and compare them. Equal lengths help the tire hang level.
The correct length depends on the support height and the desired seat height. The tire should be low enough for the intended users to climb on without dangerous drops, but high enough to avoid scraping the ground during normal movement.
Do not rely on a knot to shorten load-bearing chain unless the chain maker specifically allows it. Use a rated connector or a properly installed chain adjustment device.
6. Join the Chains Above the Tire
Connect the upper ends of the chains to a rated swivel or central connector. The swivel should be made for outdoor use and rated for the combined load and movement.
A swivel can help the tire turn. It does not make a weak branch safe, and it does not replace a properly sized connector. Some swivels are designed for hanging chairs or light decorative loads rather than active playground use. Check the stated application and load information.
Do not use a carabiner, S-hook, rope clip, or decorative hook unless the manufacturer clearly rates it for this type of load and movement. An open connector can unhook when the swing twists.
7. Install the Support Hardware
Attach the upper connector to the tree limb or swing frame using hardware designed for that support.
For a tree, avoid wrapping a thin rope tightly around the branch. Rope can abrade the bark and may cut into the wood as the swing moves. A tree-swing strap made for load-bearing outdoor use may reduce abrasion, but it must be correctly installed and inspected.
Do not drill a hole through a tree limb unless a qualified tree professional recommends that method. A branch-mounted eye bolt can create a concentrated stress point and may damage the limb.
For a frame, install the hanger according to the frame and hardware instructions. Confirm that the frame is anchored and cannot slide, tip, or lift when the swing moves.
8. Set the Tire Level
Place a level across the tire in more than one direction. Adjust the chain lengths until the tire sits level or nearly level.
A small tilt may be acceptable, but a clear lean can cause uneven loading. It may also make the rider slide toward one side. Recheck the connectors after each adjustment.
9. Test It Without a Rider
Perform a slow test before allowing a child to use the swing.
- Pull down on the tire with your hands.
- Check whether the support bends, cracks, shifts, or makes unusual sounds.
- Push the tire gently in several directions.
- Watch the connectors for twisting or opening.
- Confirm that the tire returns to its position without rubbing nearby objects.
- Inspect the rubber around every attachment point.
Next, apply a gradual load using a safe method. Do not stand beneath the tire while testing it. If anything shifts, sags, tears, or makes a new sound, stop and correct the problem before use.
A successful test does not prove that the swing is safe forever. Wood, rubber, chain, soil, and fasteners change over time.

How to Choose the Right Suspension Design
The best design depends on how much movement you want and how well you can control the tire’s position.
| Design | Main benefit | Main limitation |
|---|---|---|
| Three chains | Fewer attachment points and a lively ride | More likely to tilt or twist |
| Four chains | Better level control and stability | More hardware and more precise setup |
| Vertical tire with one chain | Simple appearance and small footprint | Less stable seating and more swing movement |
| Purpose-built frame | Does not depend on a tree | Requires sound construction and anchoring |
For most home users, a level horizontal tire with three or four chains is the most practical choice. Four chains are often easier to balance, while three chains can feel more flexible.
A vertical tire swing is not the same project. It needs different attachment points and may place more force on one section of the tire. Use a separate design rather than adapting the horizontal instructions without checking the load path.
How High Should a Tire Swing Hang?
Set the seat height for the smallest intended user, not the tallest one. The rider should be able to climb onto the tire without jumping from a dangerous height.
A tire that hangs too low may hit the ground or catch on roots. A tire that hangs too high increases the fall distance and makes it harder to supervise young children.
The total swing height also depends on the support above it. Leave enough room for the tire and chains to move without striking a branch, frame crossbar, or overhead object.
There is no single safe height for every tire swing. Tire diameter, rider size, support height, surface, and swing design all change the result.

Safety Rules for Use
Set clear rules before anyone rides. Only one rider should use the tire unless the structure and hardware were specifically designed and rated for more than one person.
Young children should have close adult supervision. Do not allow riders to stand, climb on the chain, jump from the swing, or push another person while standing in the swing path.
Stop use during severe weather. Wet rubber and wet surfacing can increase slipping risk. Strong wind can also push the swing into nearby objects.
Keep pets, toys, bikes, and loose objects away from the swing area. Teach children to wait until the tire stops before getting off.
The CPSC provides home playground safety guidance, including inspection, supervision, and protective surfacing information. Public playground equipment may also be subject to ASTM standards and local requirements that do not automatically apply to a private backyard installation. Check your city, county, homeowner association, or rental rules when they apply.
Inspection and Maintenance
Inspect the tire swing before each use. A quick check should include:
- Cracks, cuts, or exposed cords in the tire
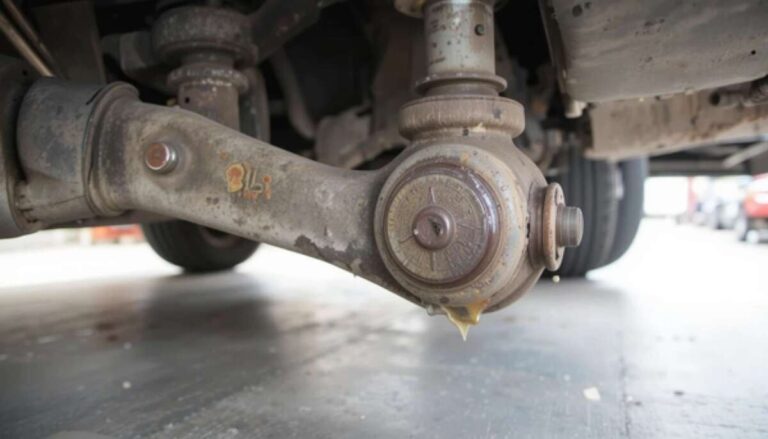
- Loose, bent, or rusty hardware
- Open chain links or damaged connectors
- Fasteners pulling through the rubber
- A branch with new cracks, decay, or movement
- A frame that has shifted or loosened
- Standing water inside the tire
- New rubbing points or changes in swing height
- Damaged or displaced protective surfacing
After storms, inspect the tree and the entire support system again. A limb can suffer damage even when the swing itself looks normal.
Replace the tire if the rubber becomes brittle, deeply cracked, cut, or structurally damaged. Replace chains and connectors when they show serious corrosion, deformation, or wear. Do not paint over damage and continue using the part.
Record the installation date and inspection dates. This simple habit makes it easier to notice gradual changes.

Common Mistakes and How to Fix Them
Using a thin or damaged branch
Problem: The swing appears secure, but the branch bends sharply, cracks, or moves at the attachment point.
Fix: Stop use. Have the tree assessed or move the swing to a properly designed frame. Do not add more hardware to compensate for a weak branch.
Hanging the swing from a deck or porch
Problem: The deck or porch may not be designed for repeated swinging loads.
Fix: Use a purpose-built swing frame or obtain a qualified structural assessment before attaching anything.
Using rope without checking its condition
Problem: Rope can wear against bark, absorb water, degrade in sunlight, or slip at a connection.
Fix: Use a rated swing strap or purpose-designed hardware. Inspect any textile component often and replace it at the first sign of serious wear.
Leaving the chains unequal
Problem: The tire tilts, twists, or loads one attachment point more than the others.
Fix: Remove the load, compare chain lengths, and use rated adjustment hardware. Do not force the tire level while someone is sitting on it.
Skipping drainage holes
Problem: Rainwater stays inside the tire, adding weight and creating a dirty, damp cavity.
Fix: Drill clean drainage holes in the lowest area and turn the tire over during inspections.
Relying on a “heavy-duty” label
Problem: A product may use that phrase without giving a working load limit or intended use.
Fix: Choose hardware with clear specifications from the manufacturer. Keep records of the product instructions and limits.
Ignoring the fall surface
Problem: A swing over concrete, asphalt, rocks, or roots can cause severe injury during a fall.
Fix: Move the swing or install a suitable protective surface. Keep hard hazards outside the use zone.

What to Do If the Swing Fails a Test
Stop use at once if the swing shifts, tilts sharply, makes a cracking sound, or shows damage.
First, remove the tire from service. Then identify whether the problem is in the tire, chain, connector, support, frame, or ground. Do not simply tighten a nut if the real issue is a cracked limb or damaged rubber.
Replace damaged parts with components that have known specifications. If the support is uncertain, have it inspected by a qualified professional. When the cause cannot be identified, rebuilding the support is safer than guessing.
A tire swing is not worth repairing if the tire is badly damaged or the support would need major alteration. In that case, remove the setup and use a purpose-built swing structure.
Frequently Asked Questions
Can I use any old tire for a tire swing?
No. Use only a tire with sound rubber, no exposed cords, no major cuts, and no sharp embedded objects. Clean it well and reject any tire that has been damaged or exposed to harmful chemicals.
Is a tire swing safe on a tree?
It can be, but only when the tree and limb are healthy and strong enough for the repeated movement. A visual check cannot always reveal internal decay. Ask a qualified arborist when the branch, tree, or attachment point is uncertain.
Should I use three chains or four?
Three chains can work and may allow more movement. Four chains usually make it easier to keep the tire level. The choice matters less than equal chain lengths, sound connectors, and a support designed for the load.
Do I need a swivel?
A rated swivel is useful when the tire may rotate. It can reduce twisting in the chains, but it is not required for every design and does not compensate for weak support hardware. Use only a swivel rated for outdoor, moving loads.
Can two children ride at the same time?
Do not allow two riders unless the complete swing system was designed and rated for that use. A second rider changes the load, balance, and movement. Follow the limits for the specific hardware and support.
How often should I replace a tire swing?
There is no universal replacement interval. Inspect it before each use and replace it when the tire, chain, connector, or support shows damage, serious wear, or corrosion. Outdoor conditions and use levels vary widely.
Final Checklist
Before the first ride, confirm that:
- The tire is clean and structurally sound.
- Drainage holes are open.
- Chains are equal in length.
- Connectors are closed and locked.
- Hardware has known outdoor load specifications.
- The tire hangs level.
- The tree limb or frame is sound and stable.
- The swing path is clear.
- The landing surface has no hard hazards.
- A responsible adult will supervise use.
- The swing has passed a slow, unloaded and gradual-load test.
A well-made tire swing starts with the support, not the tire. Choose a sound structure, use rated outdoor hardware, provide a clear and forgiving play area, and inspect the entire system every time the conditions change.